Join thousands of other birdwatchers worldwide in contributing to data collection that saves birds.
In this guide, we will be walking through each tab in the app:
But what is eBird? eBird is a mobile and web application with the goal of gathering, archiving, and sharing every birdwatcher’s unique knowledge and experience. Managed by the Cornell Lab of Ornithology, eBird is among the world’s largest biodiversity-related science projects, with more than 100 million bird sightings contributed annually by eBirders around the world. Scientists use this data to know where birds are in trouble, what habitats need more protection, and what changes we are seeing to migratory patterns.
Application Download
Download the App
Here are the QR codes to download the eBird app for both Android and iOS. Best of all, it’s free!


Application set up
Create an Account/Log In
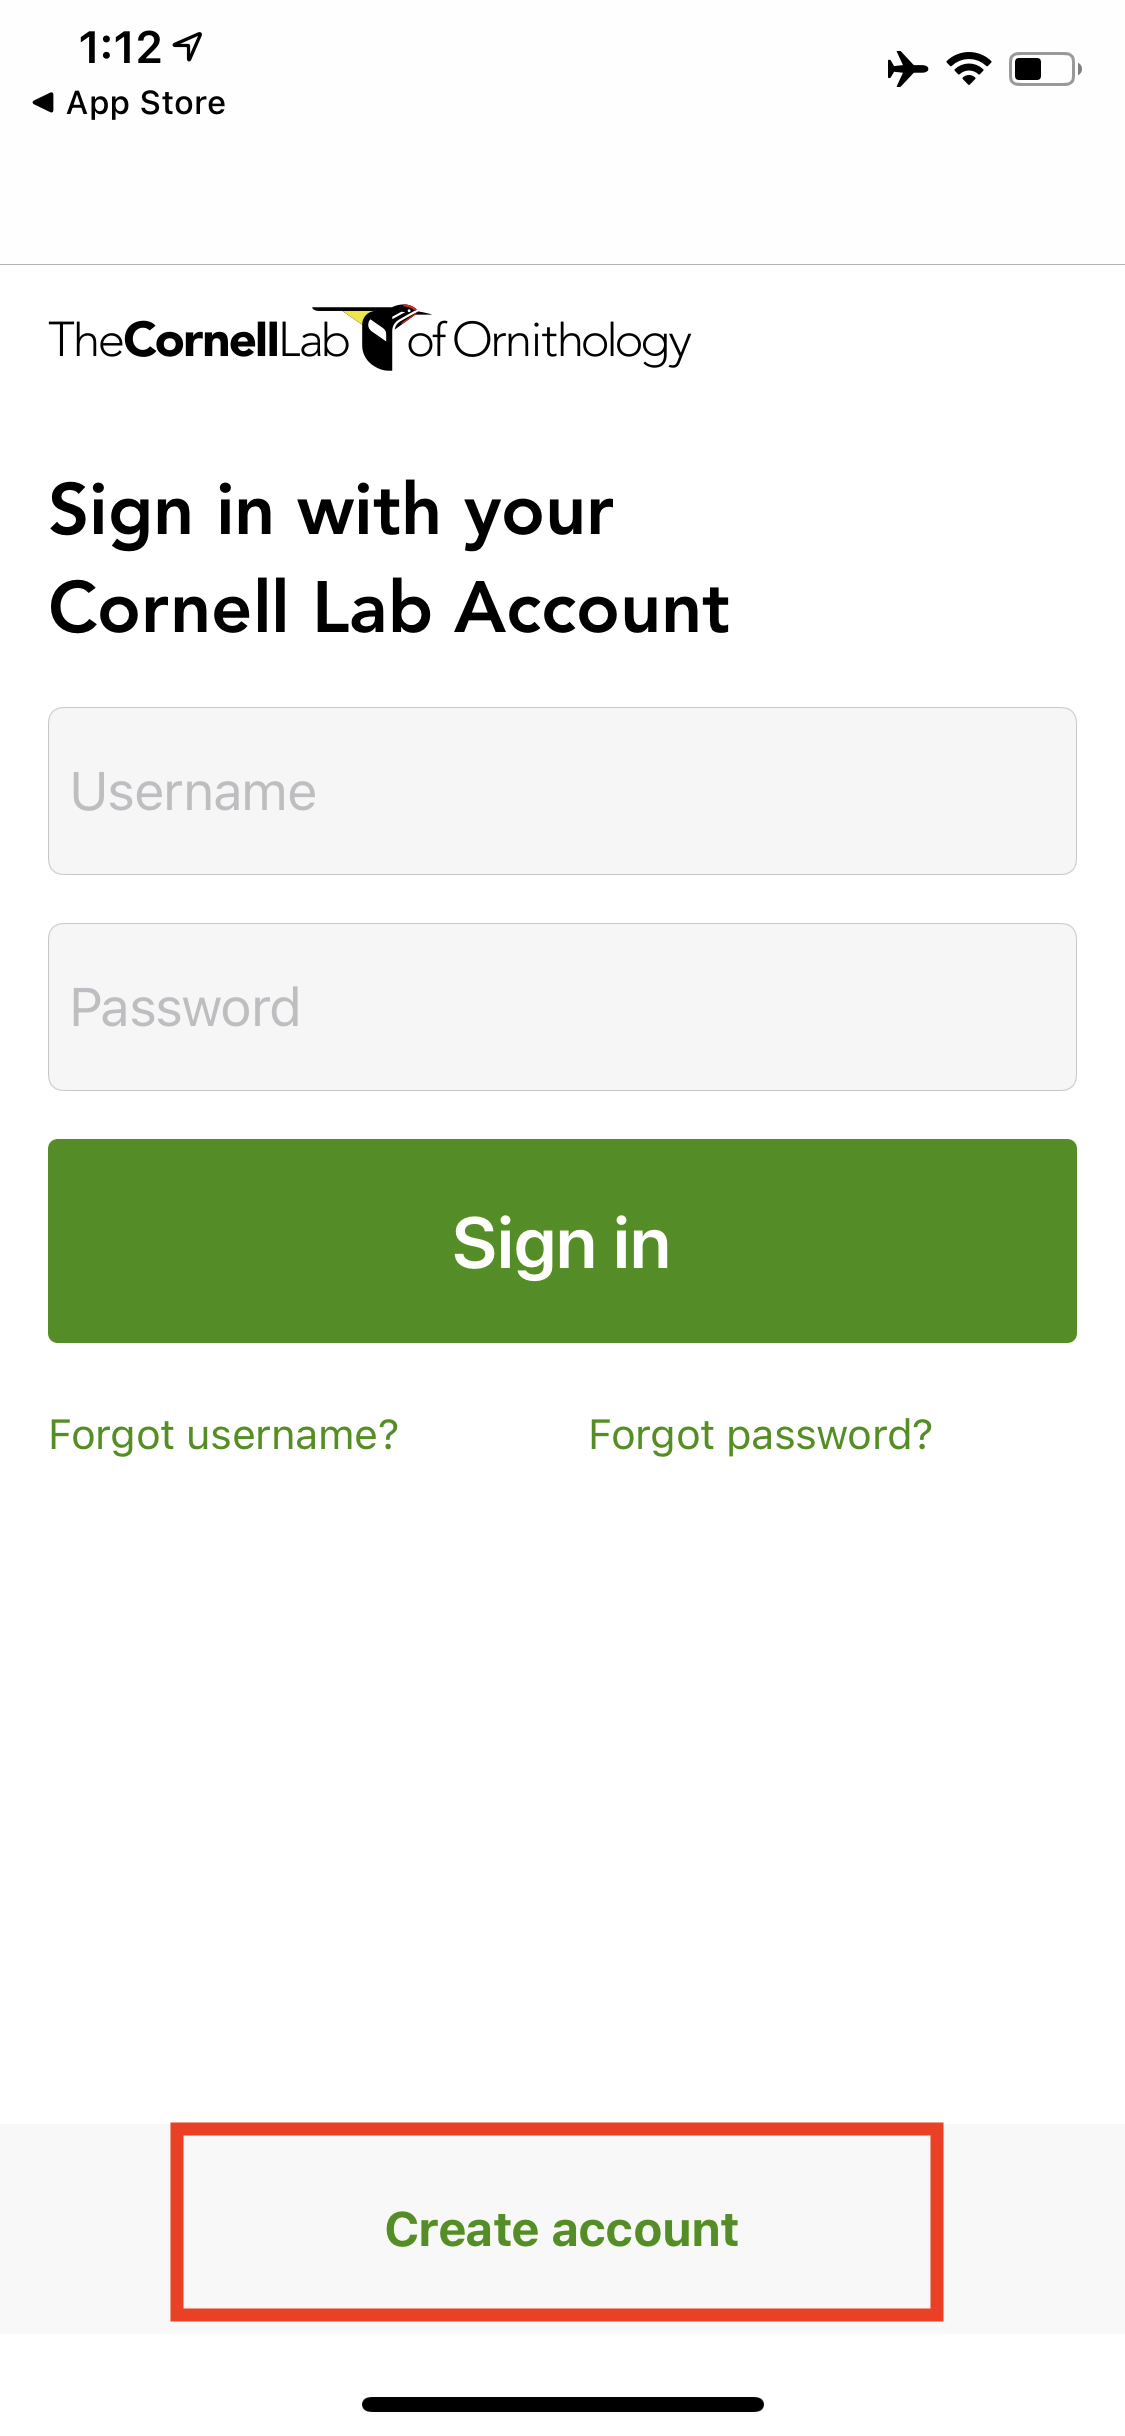
The first step we’ll take is creating an account. Select “Create account” at the bottom of the screen. If you’ve already created one, go ahead and log in with that.
eBird Login
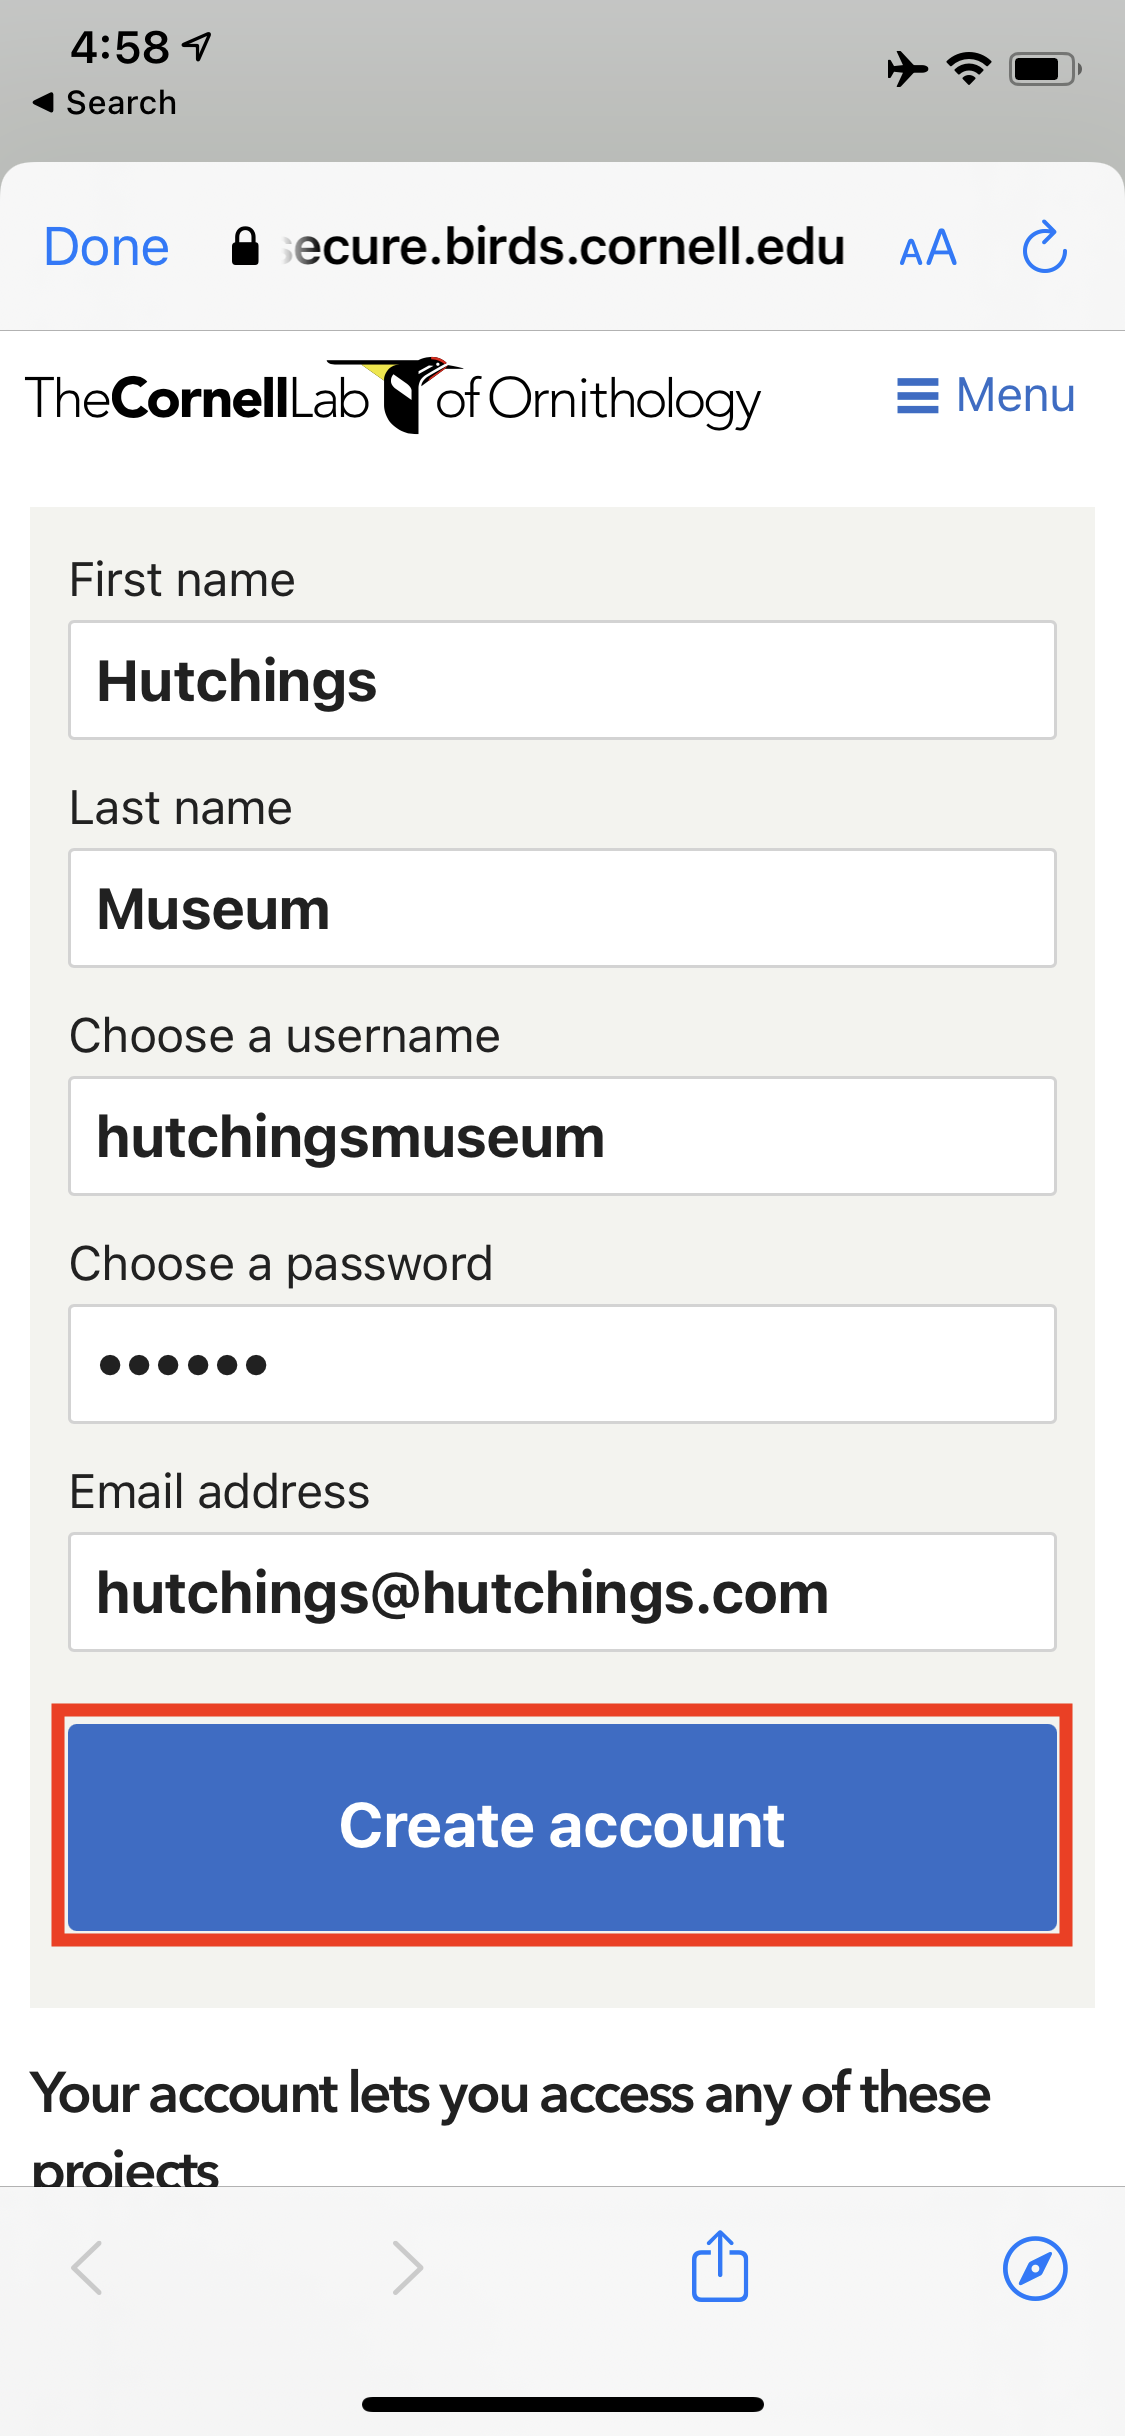
Account Creation
This account will also give you access to the following projects. Pretty cool!
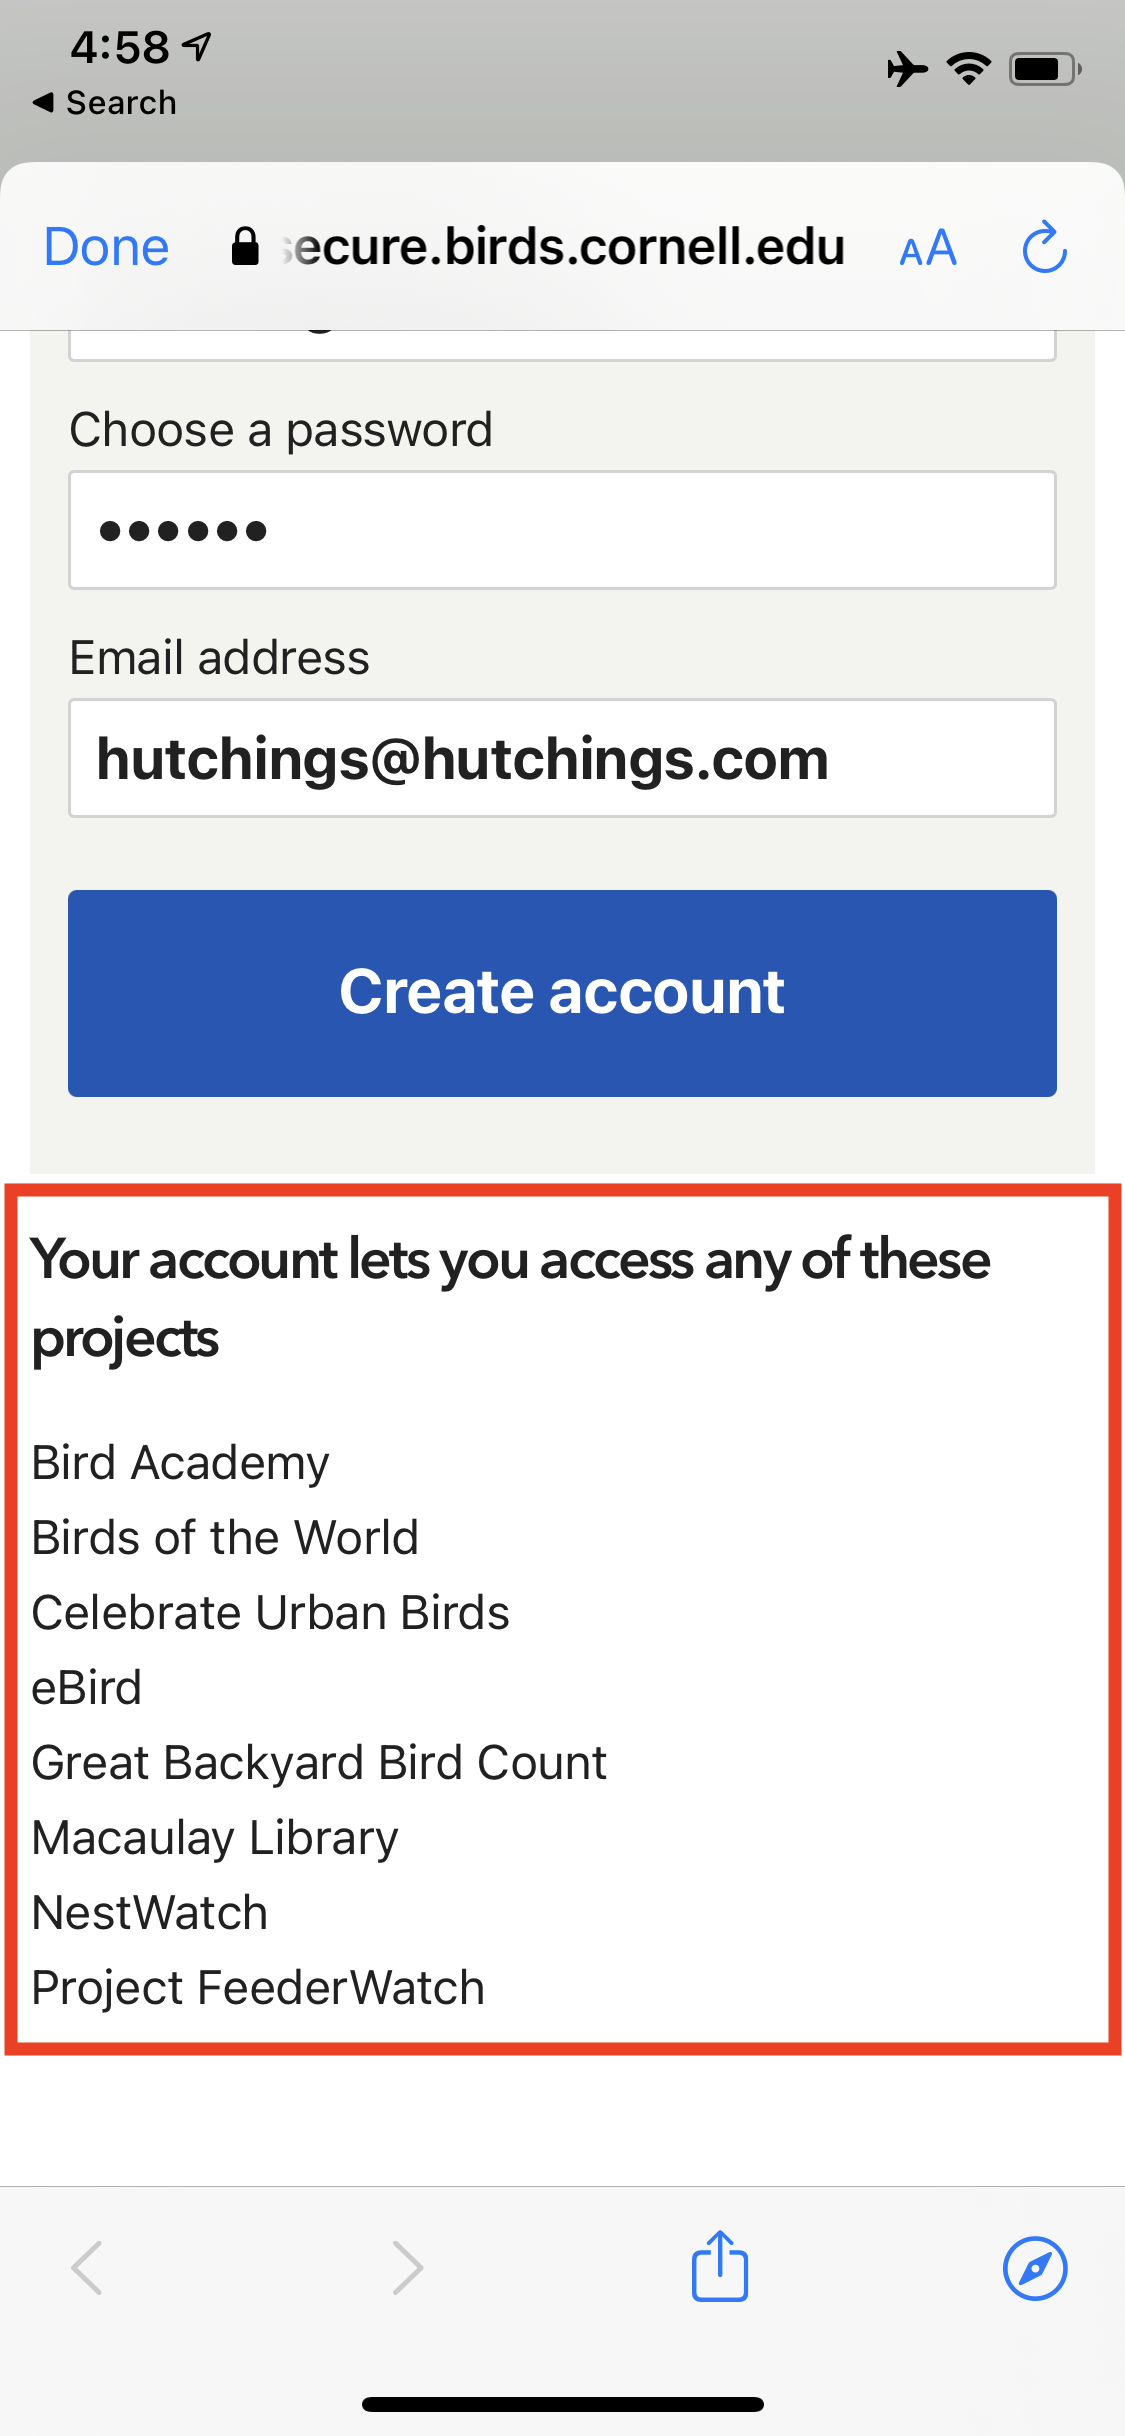
Other Access
Set Preferences
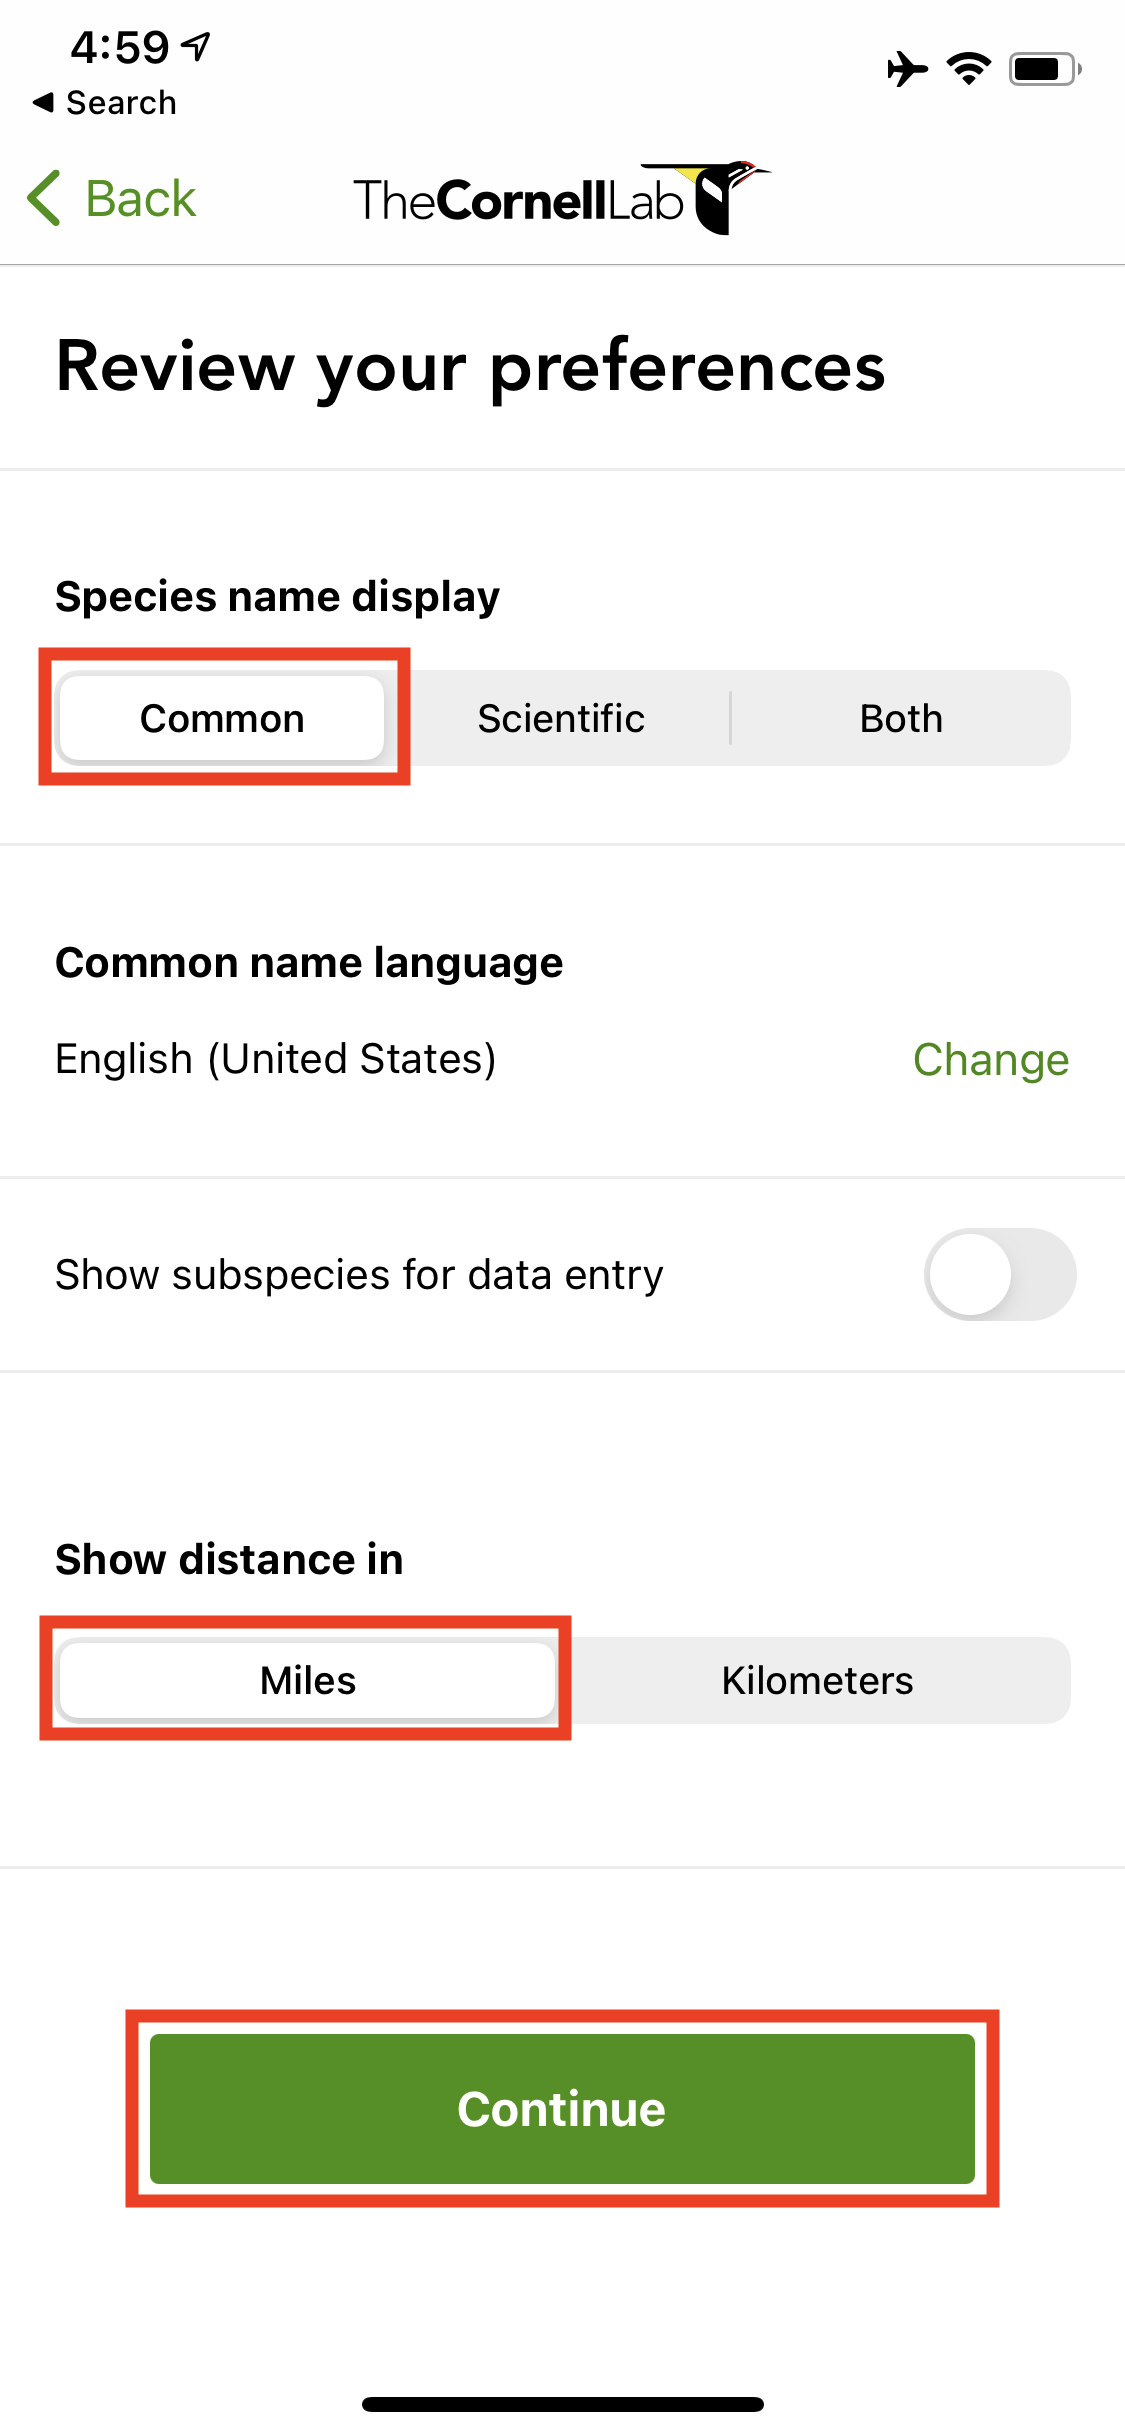
You should be asked to set your preferences at this point. We like to see Common species names so we chose that, and also used Miles for the distance. Once you have preferences selected that you like, select “Continue”.
Preferences Review
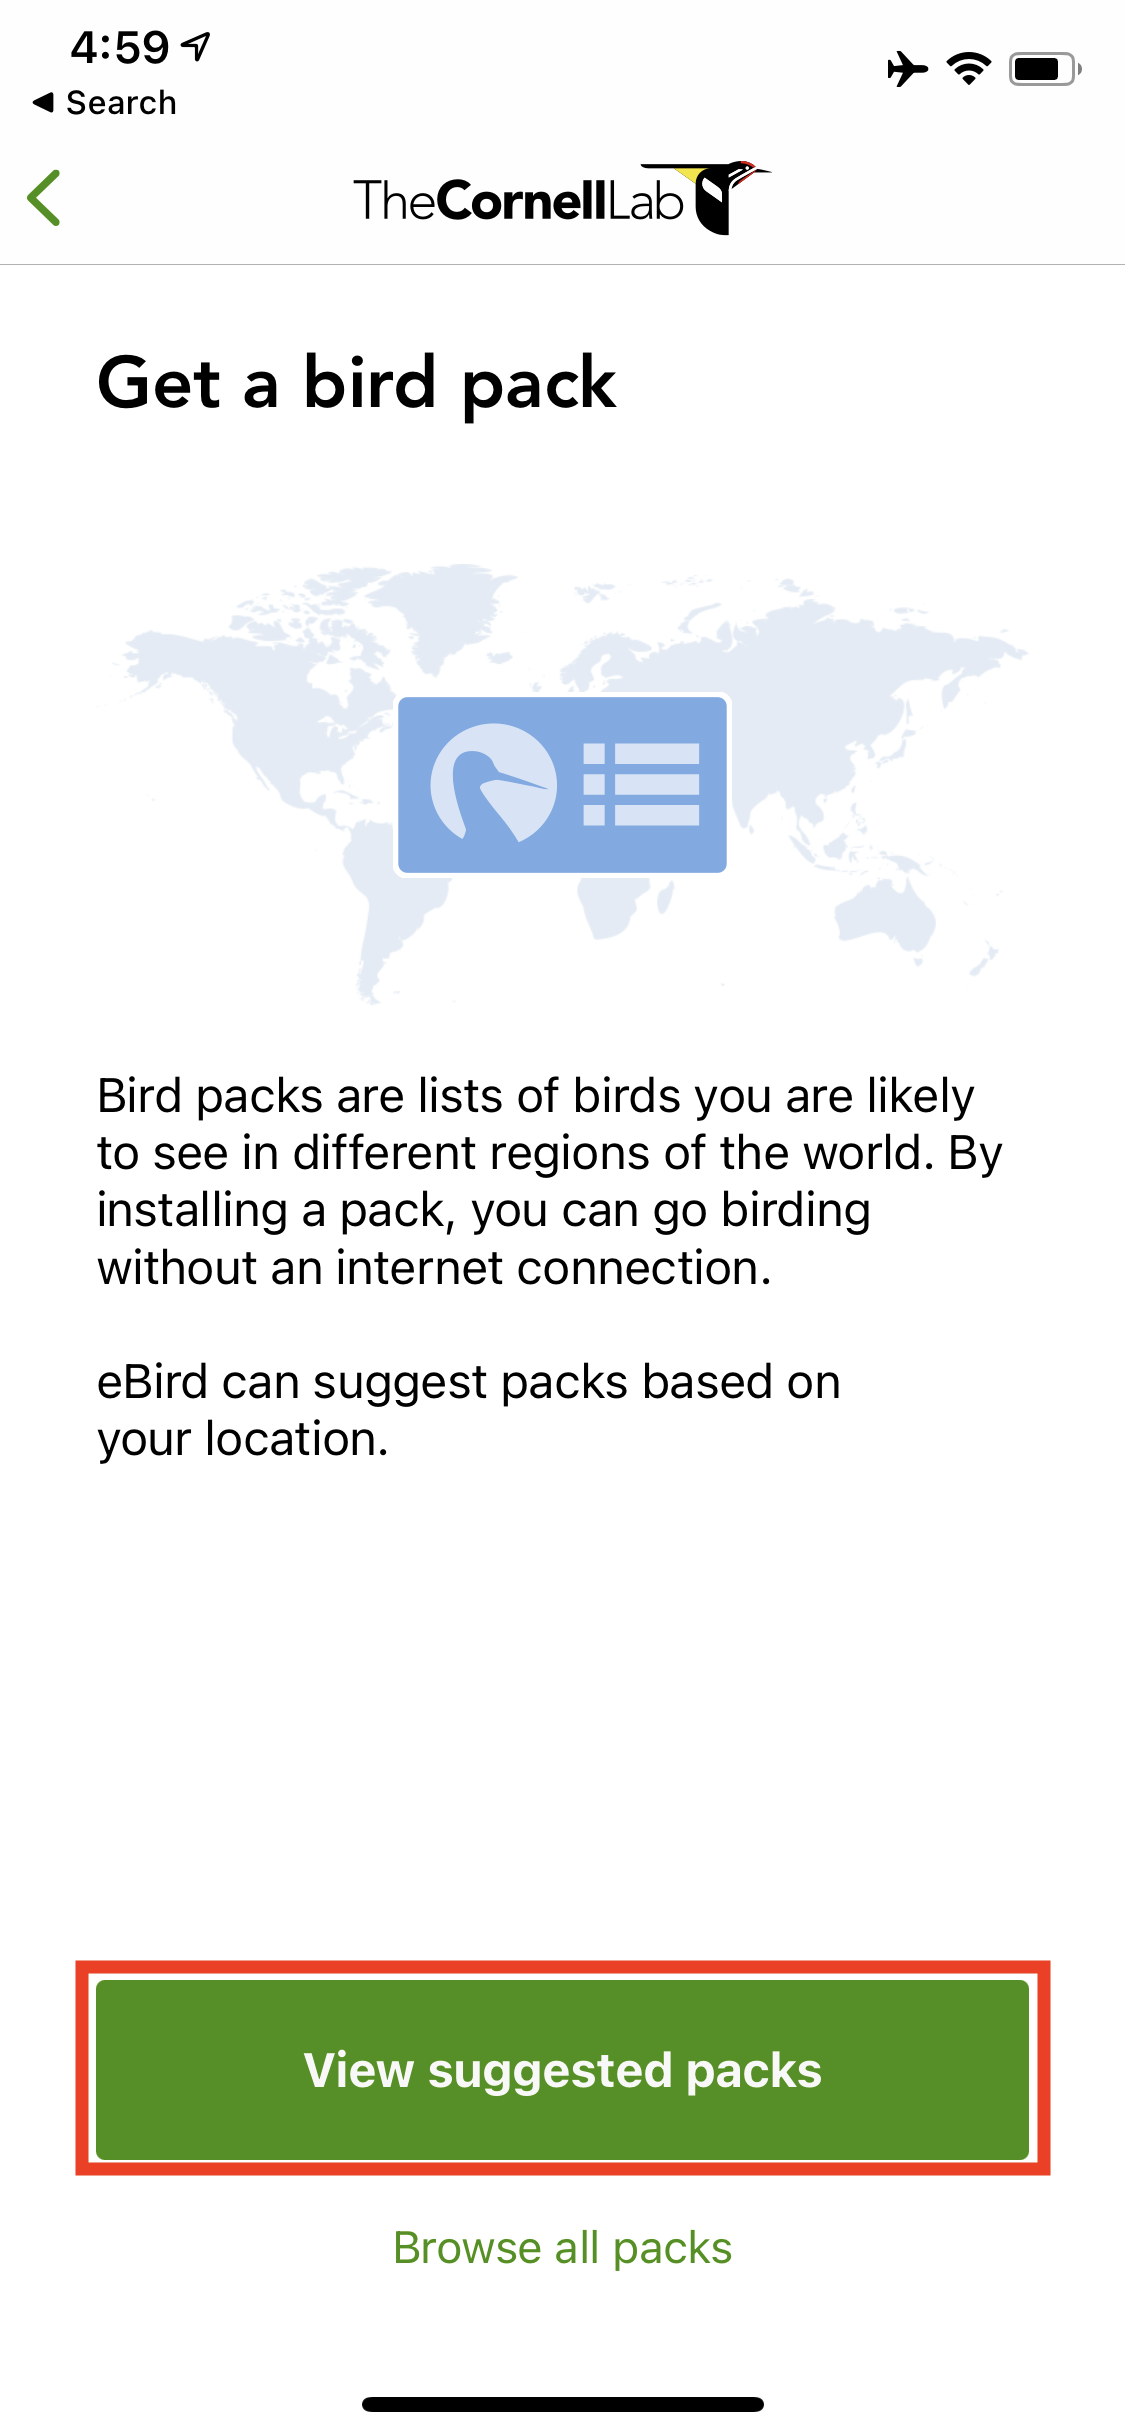
Get a bird pack
Bird packs are downloadable packs of information that allow you to use the app without an internet connection. By keeping the packs specific to your location, the app keeps the downloads small, while also allowing you to customize what packs you want. Select “View suggested packs” at the bottom, and when it asks you for permission to access your location select “Allow While Using App”. This lets the app create a visual map of where you are, and optionally shows a path of where you traveled while you were bird watching.
Suggested Packs Option

Location Permission
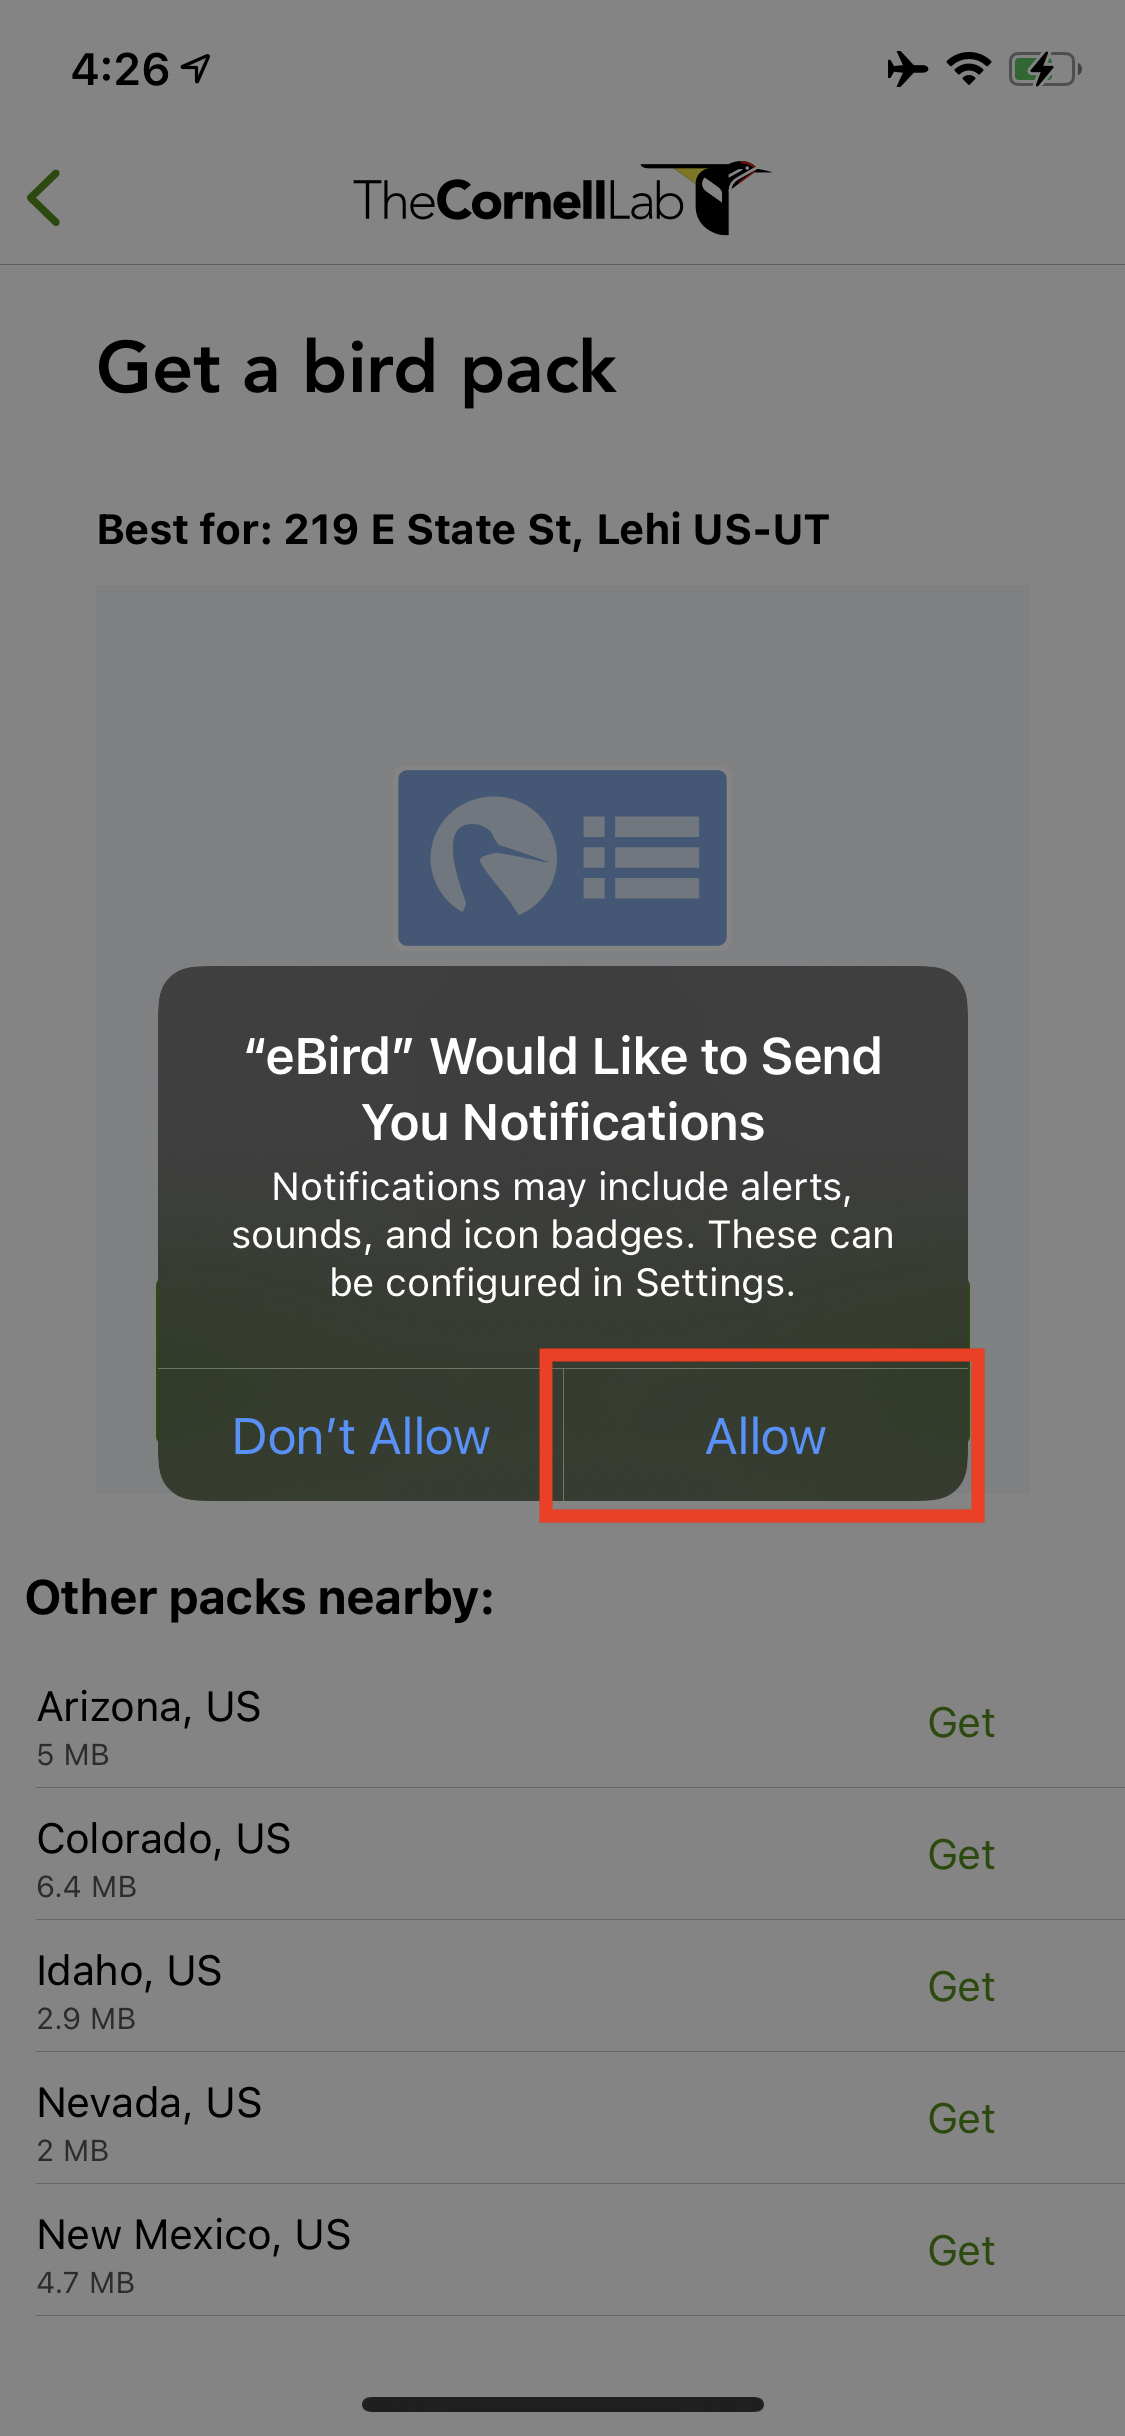
Notifications Permission
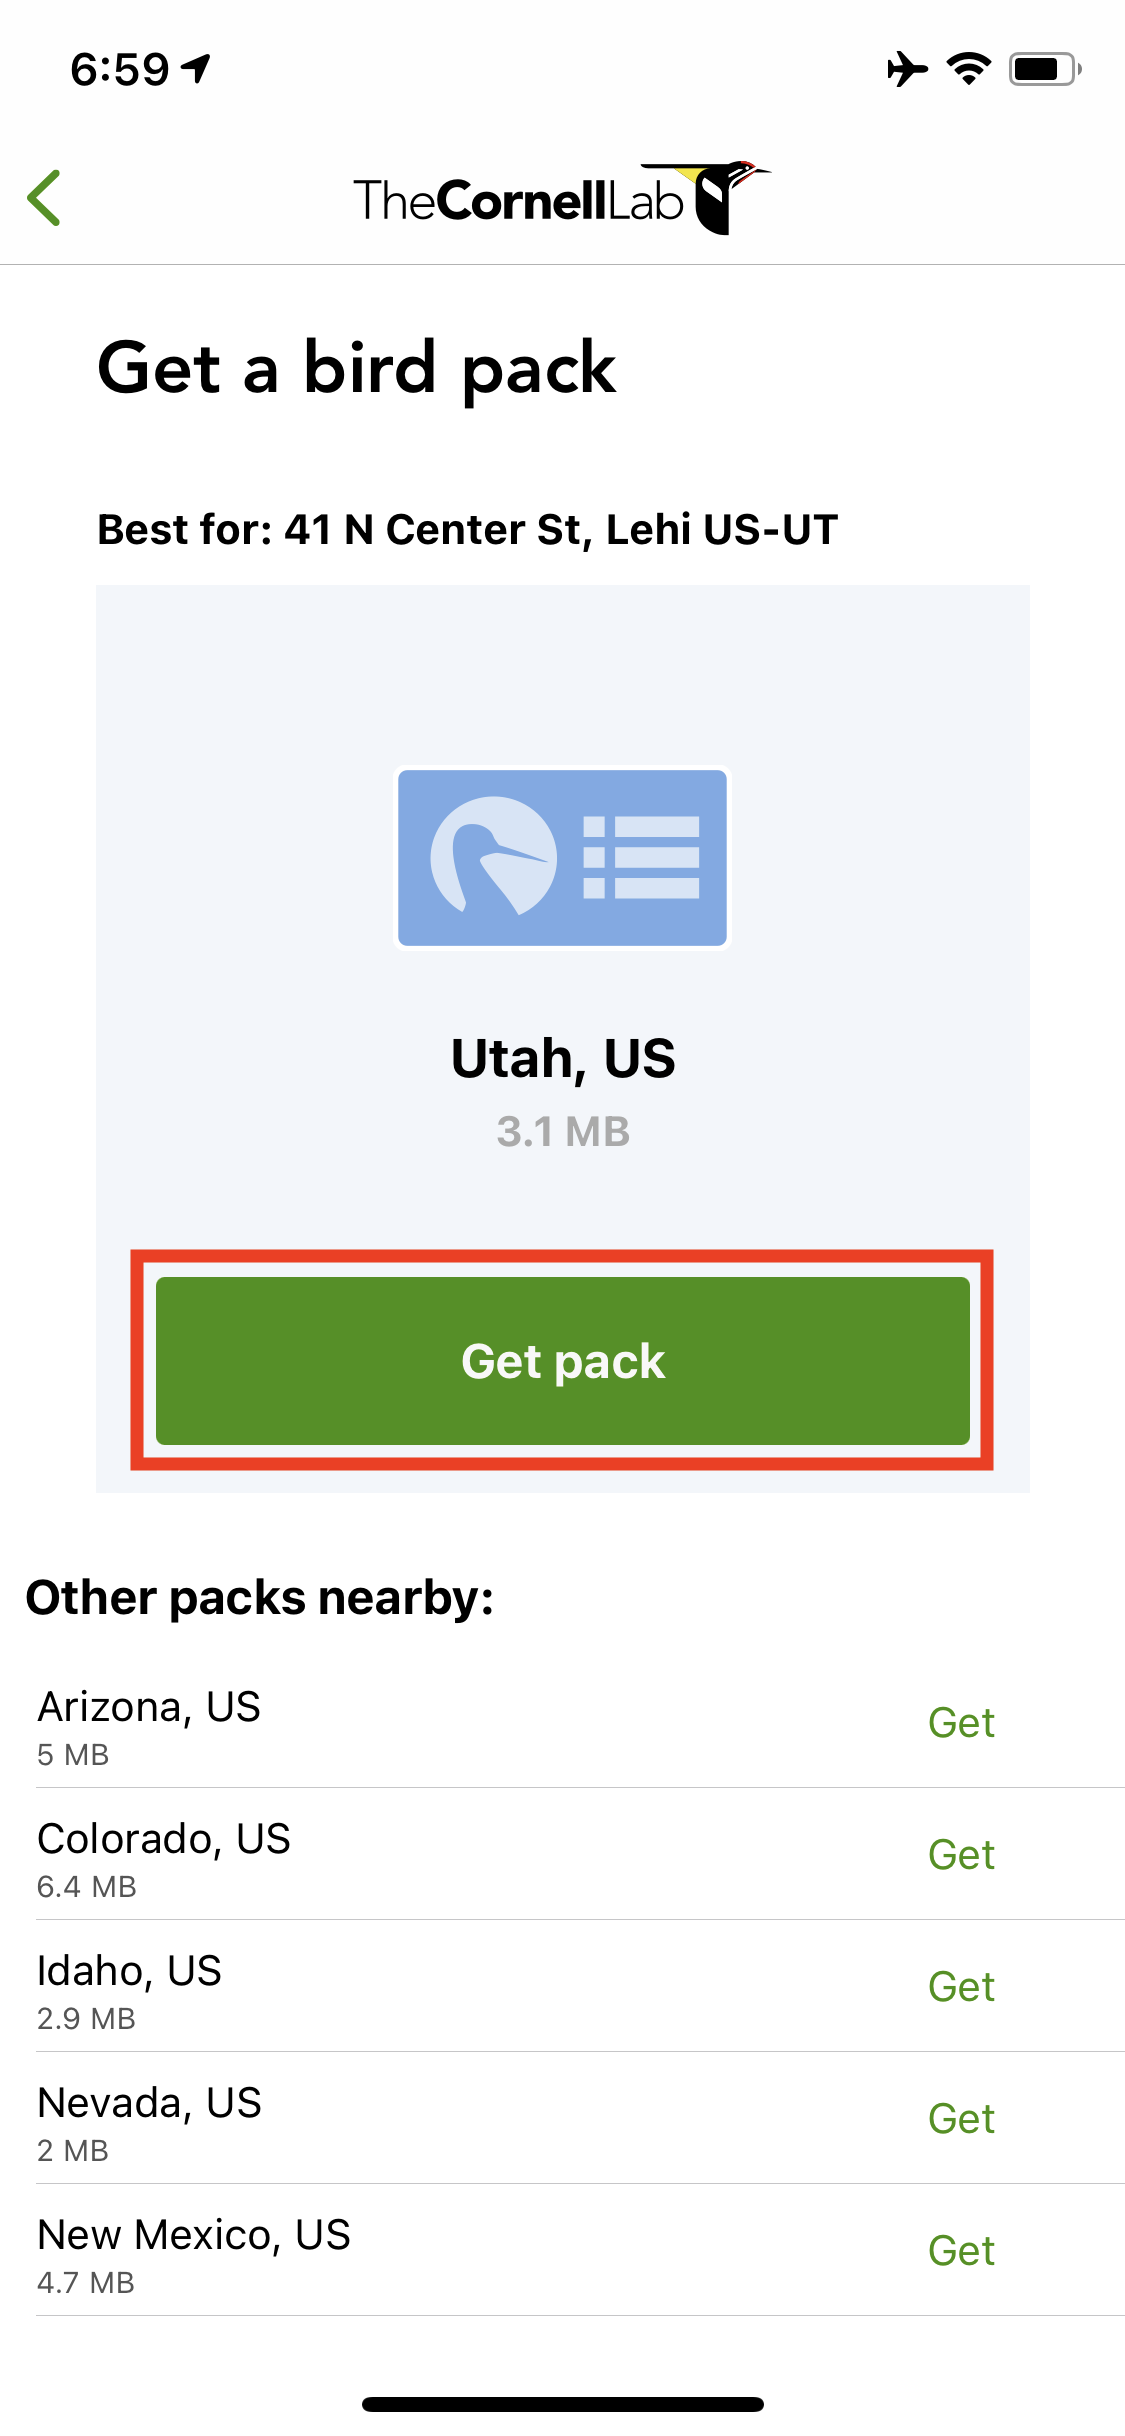
The pack shown on-screen will the recommended pack from eBird. You can also see a few other suggested packs at the bottom of the screen for locations close to you. For now, select “Get pack” in the middle of the screen. We’ll cover getting more packs in a later section.
Get Recommended Bird Pack
Checklists
And now we are off to the races! Let’s start our first checklist! Select “Start Checklist”. eBird will automatically set a location for you, and it’s pretty good so we’ll leave it for now. When we’re done with this checklist, we can further modify the location but we’ll look at that later.
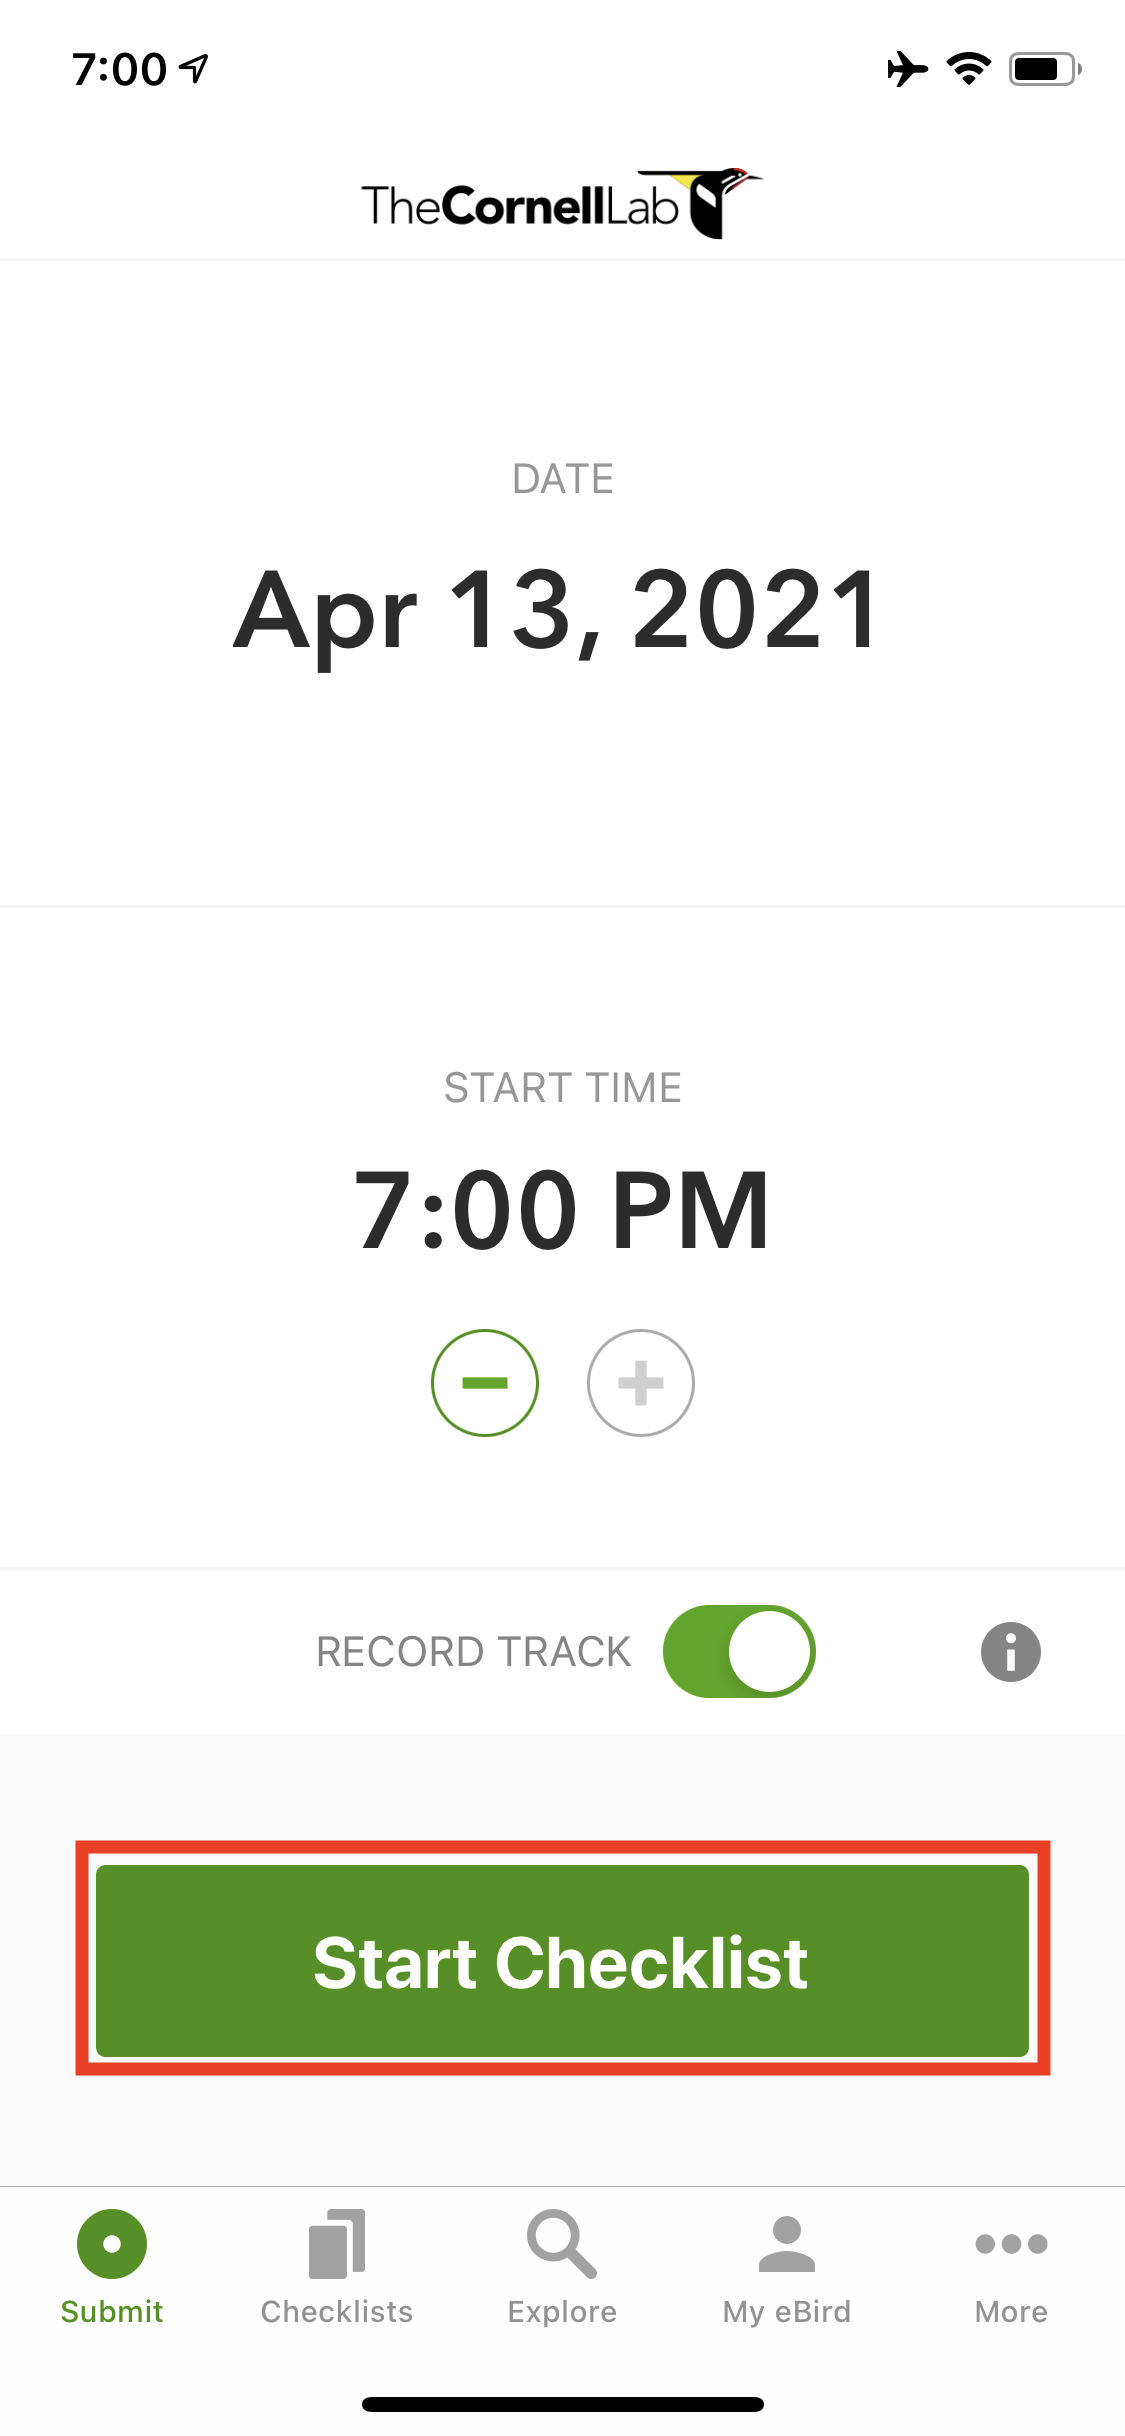
Starting a Checklist
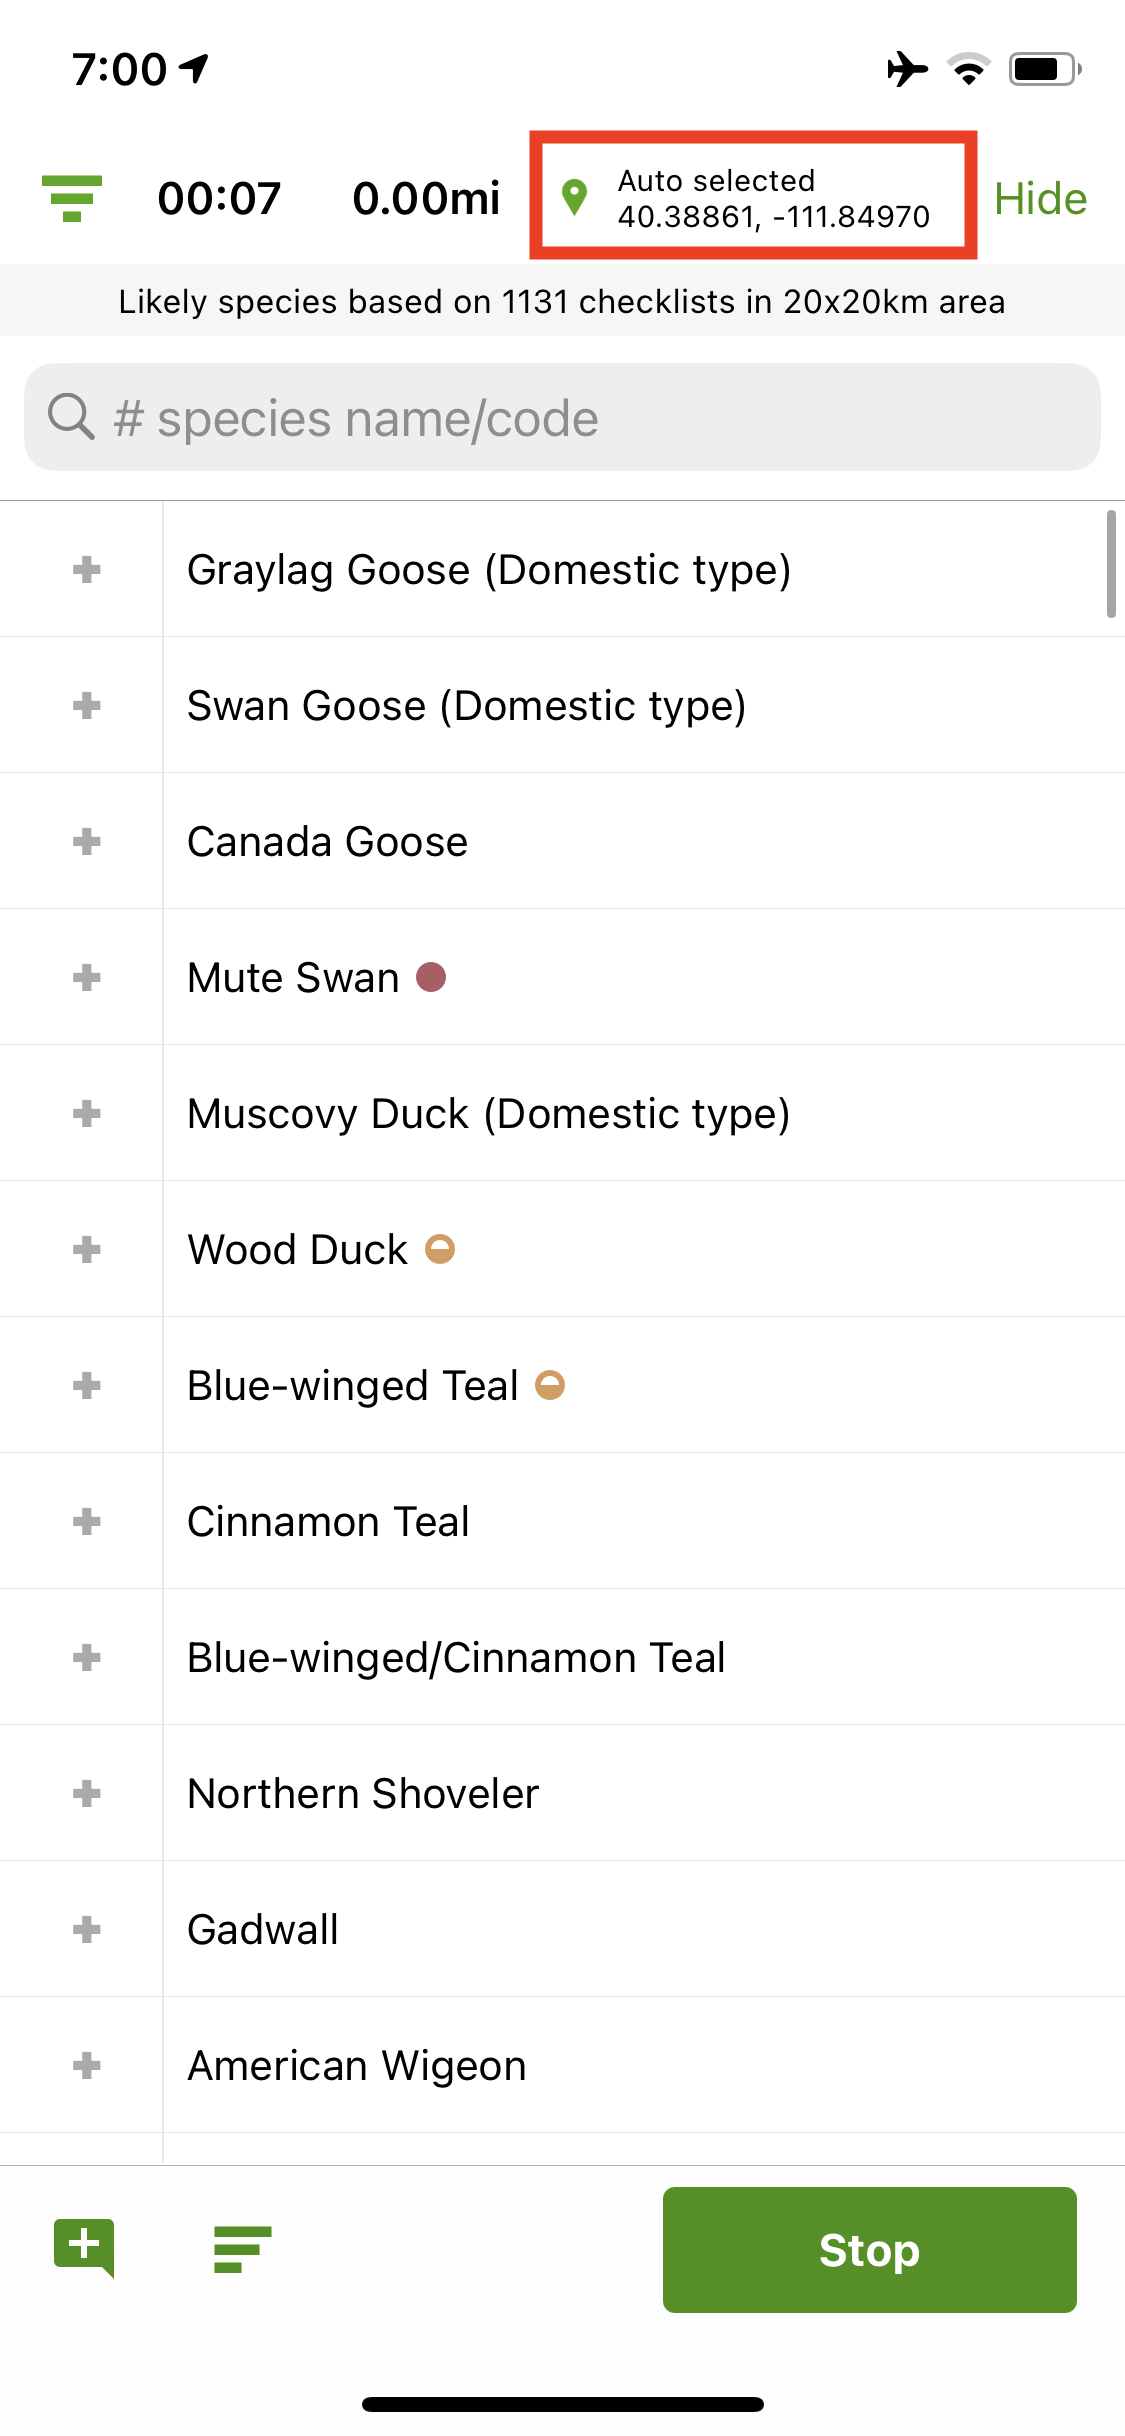
Automatic Location
At this point, one option you would have is to start hiking/driving/riding from where ever you are and documenting birds as you see them. However, for the purposes of this walkthrough, we are going to pretend that we just saw an American Kestrel from where we’re at and wanted to document it. In the search bar at the top, let’s type “Kestrel”. The app should automatically narrow the results as you type, but if it doesn’t you can select “Search” on your keyboard. Once the bird you are looking for pops up (in this case American Kestrel), select it on screen.
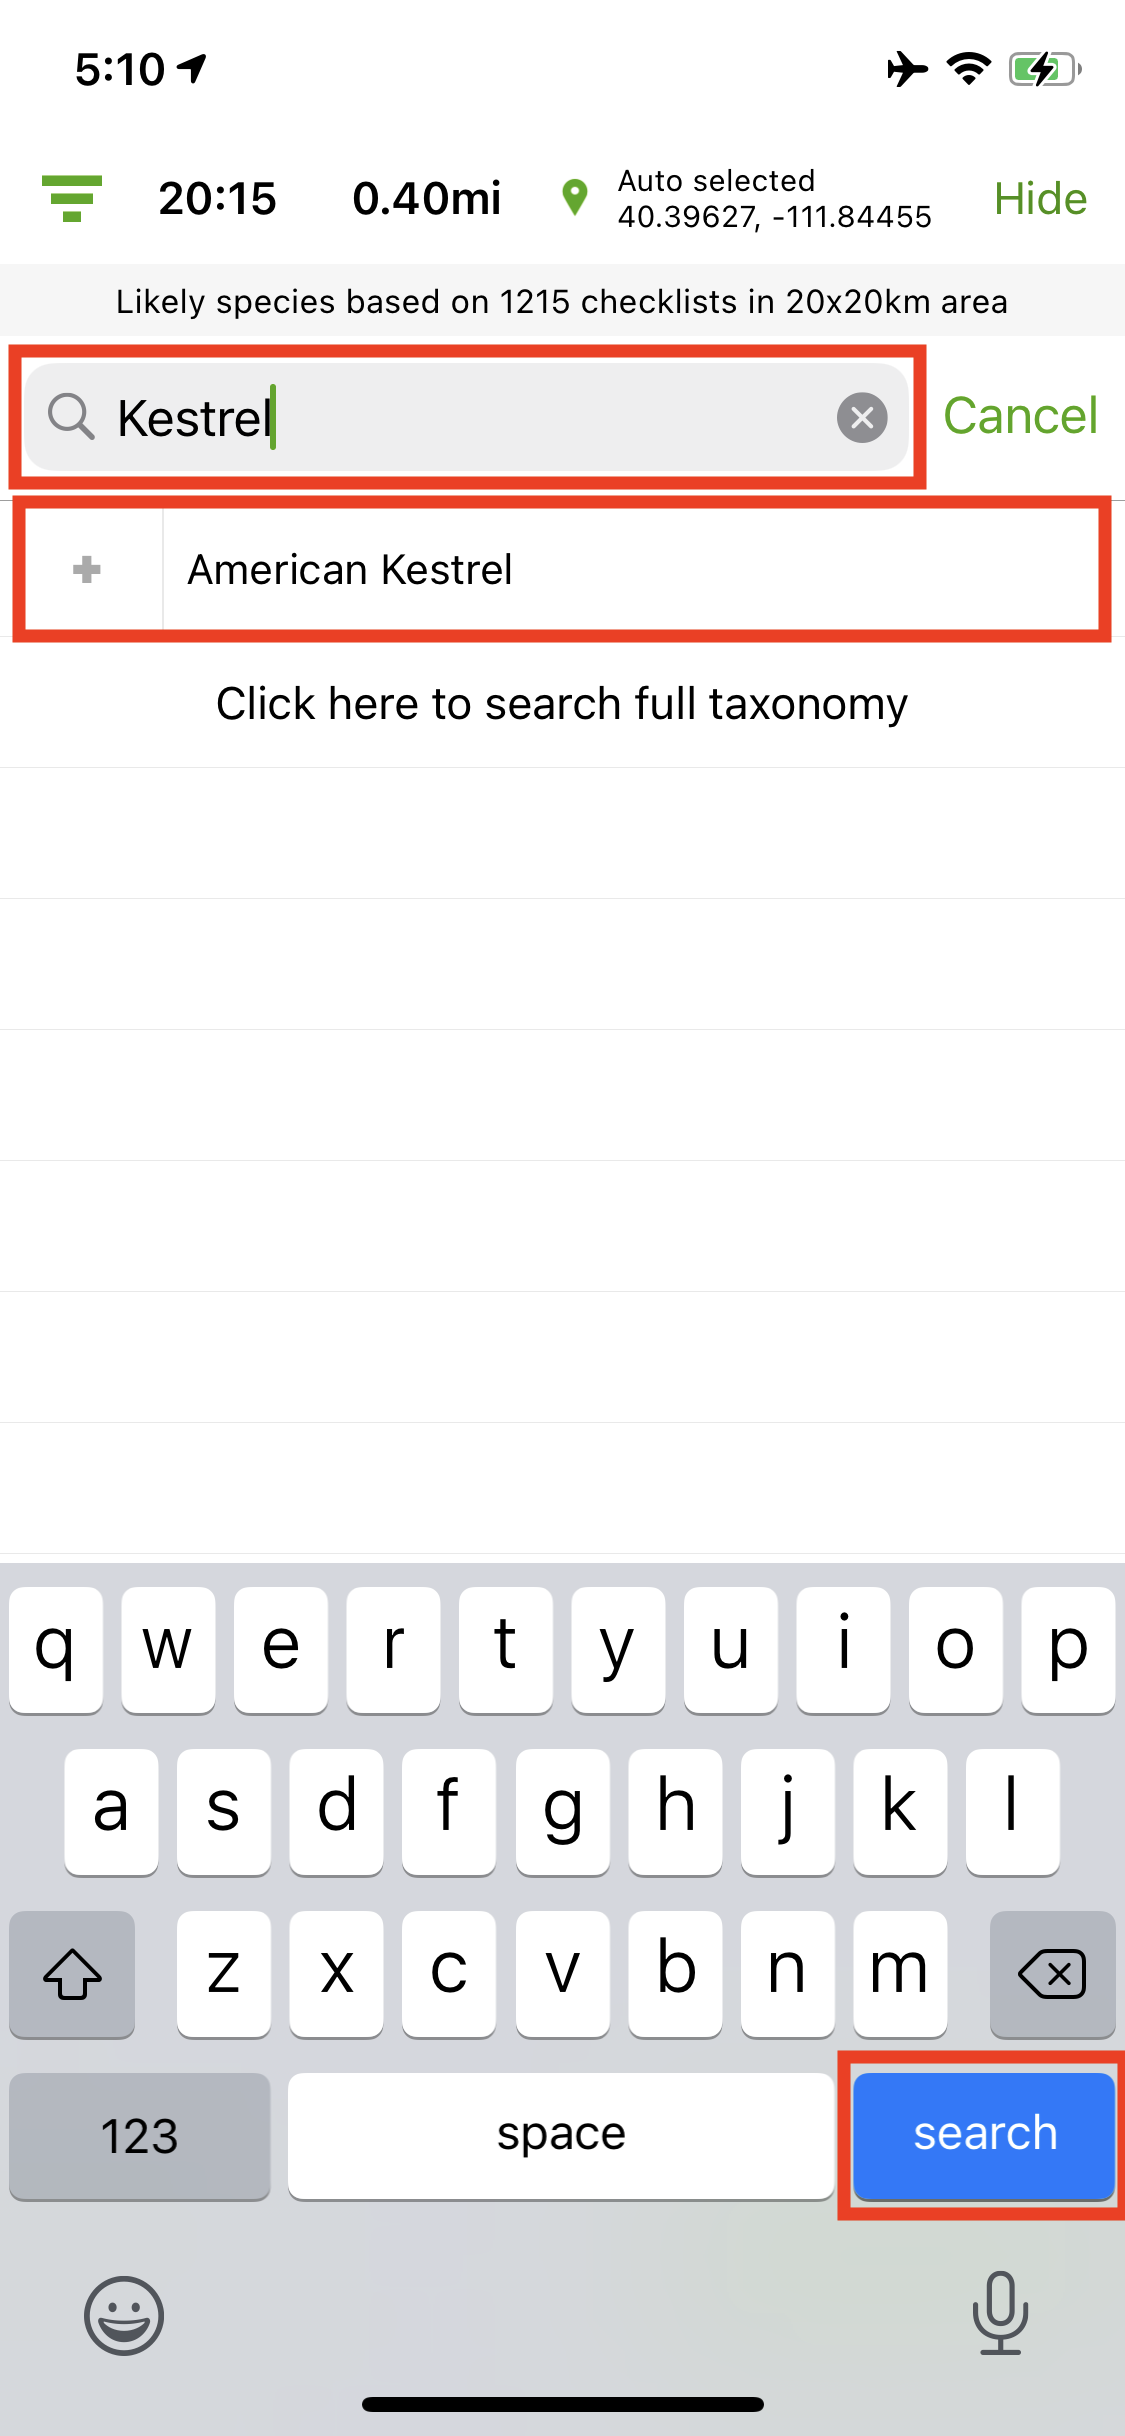
American Kestrel Search
We can now put in the number of birds we saw, let’s say 4, and then any details about those birds we’d like to document. We’ll pretend we saw the birds eating, but you can put whatever you want in this area based on what you saw. Breeding codes are outside the scope of this walkthrough, but if you’d like to learn more about them you can go to eBird’s support page on Breeding Codes. For now, we’ll leave that blank and select “Done” at the top right of the screen.

Adding Details
The checklist will now show a small “1” at the bottom of the screen. This signifies how many birds you’ve added to this checklist, and will grow as others are added. If you select the checkmark, the list will narrow to the birds you have added to the checklist.
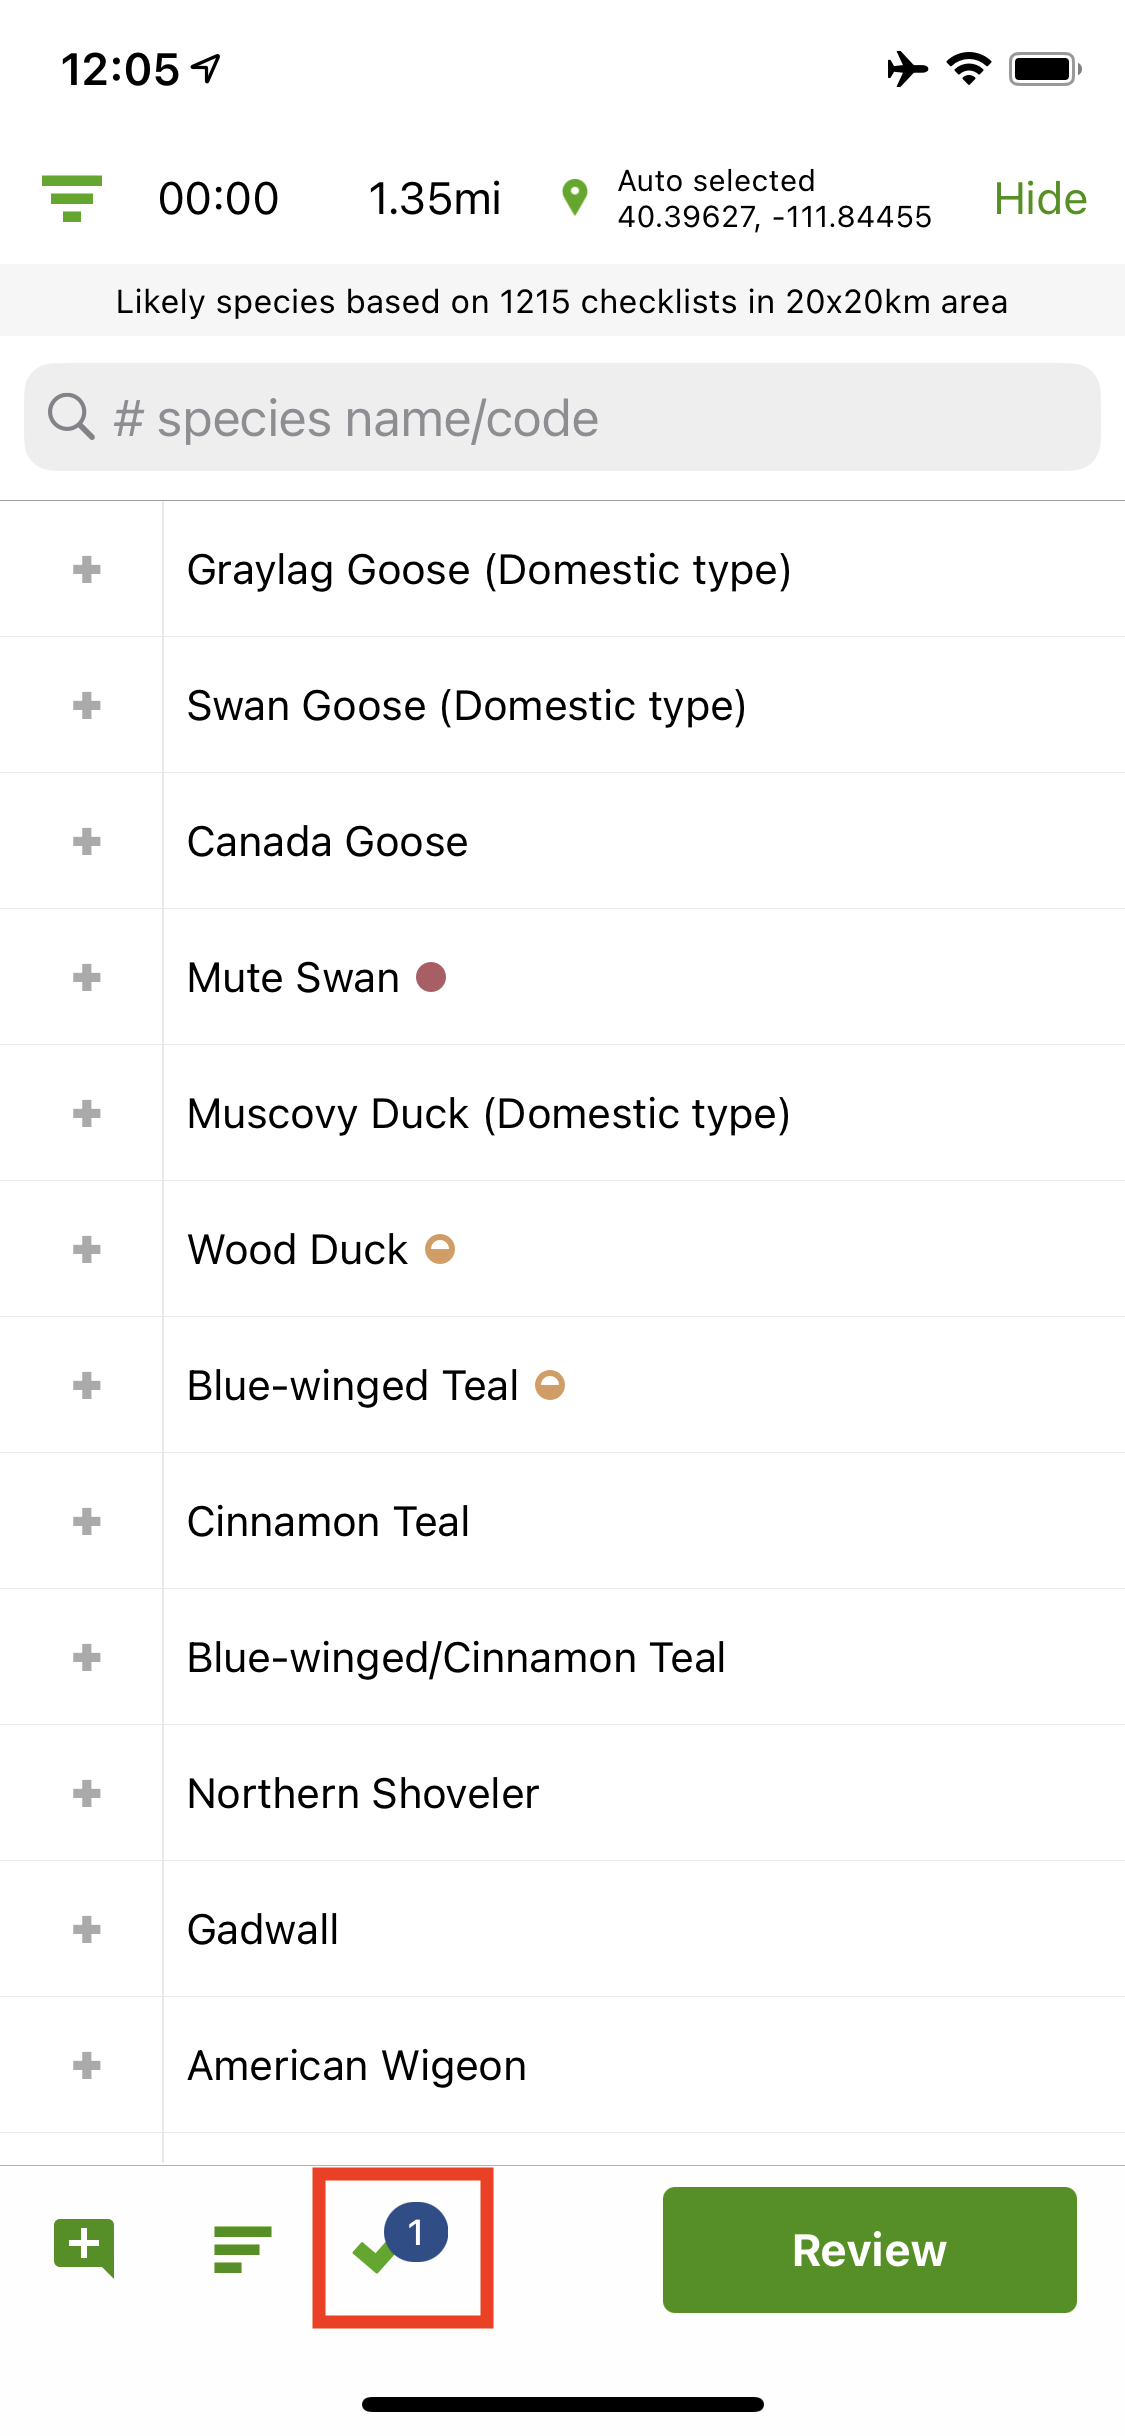
Narrowing Down the Checklist

Checklist Narrowed Down
The hamburger menu at the bottom left will open a sub-menu of settings for the checklist.
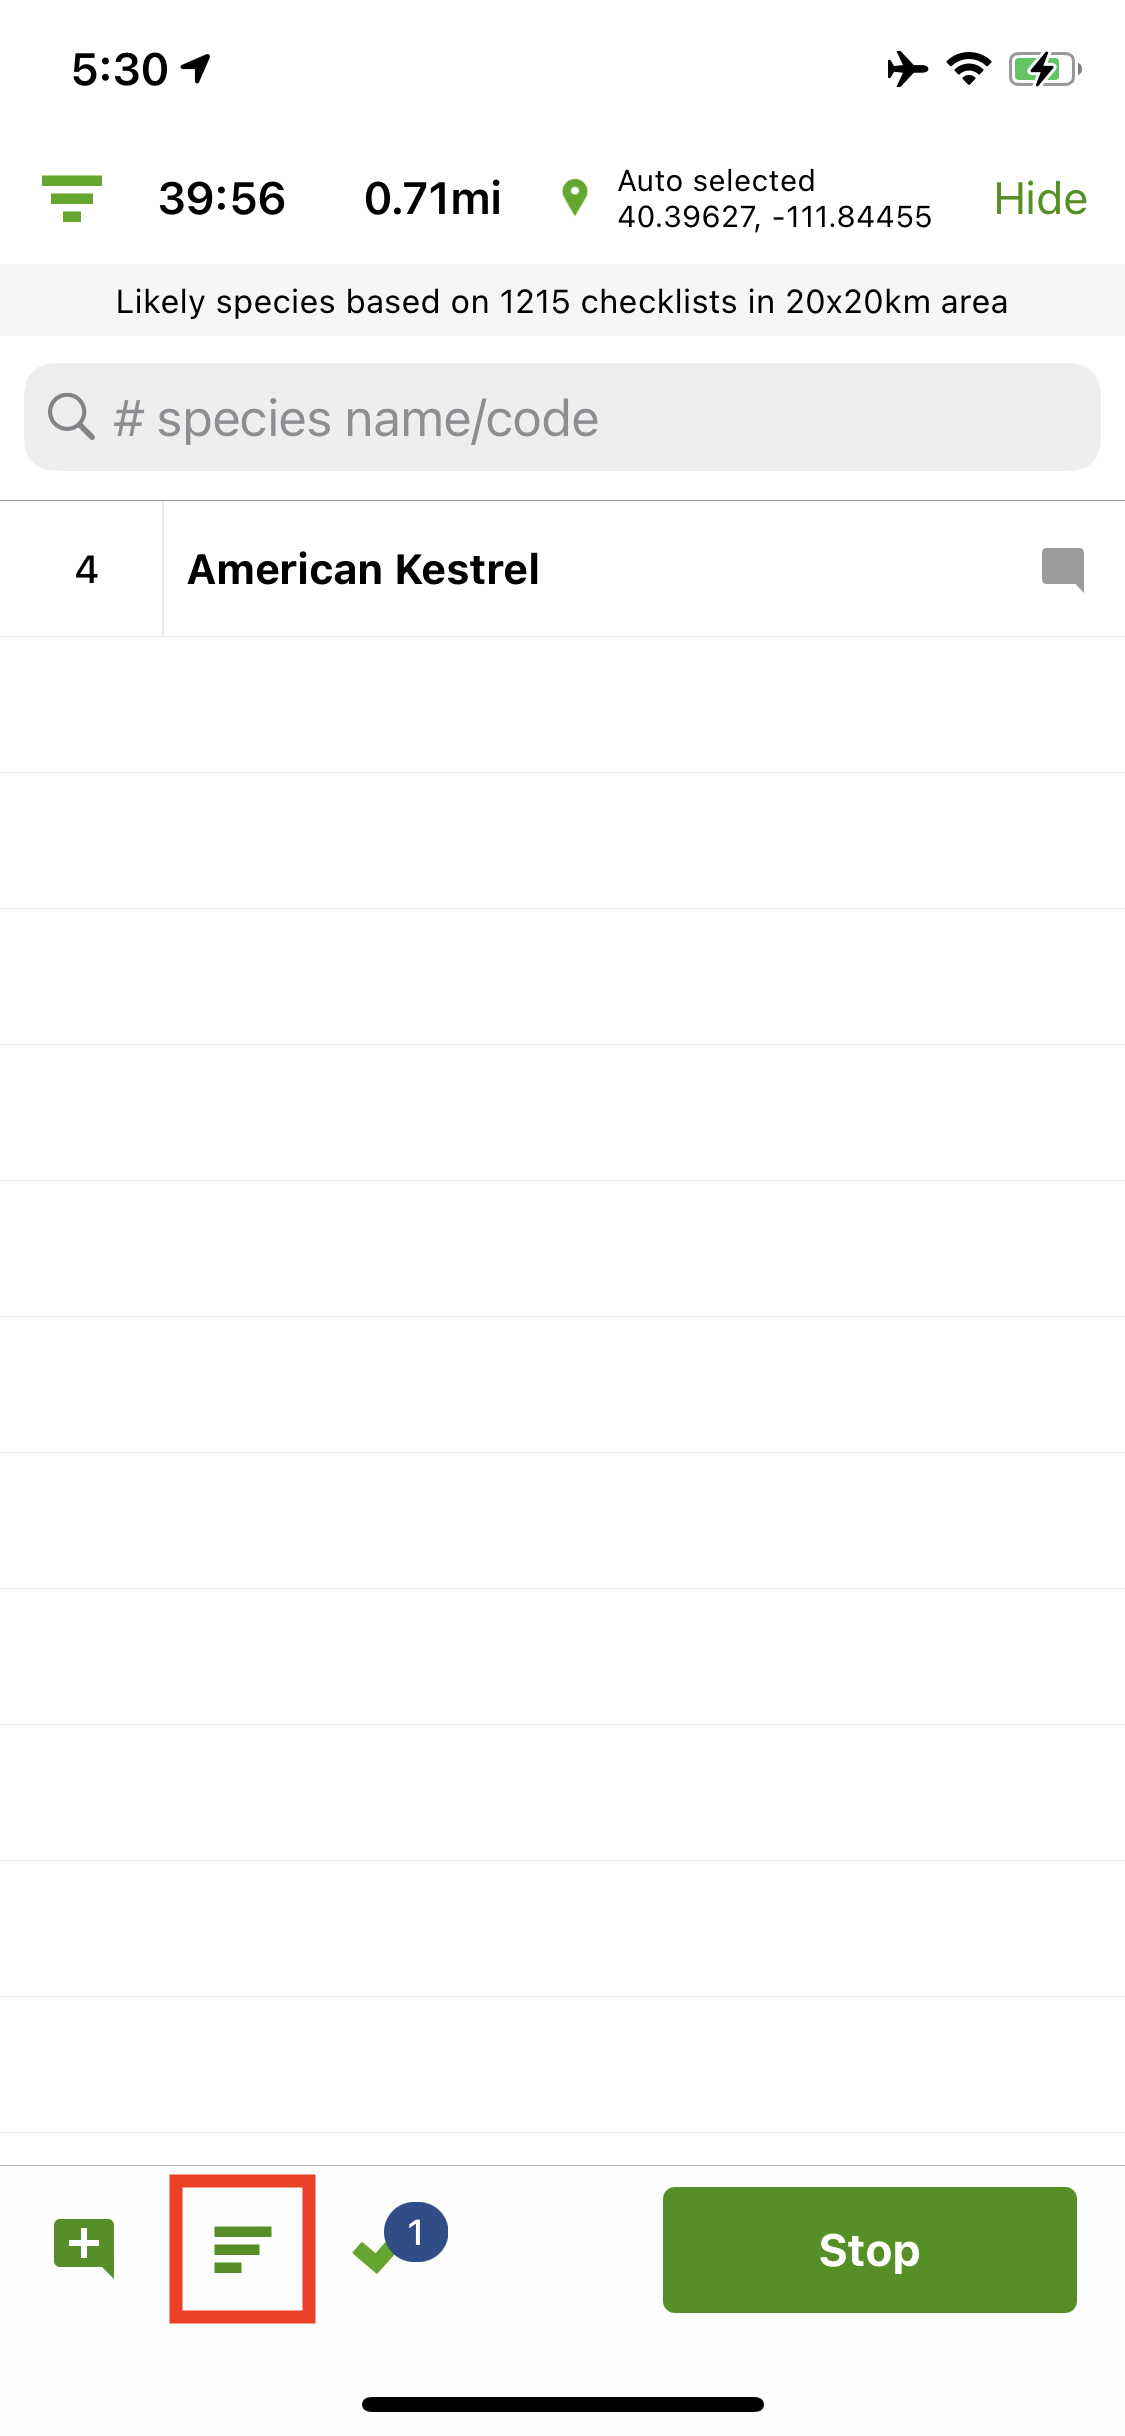
Hamburger Menu
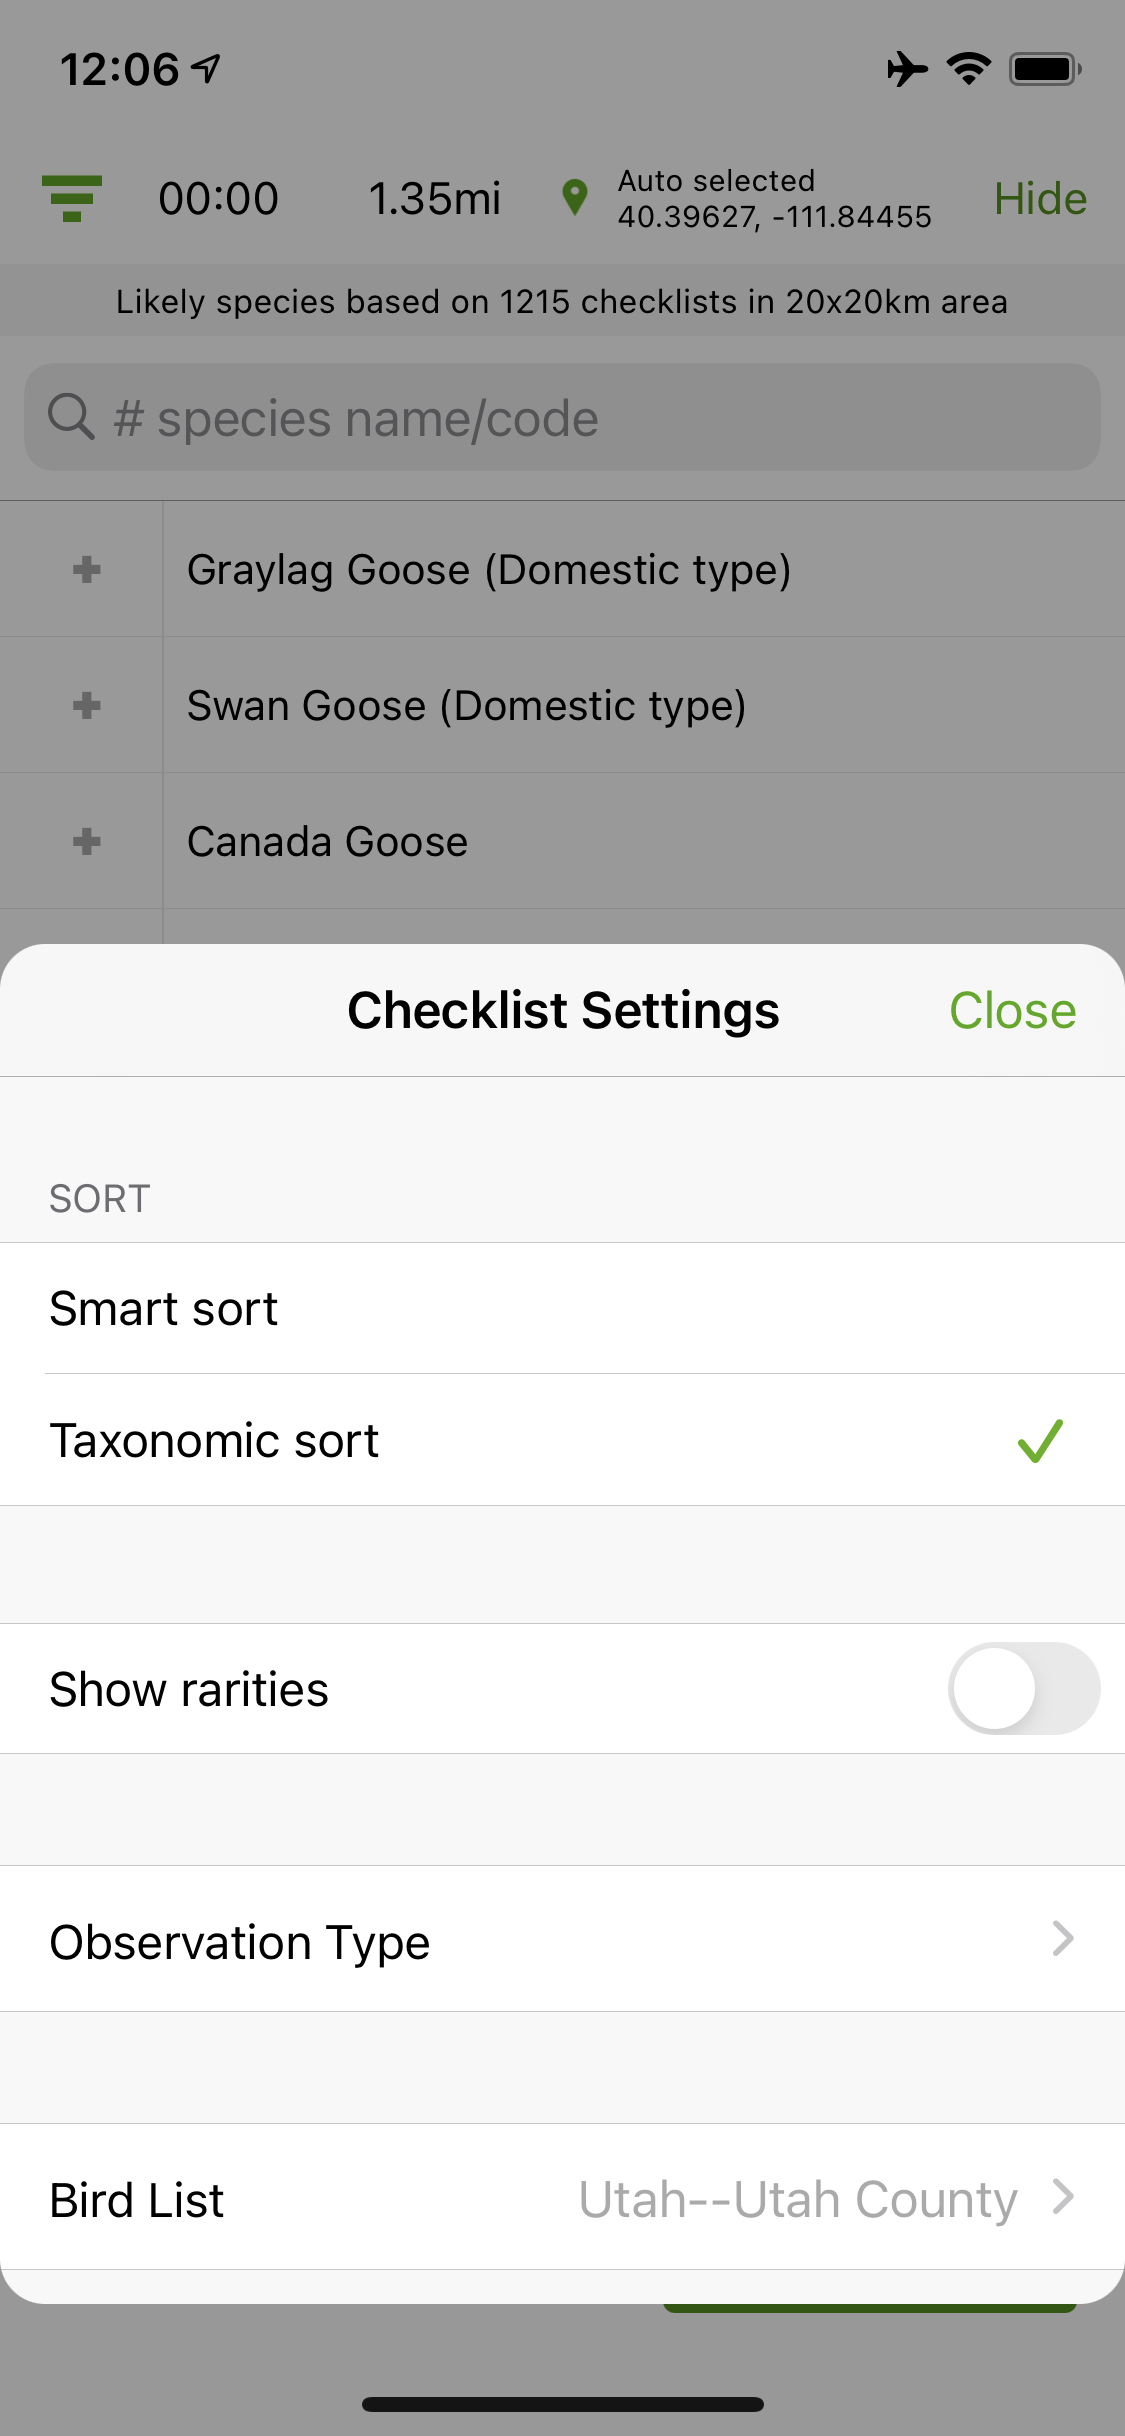
Checklist Settings
The comment icon with a plus sign inside allows you to leave overall comments on the checklist.
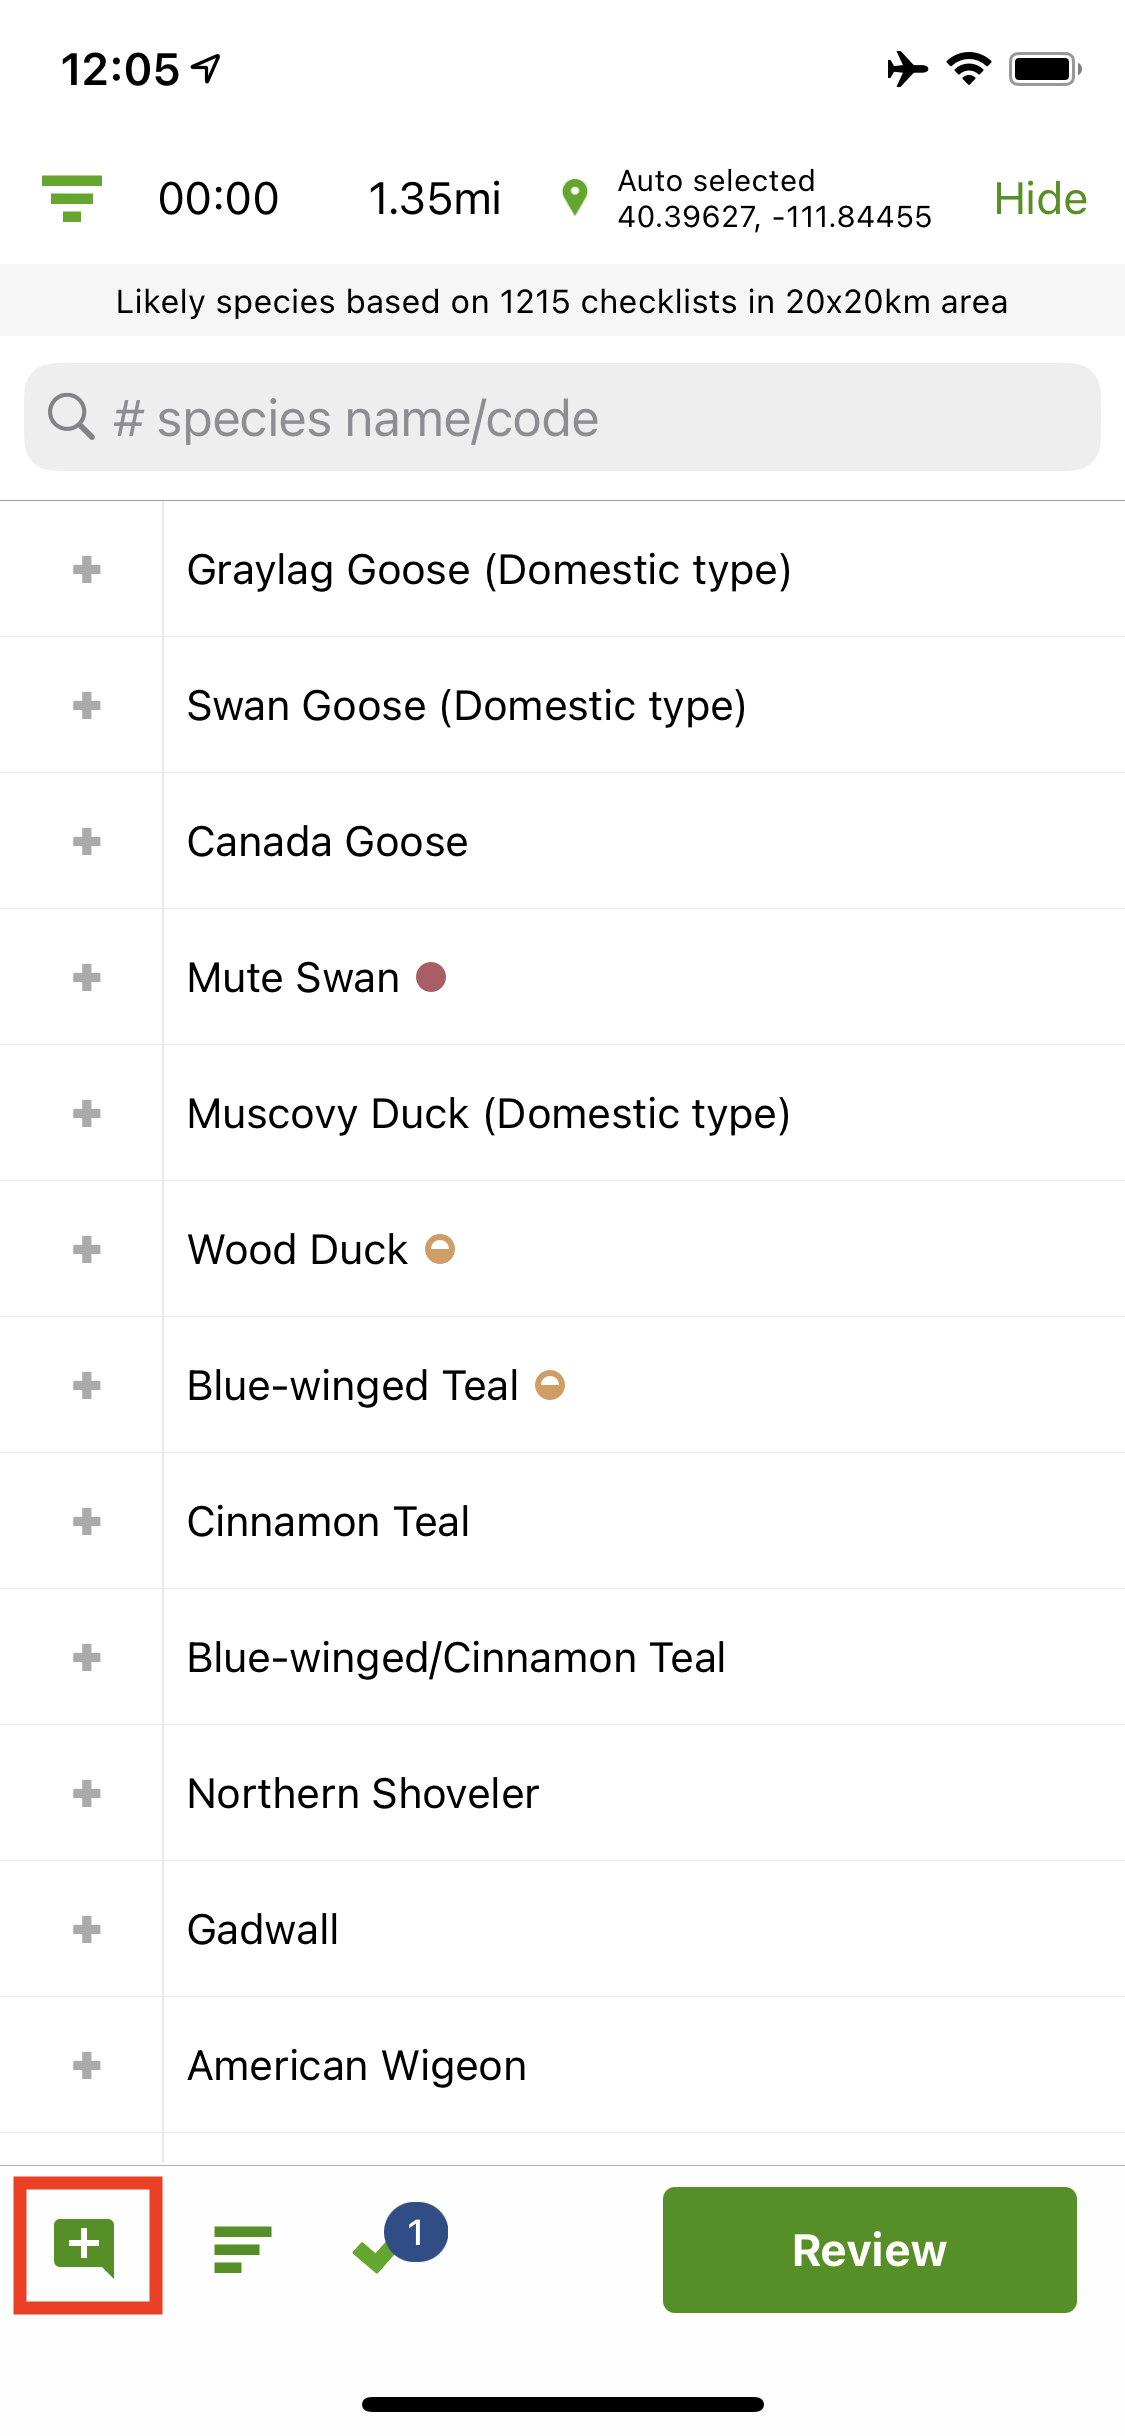
Checklist Comment Option
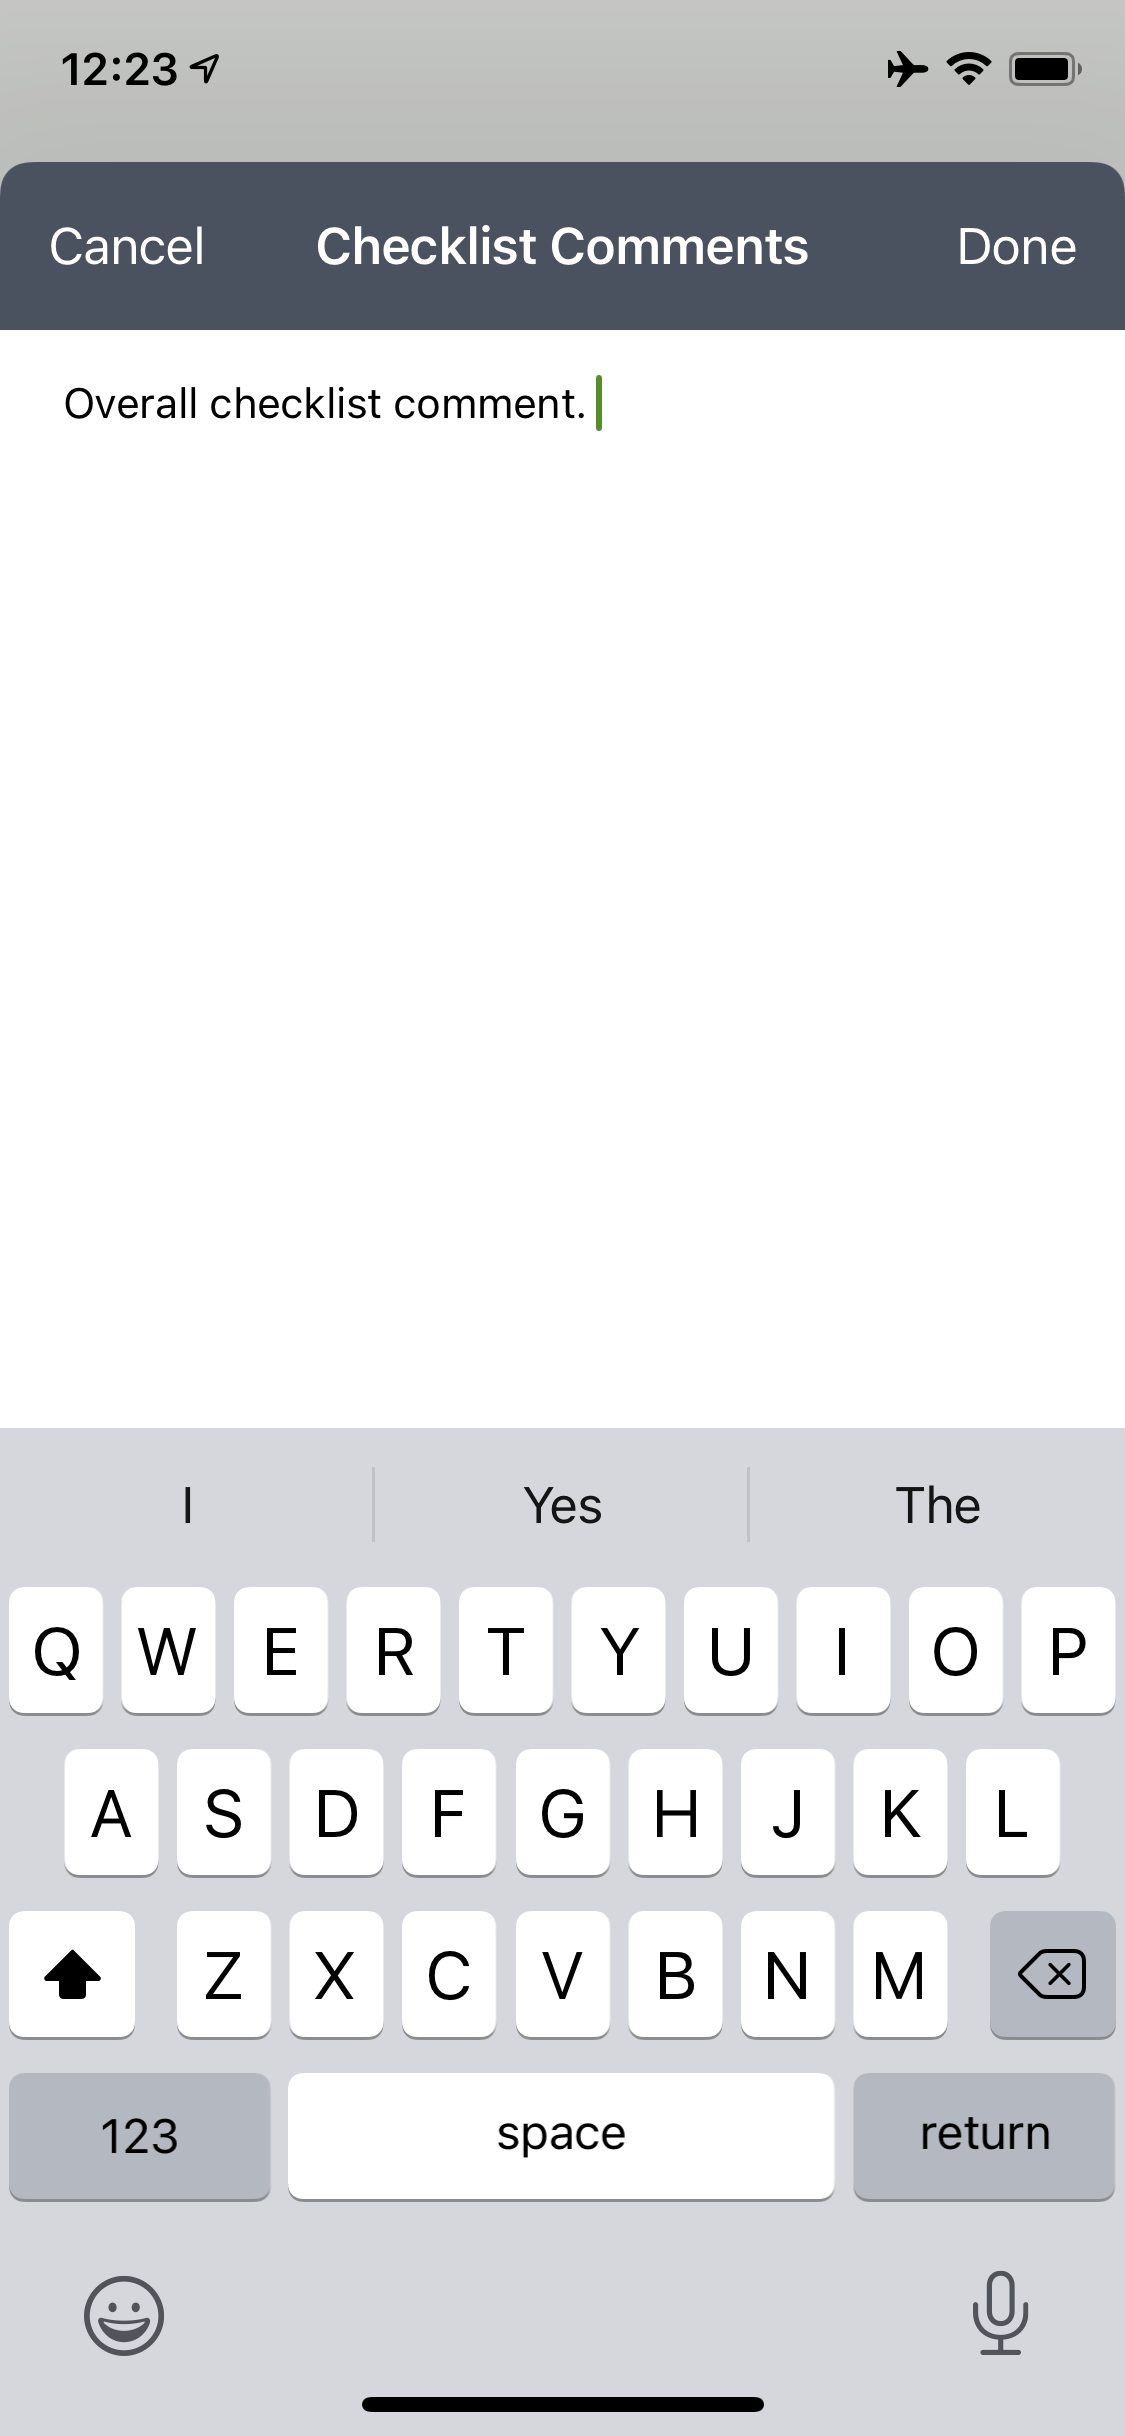
Checklist Comment Space
Alright, it’s time to submit our checklist! Select “Stop” at the bottom right, then “Stop track” on the pop up.
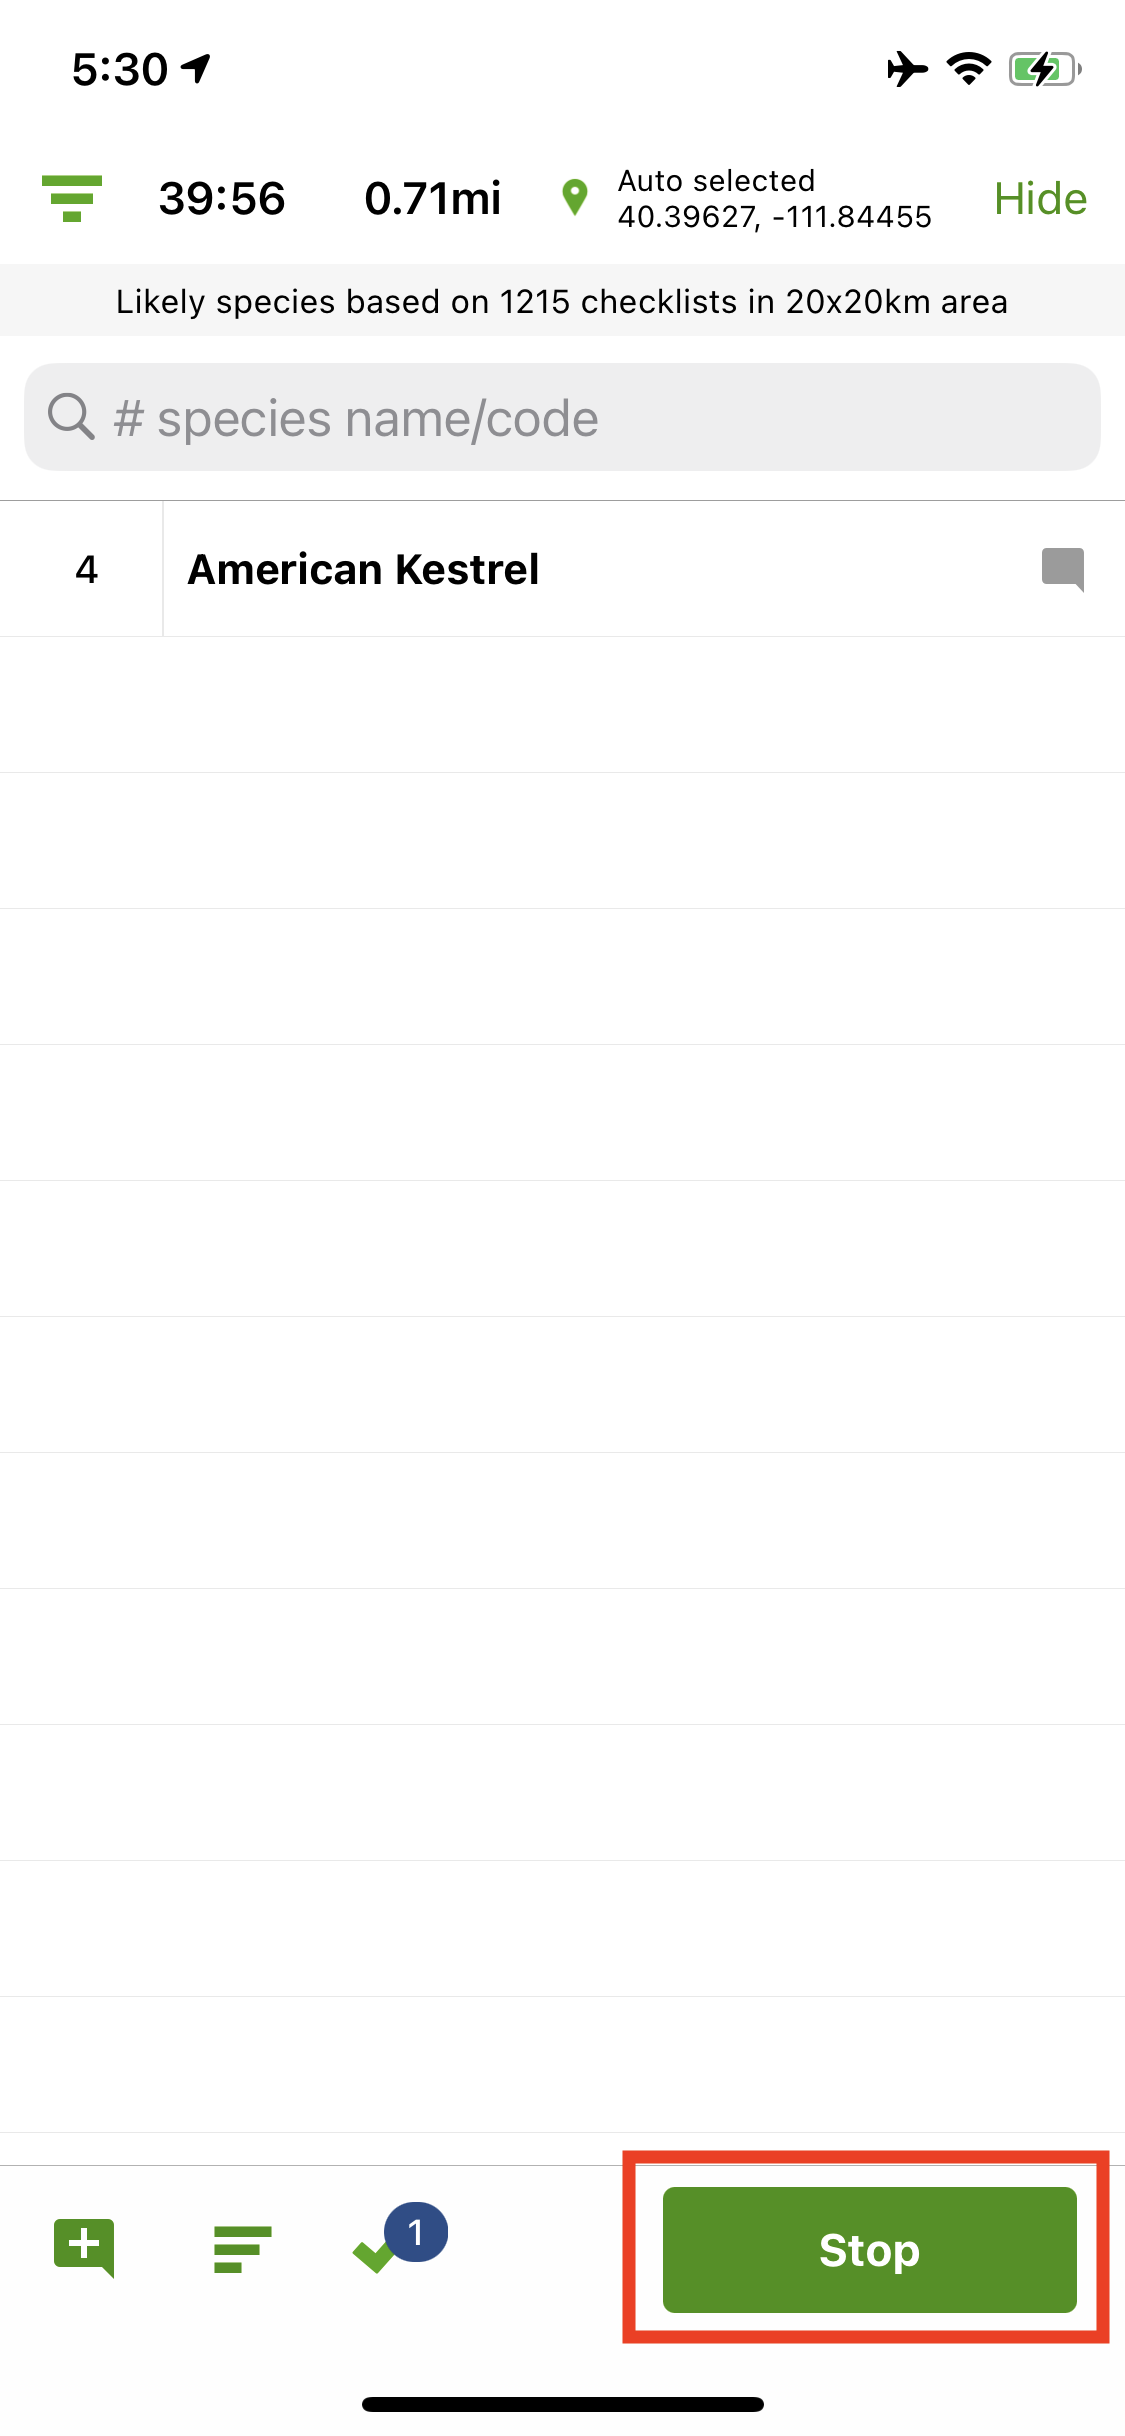
Stop Checklist
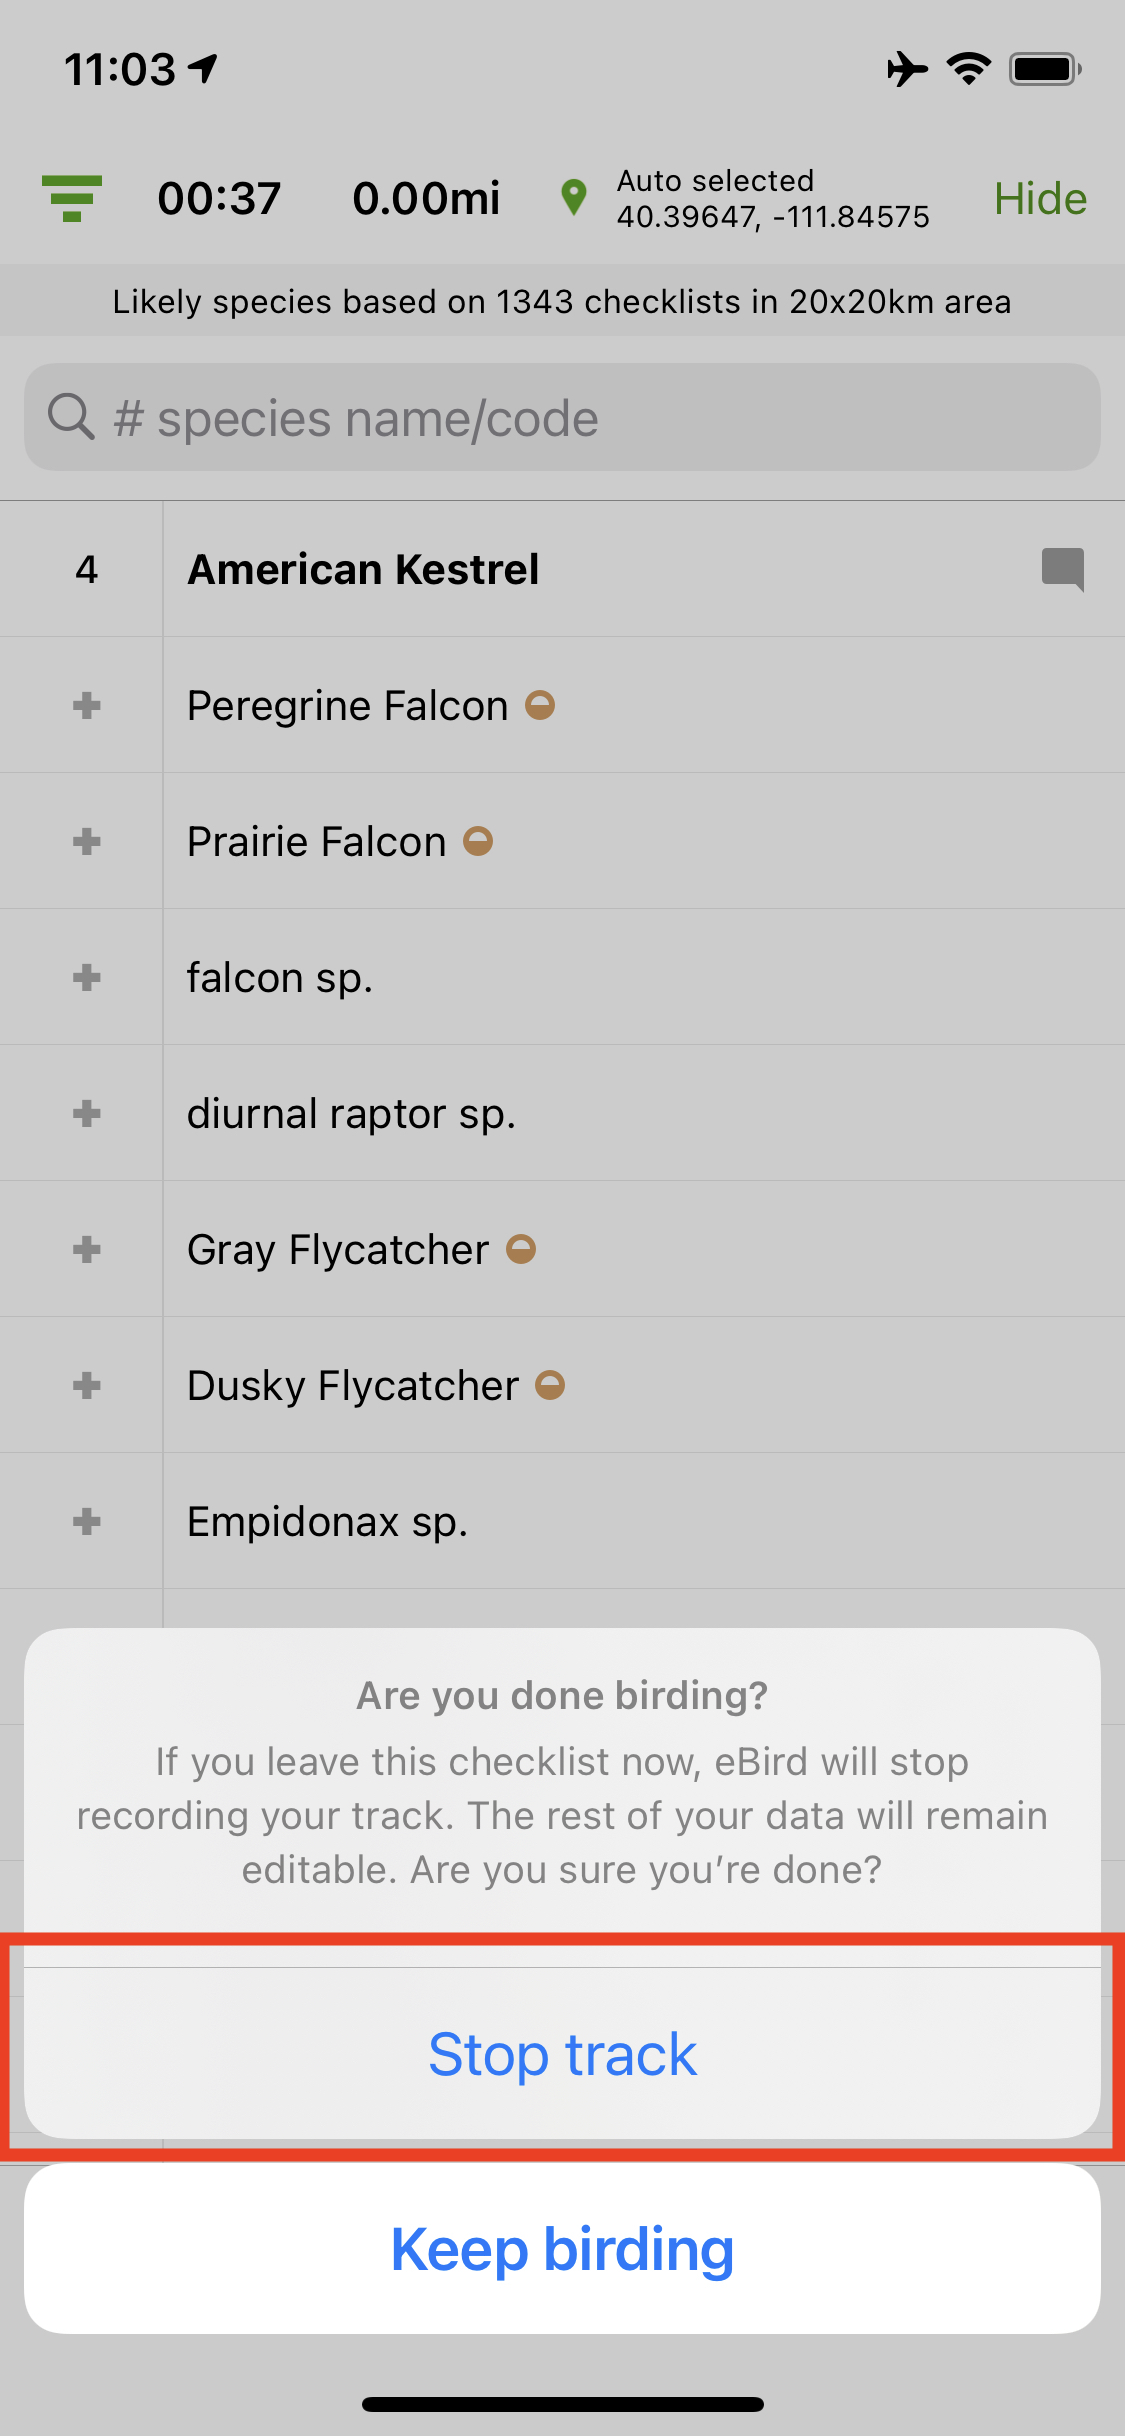
Stop Checklist Confirmation
Now let’s choose a location. At the top, select “Choose a location…”. eBird will give you a few options to choose from based on your location. You can either choose one, or type another address. When you’re done, select “Use this location”. The location should show correctly on the previous screen once that’s done.
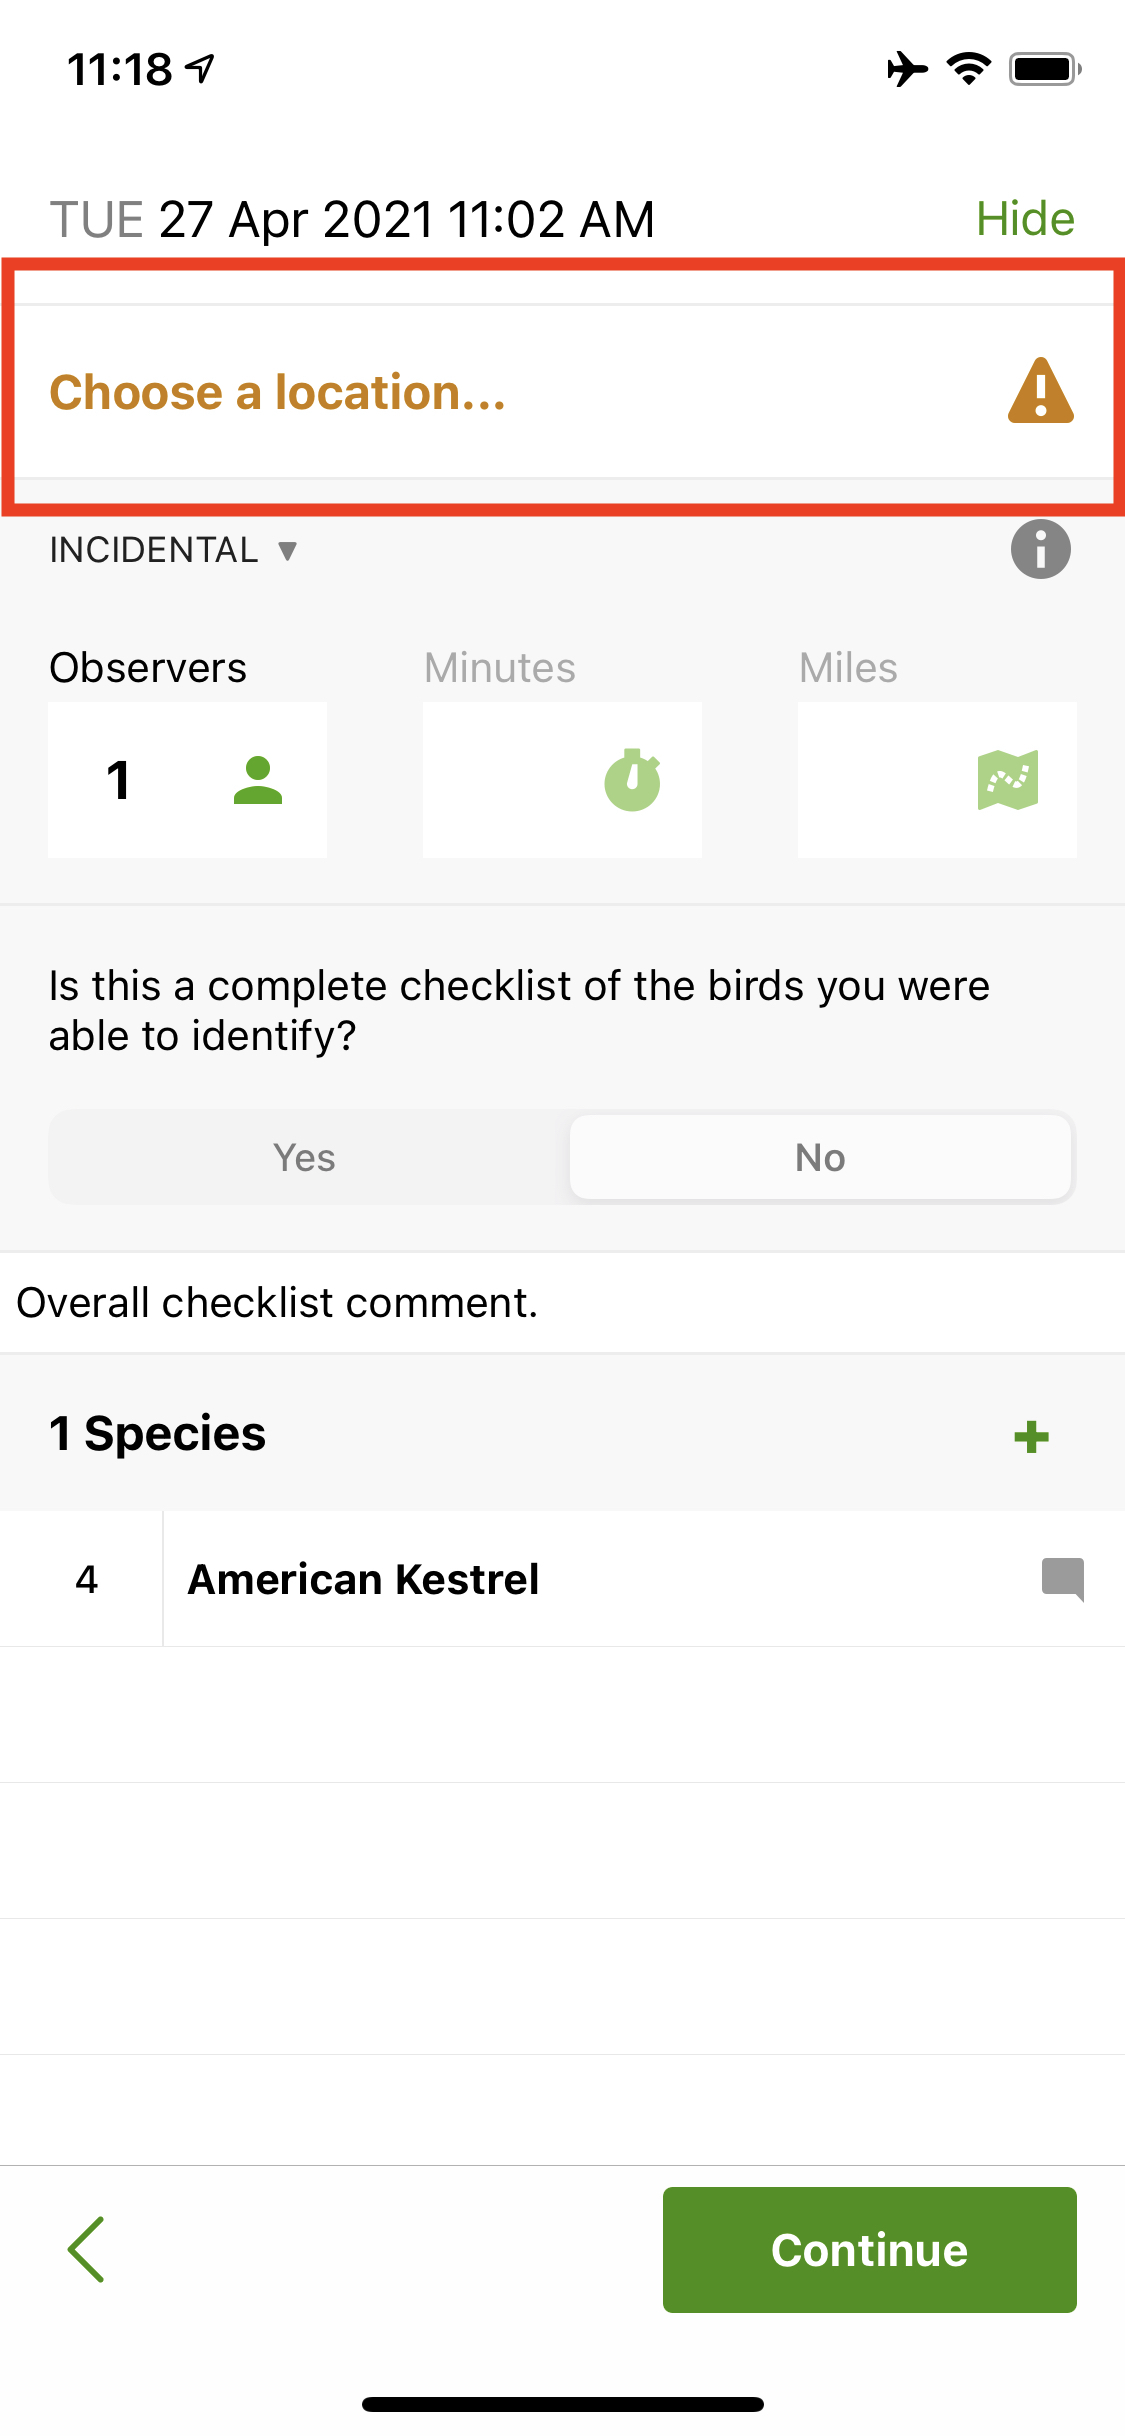
Choose a Location
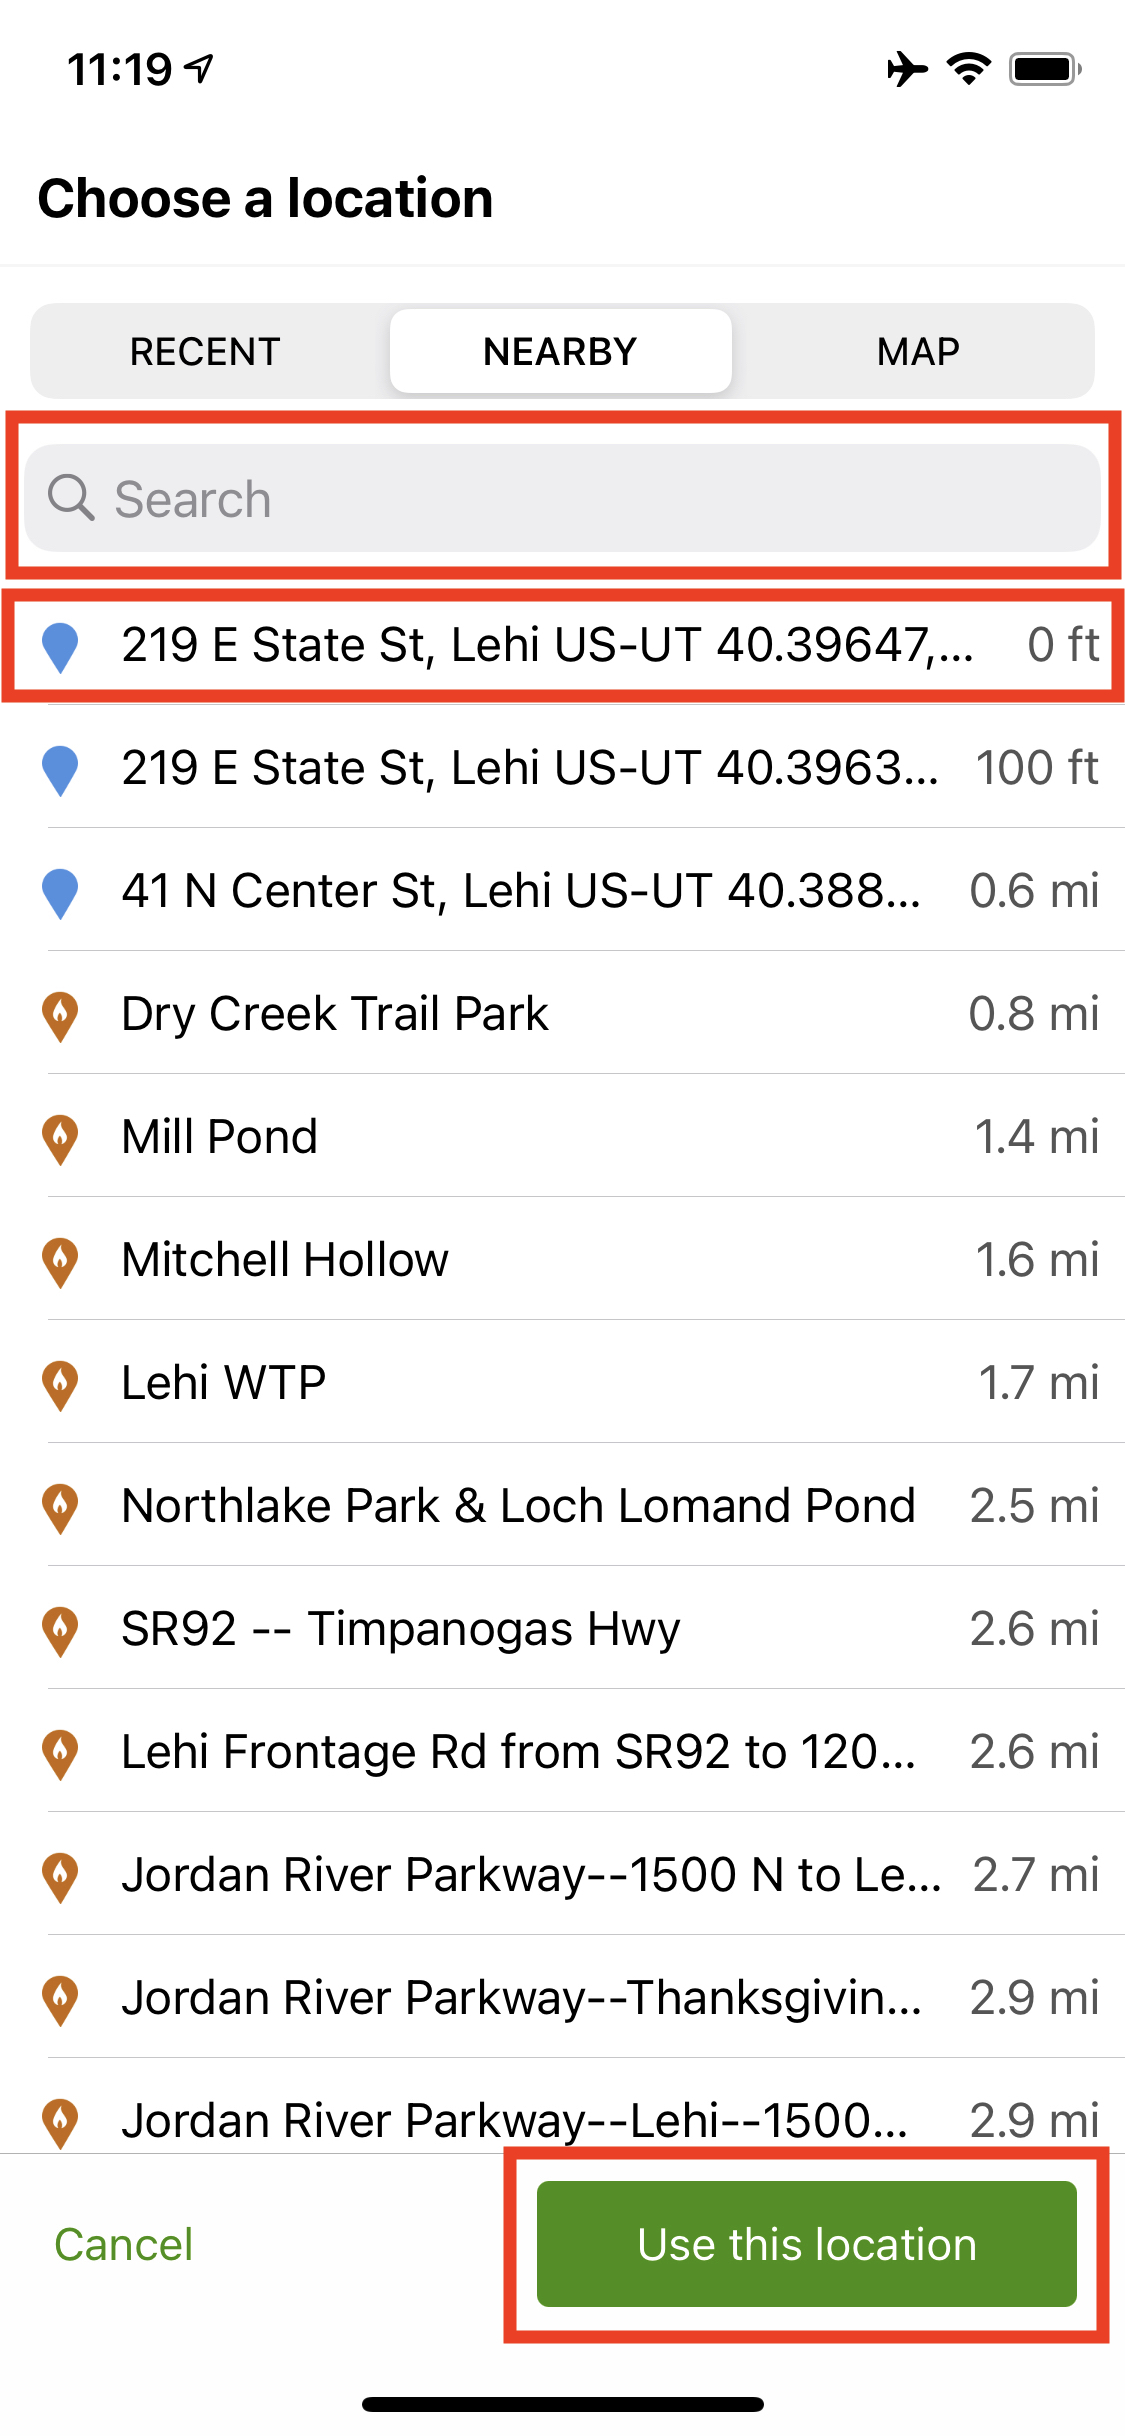
Search a Location
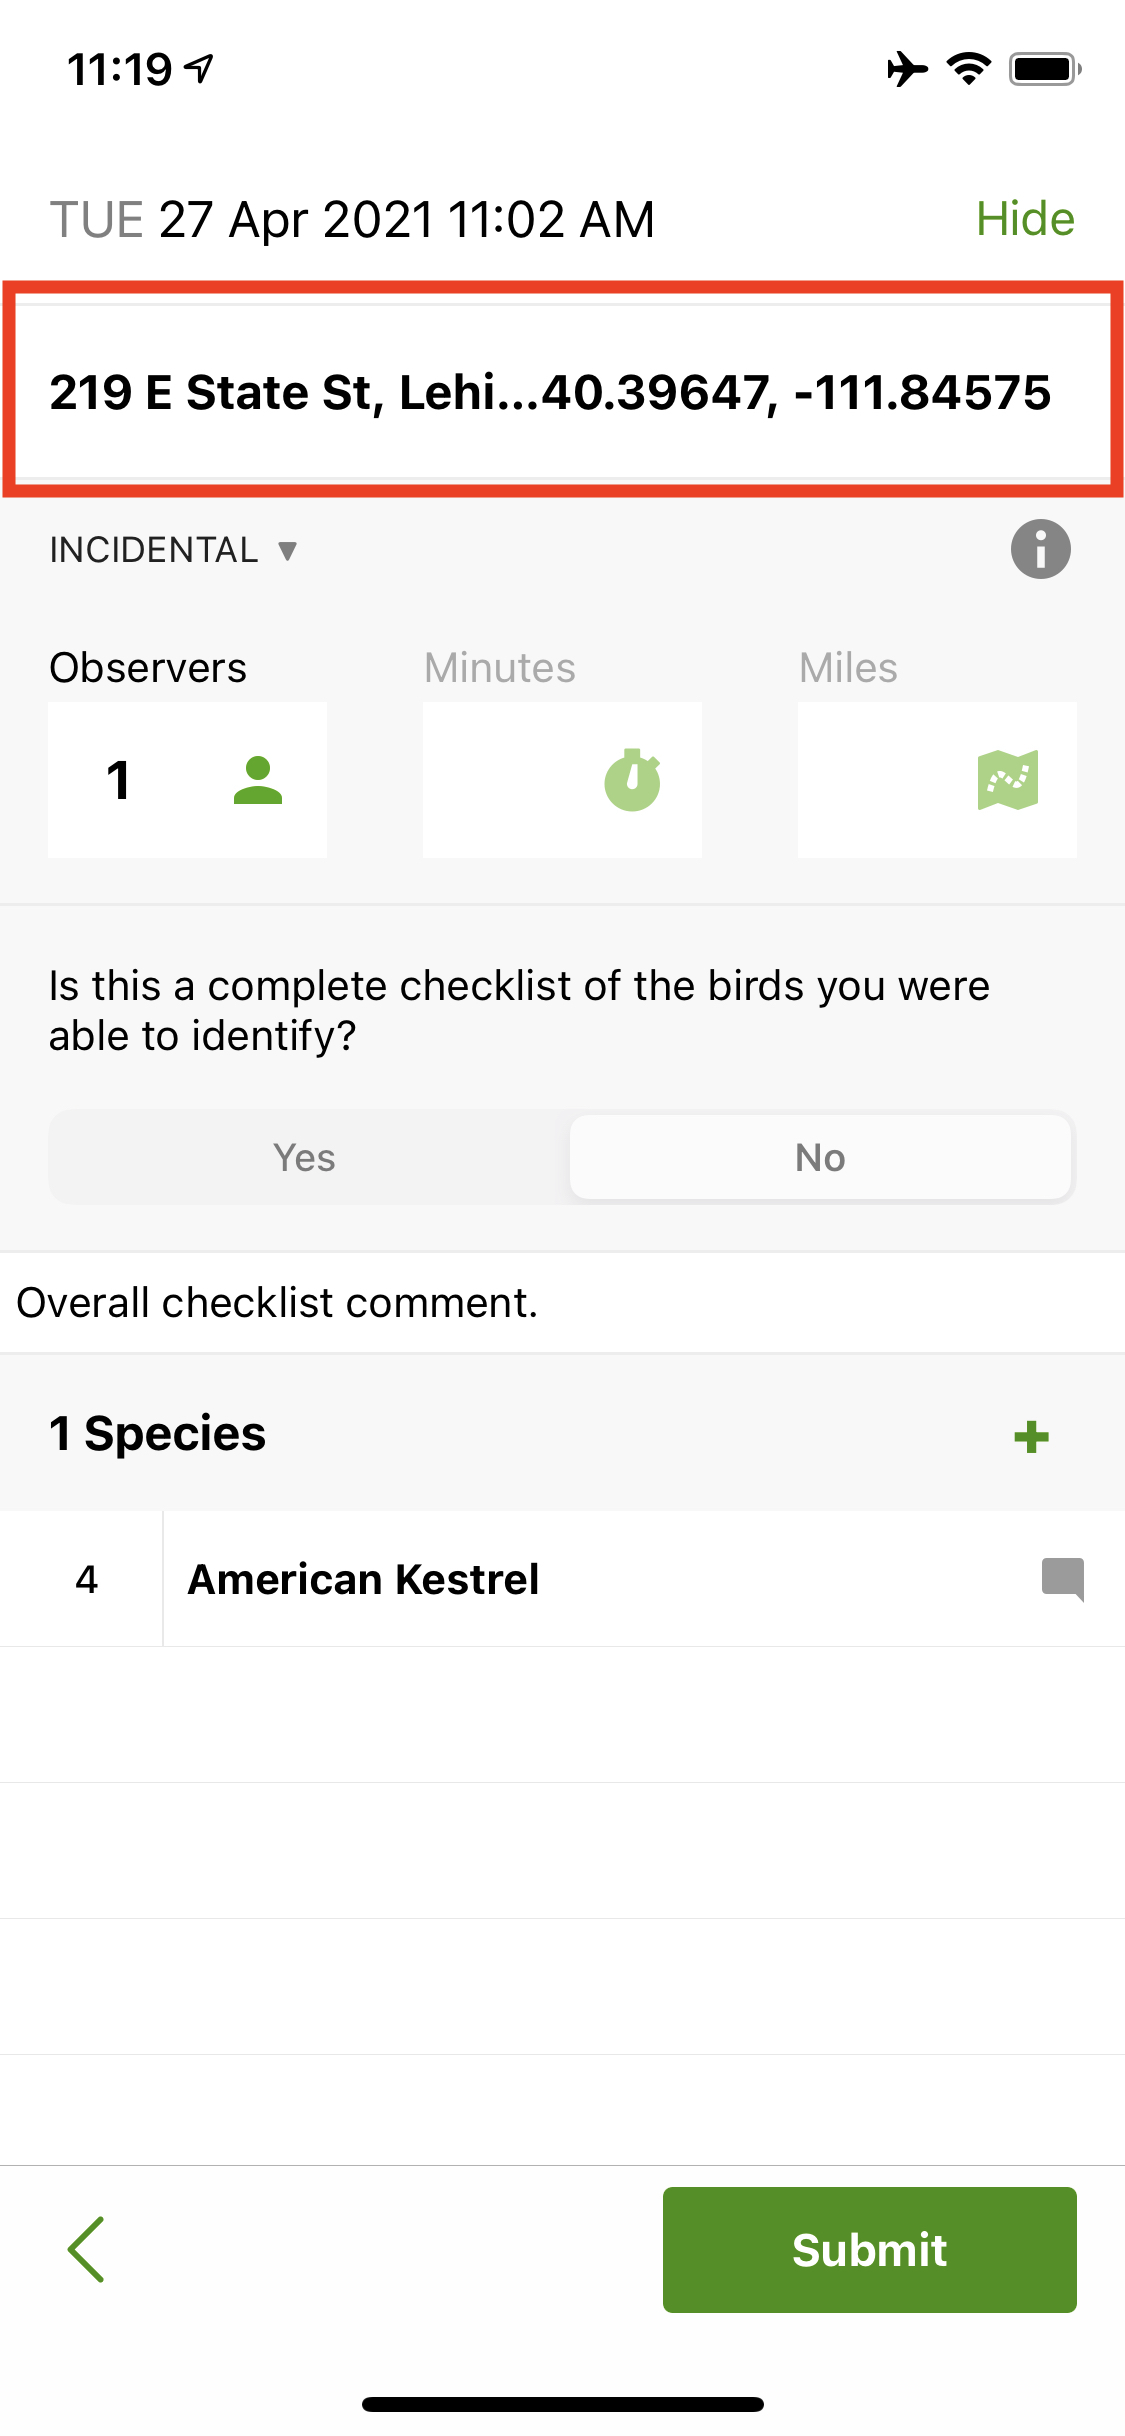
Location Updated
Now let’s submit it! Select “Submit” at the bottom right, and your sighting will be submitted to the community!
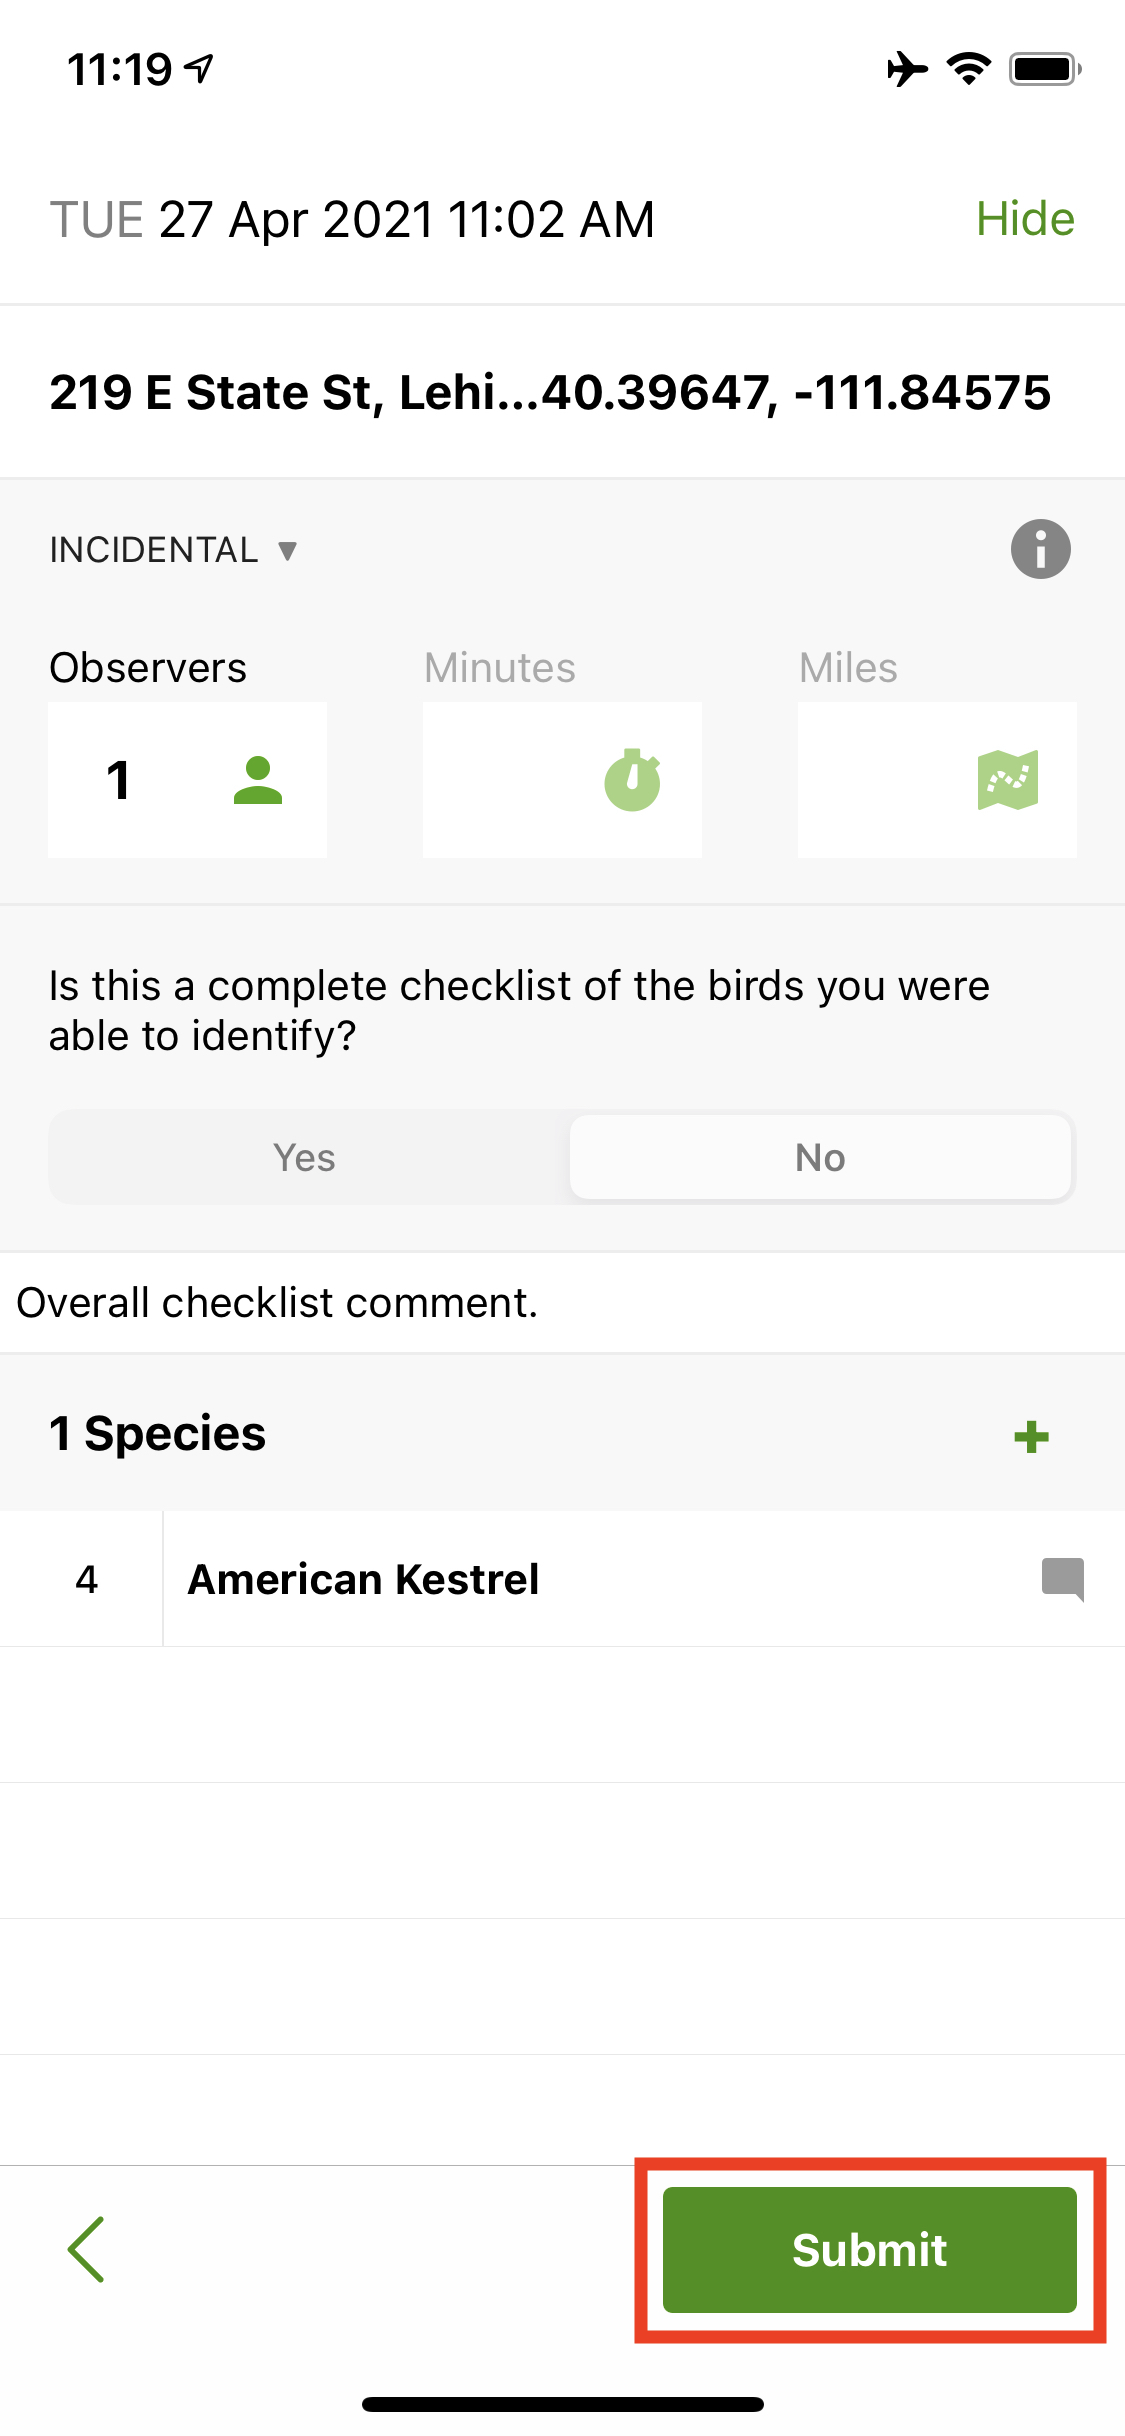
Submit Checklist
Exploring other sightings
Viewing other submissions is a really cool piece of eBird. On the bottom of the app, select “Explore” and eBird will show you a map of your location, with submitted findings highlighted as pins. To see the details of any sighting, select any pin on the map.
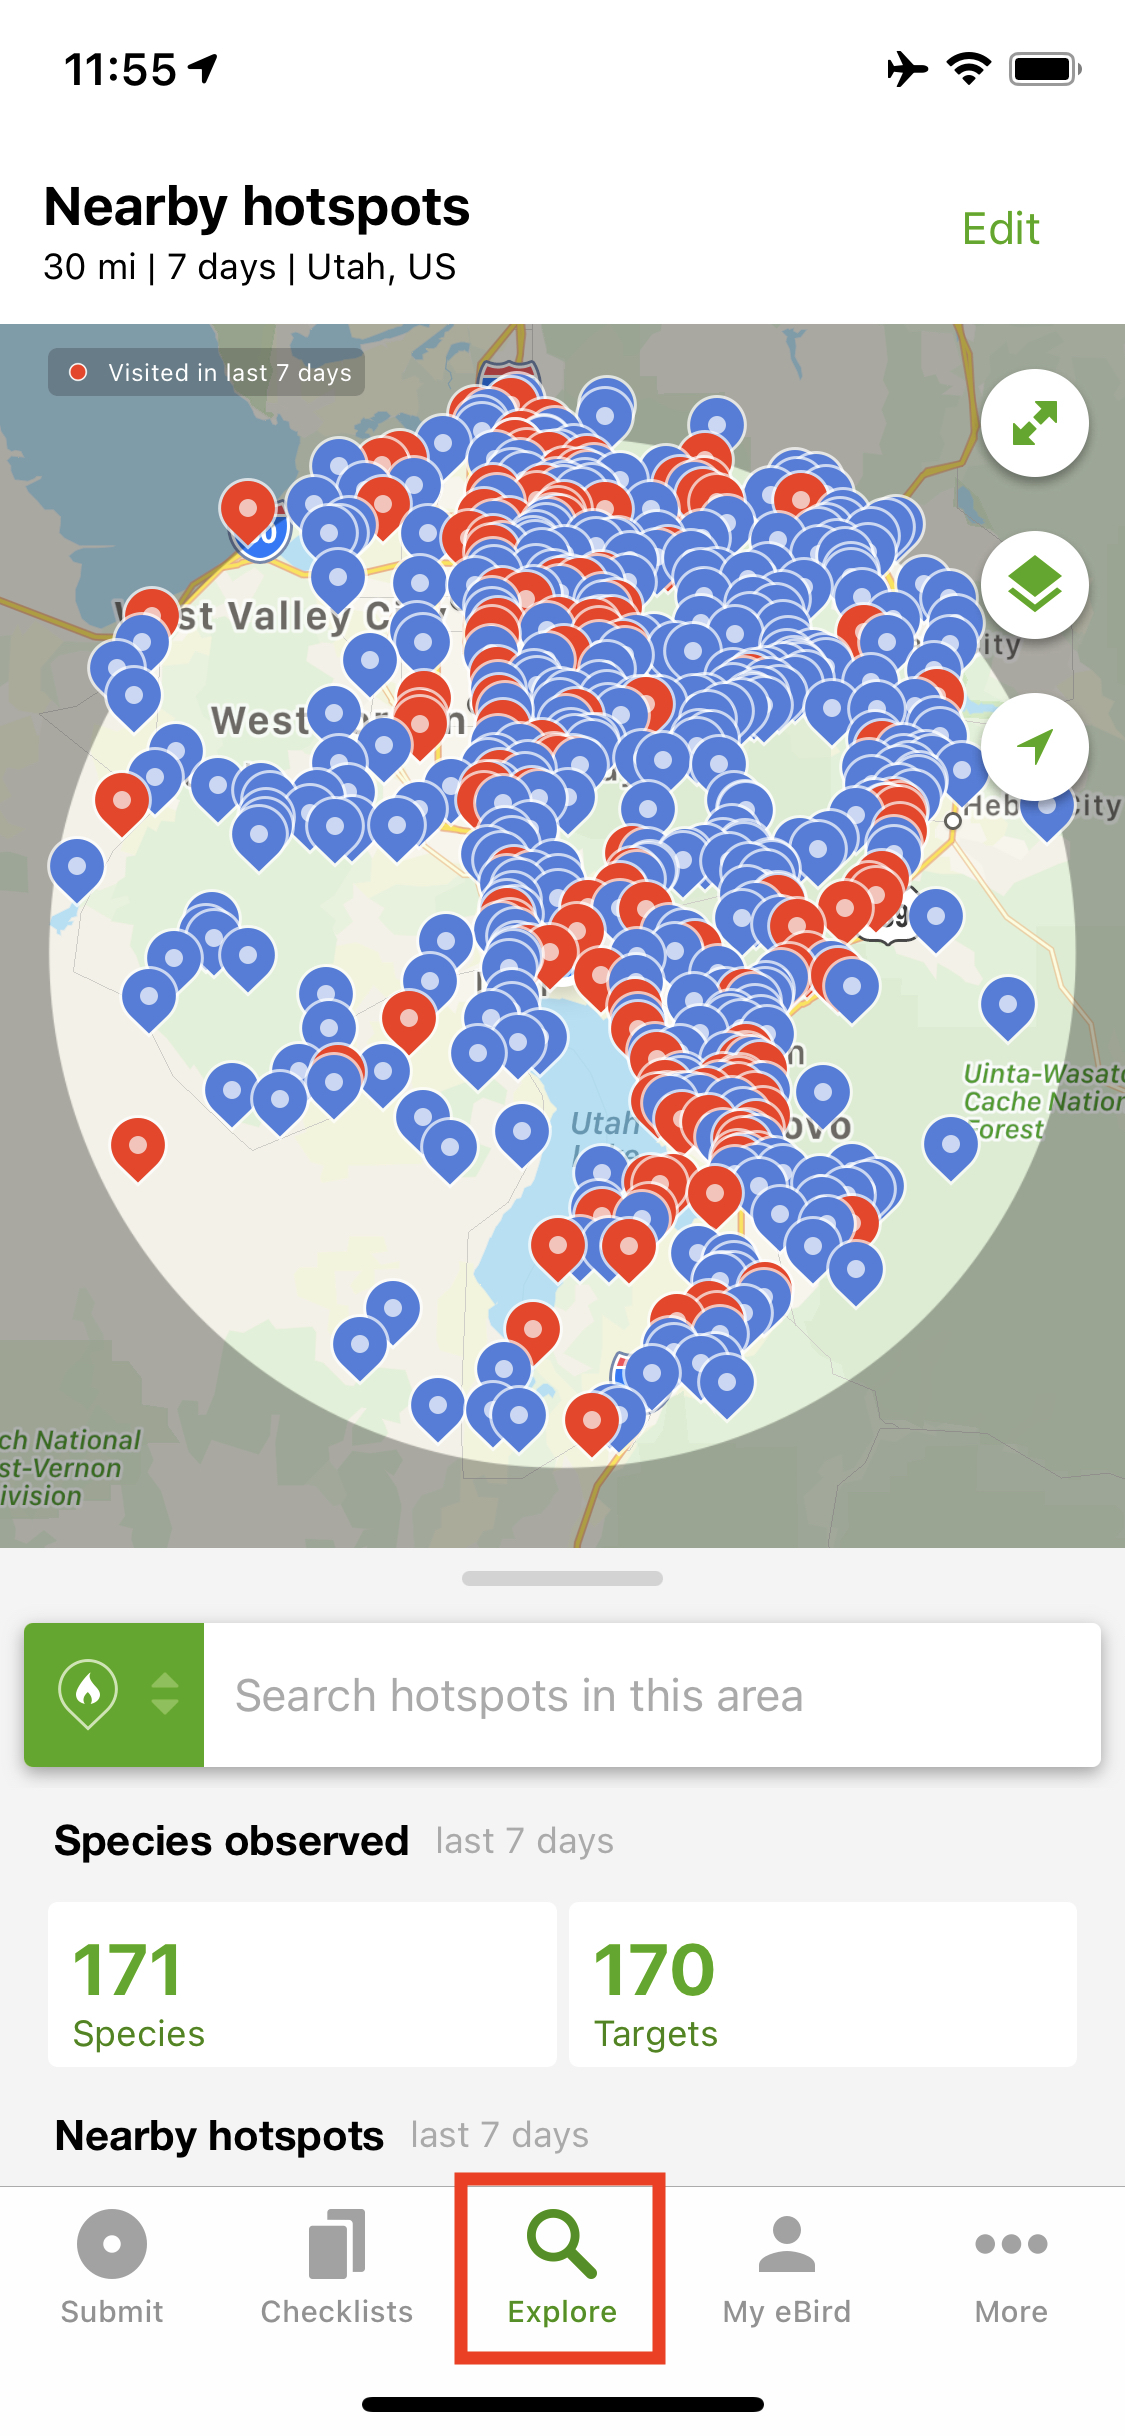
Explore Tab
When you select a pin, a small window pops up on the bottom of the screen. To see details of the sighting, select “Details” and an in-depth list will pop up.
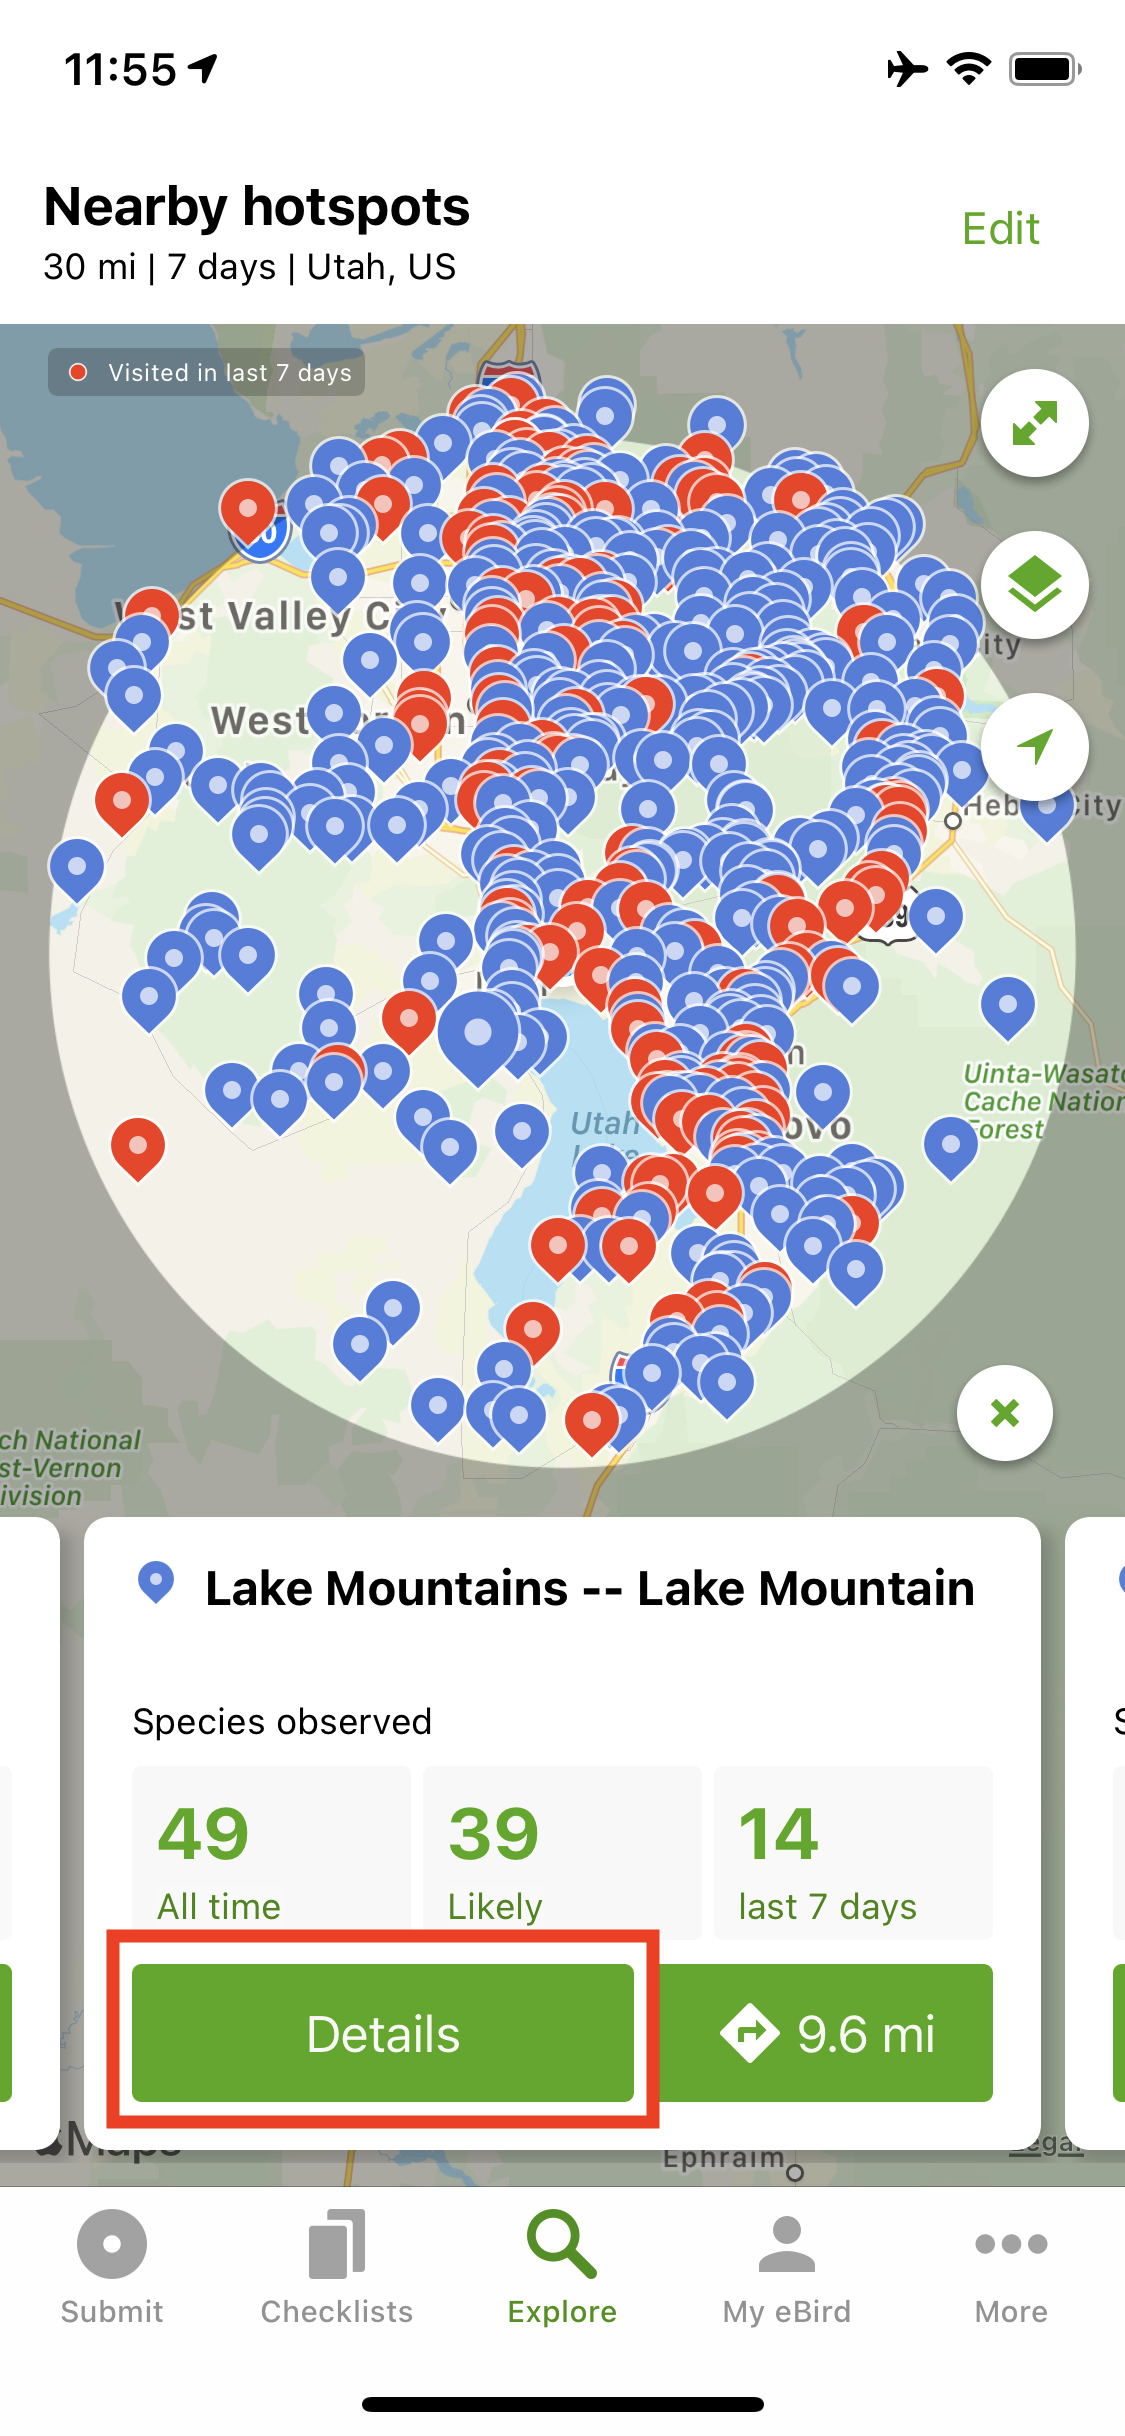
Select Pin Details
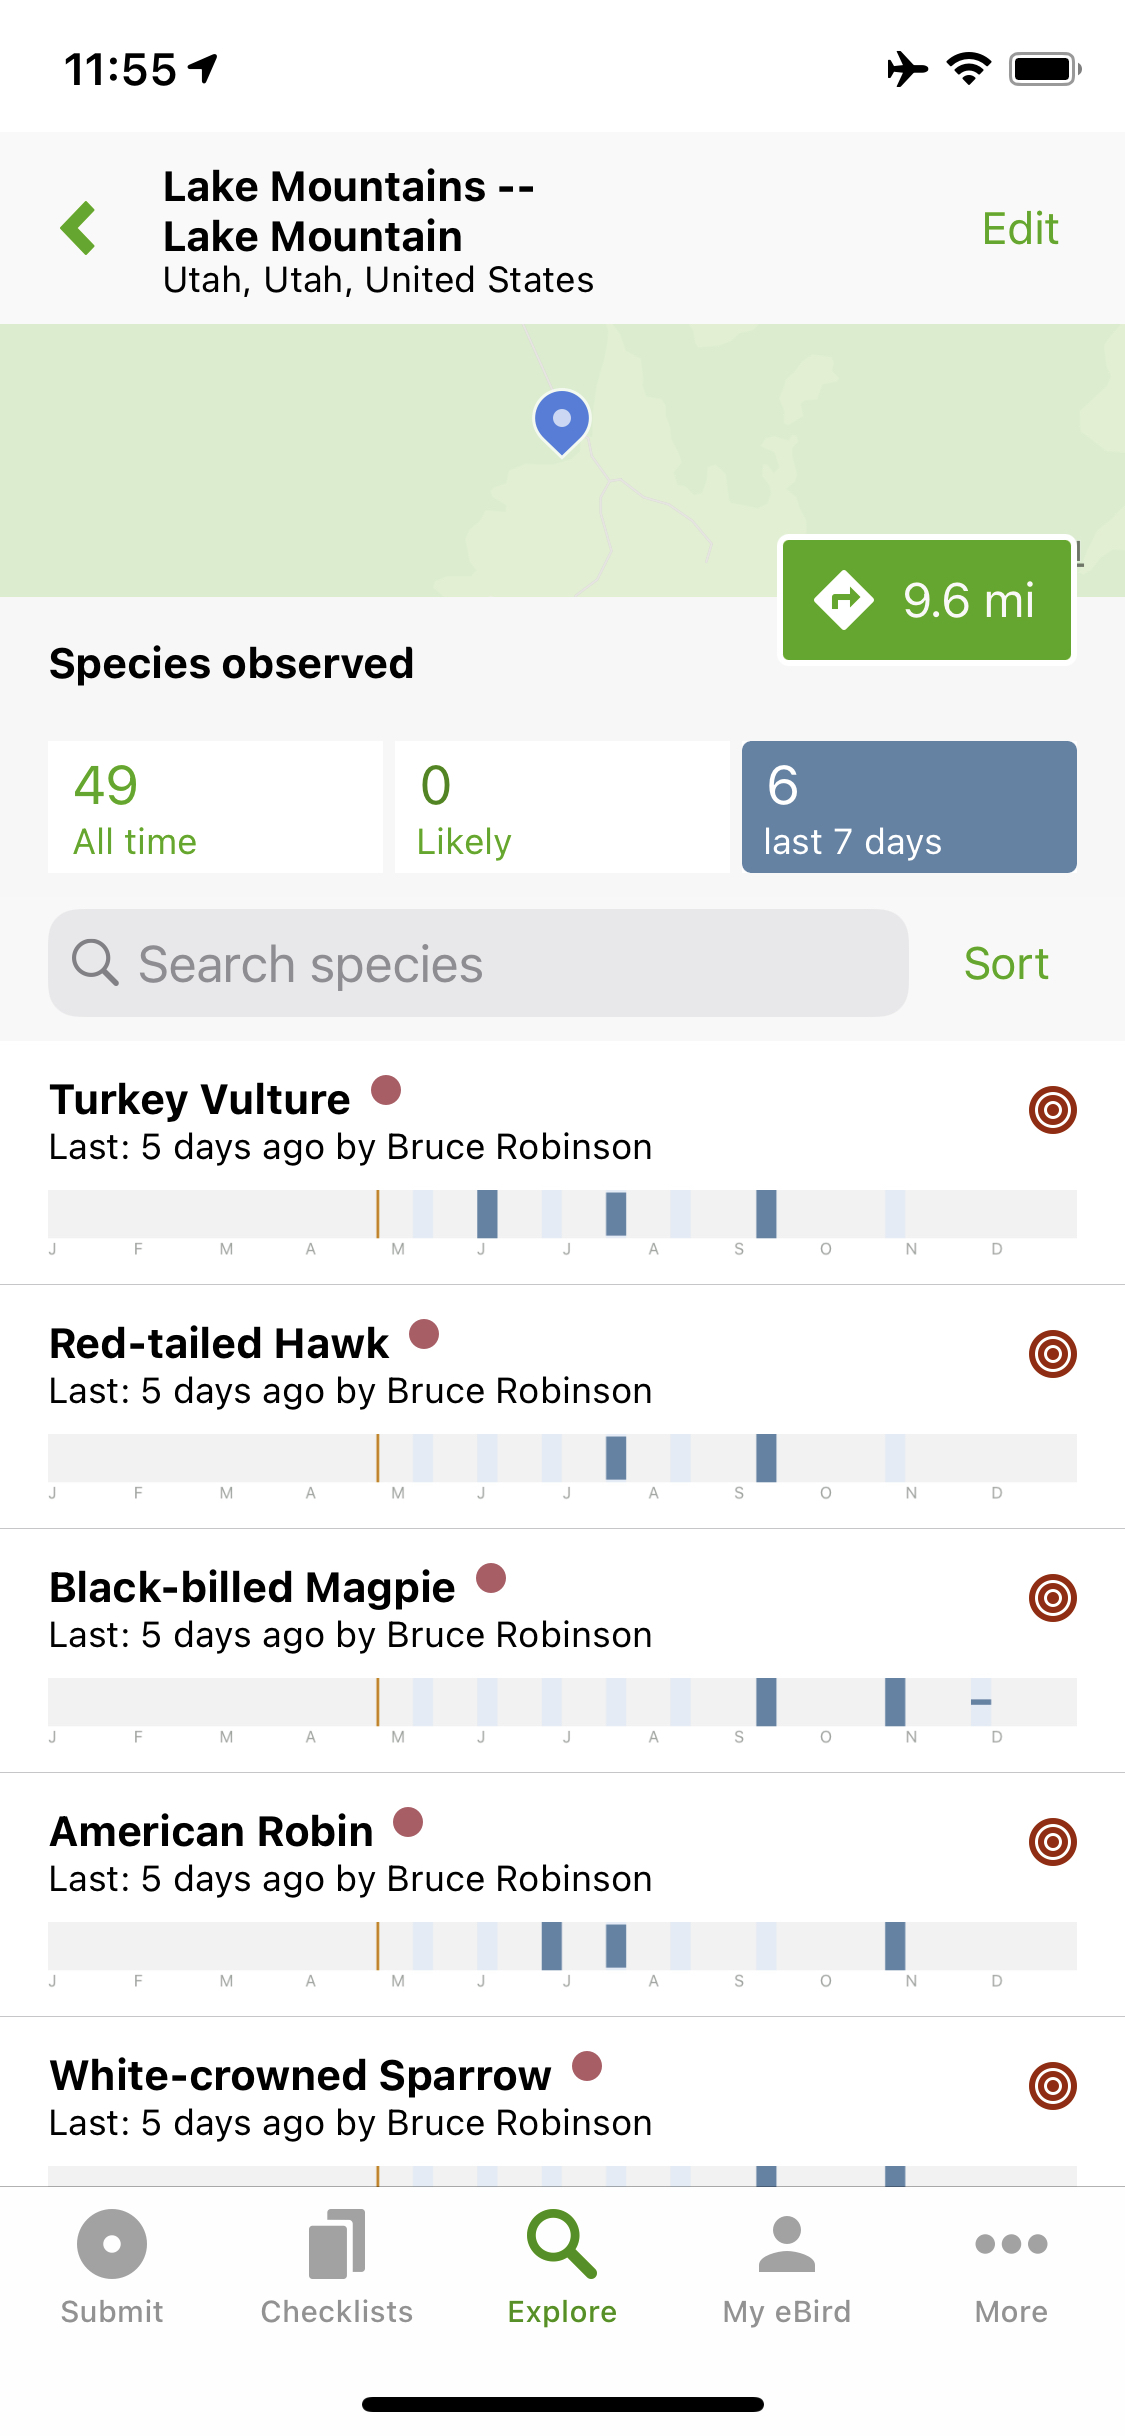
Sighting Details
My eBird
The My eBird tab will show you a list of the species and checklists you’ve submitted to the community. This can be sorted by location by pressing the up arrow on the top right.
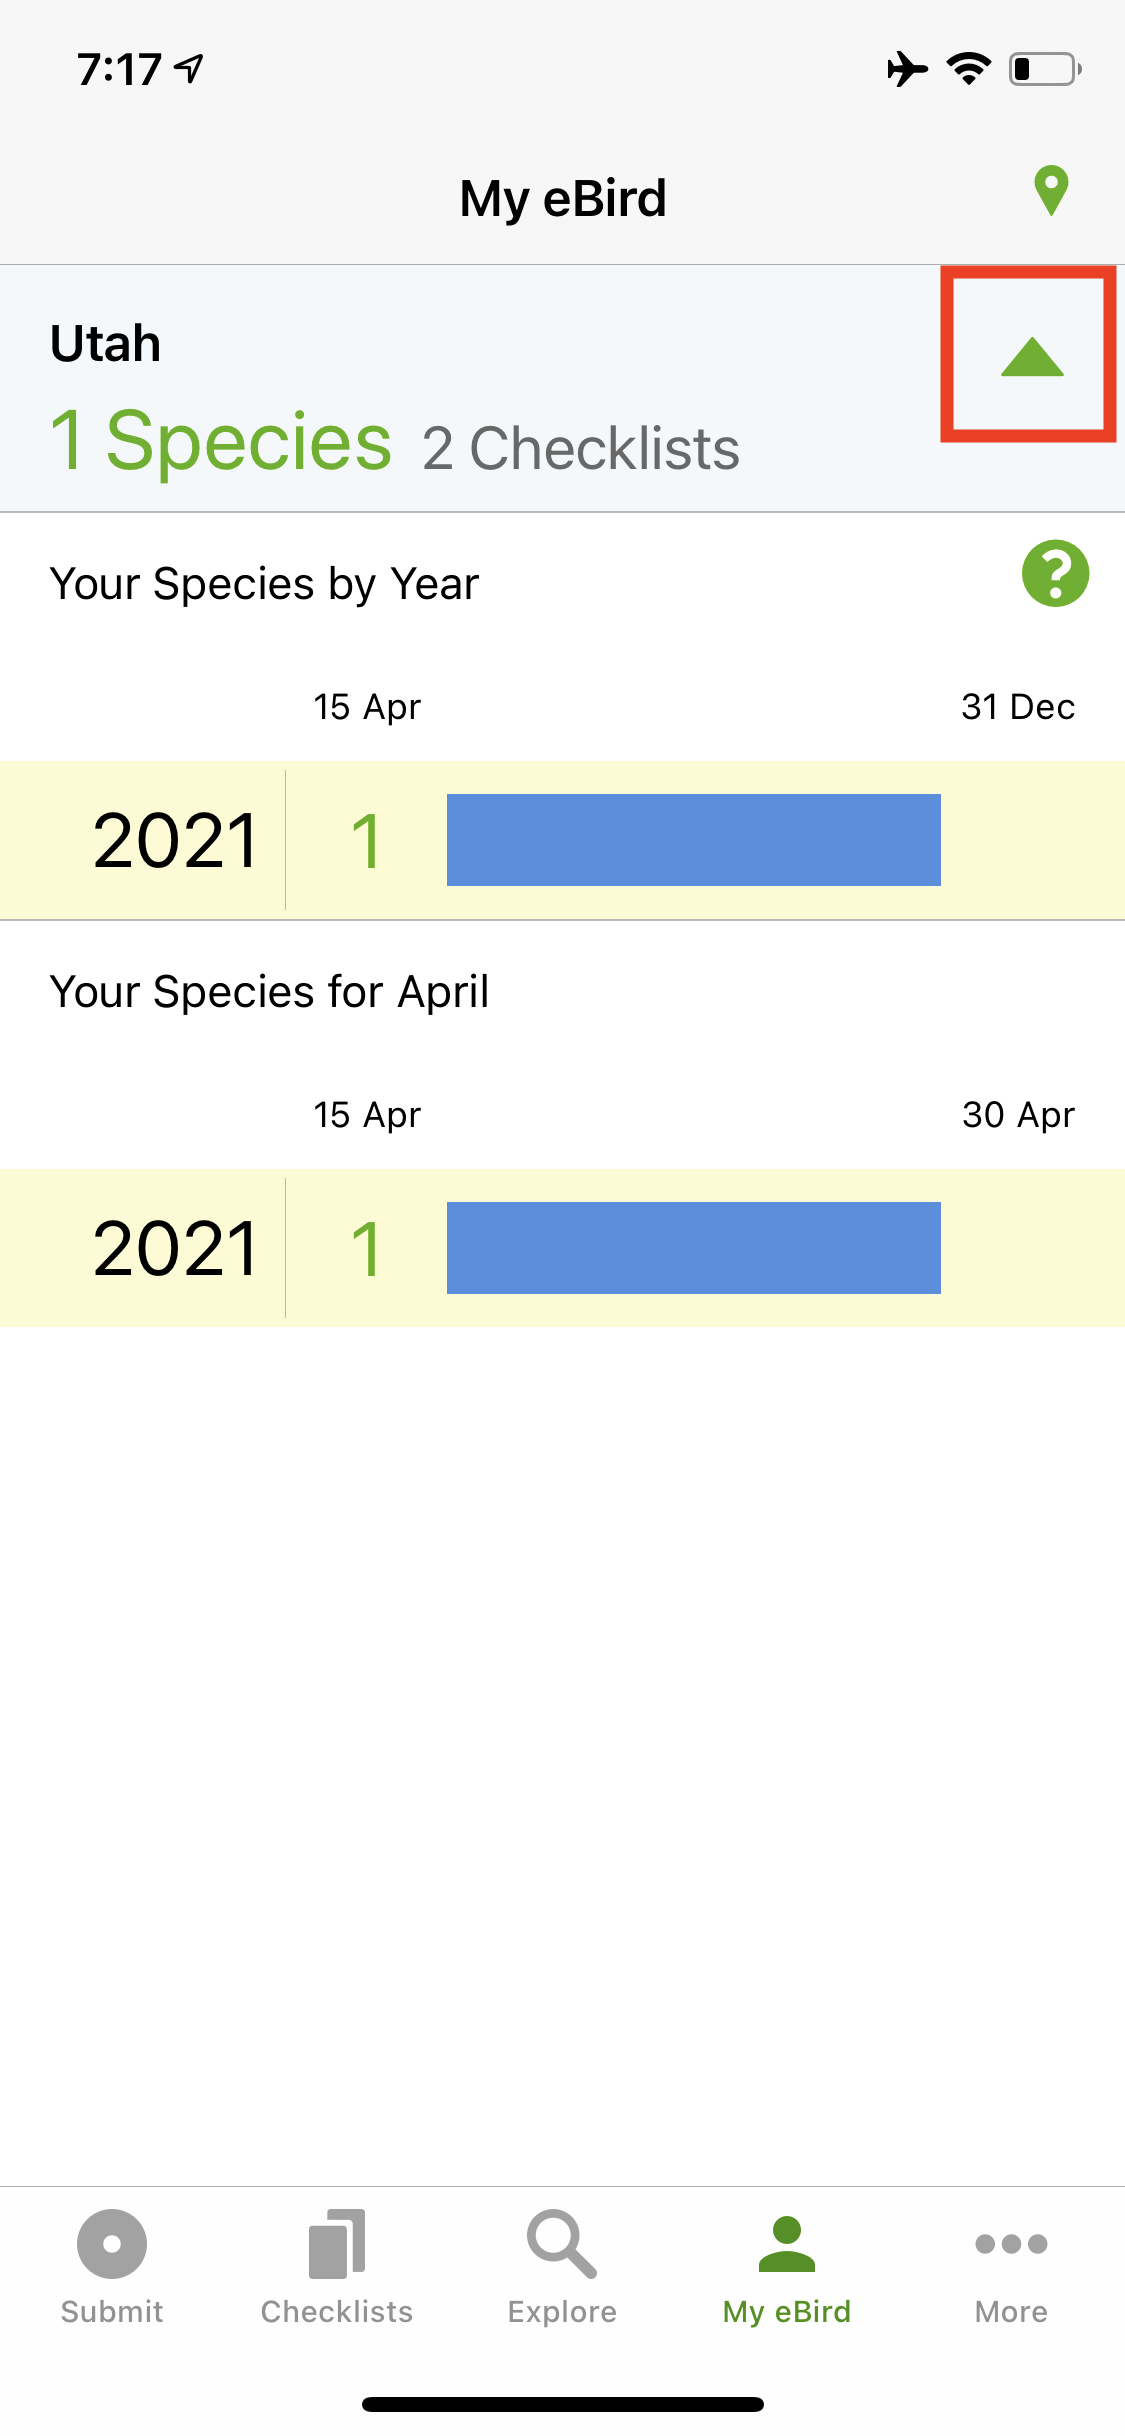
My eBird

My eBird Sorting
More
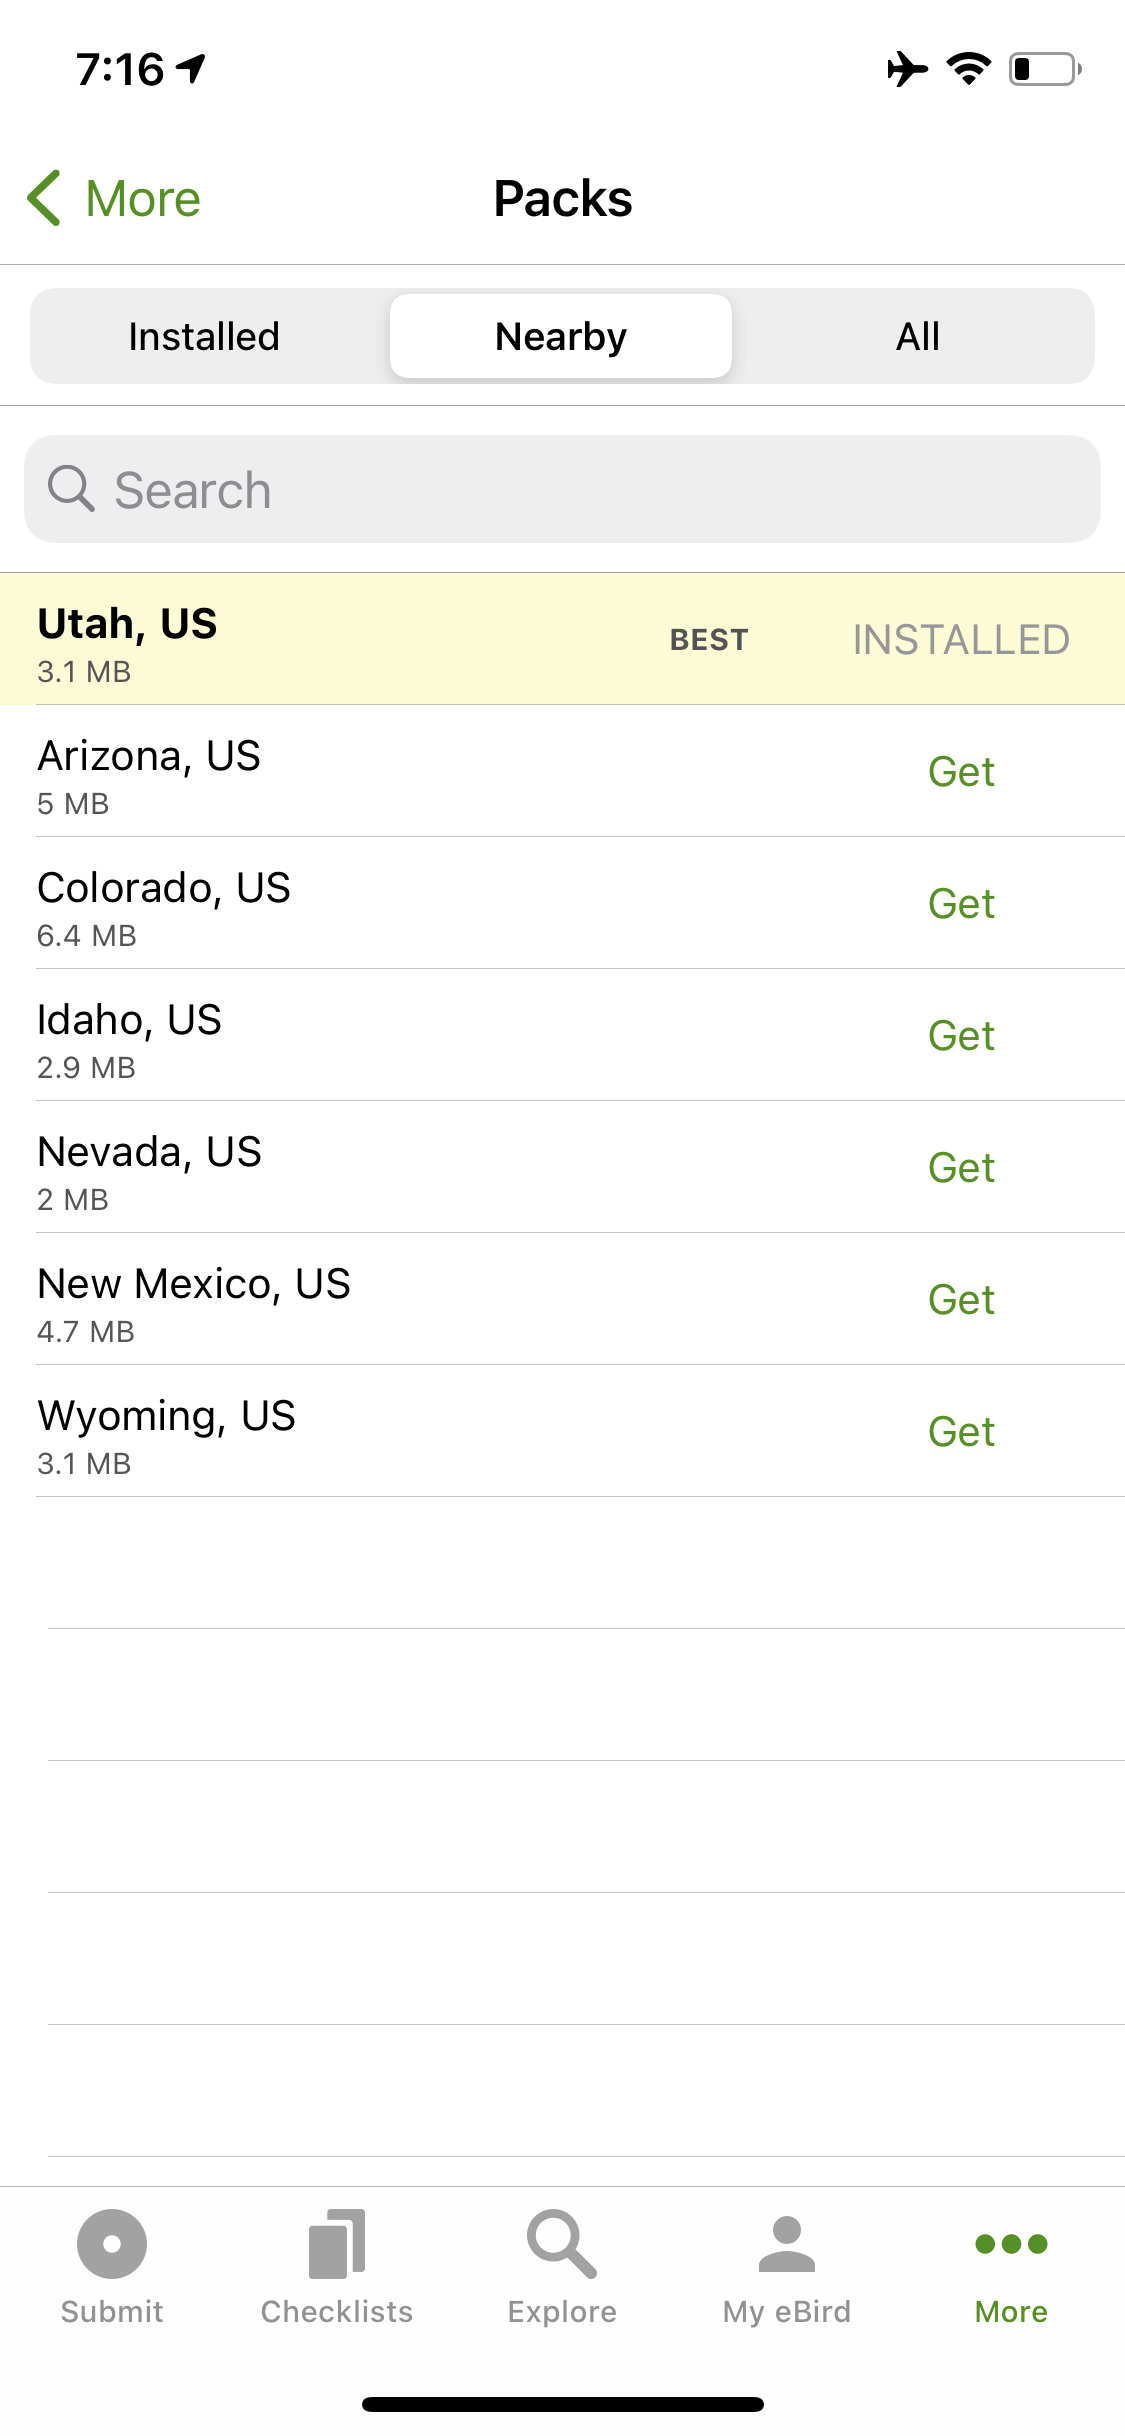
There are a lot of items in the More tab, such as information on the app, sending feedback, sharing, and information on your account. The most important part of this page will be the Packs option at the top. If you select that, you will see a list of installed packs, as well as available packs in your area. This is how you will add more Packs of information to your app should you travel to a new location.

More Tab